
Do you want to add an extra layer of authenticity and/or security to PDF documents you send in emails? If yes, consider adding a watermark to them.
You can add a watermark to your PDFs in Adobe Acrobat, Microsoft Word, and Preview. But a more efficient way is using Mailsuite, as it allows you to add a confidential watermark to your PDF with just one click when attaching the document to your email.
This article will examine the ways to watermark PDF documents and a better alternative to the methods.
How to add watermark to PDF
There are different ways to add a watermark to a PDF. Let’s discuss each of the methods in detail.
How to Insert a Text Watermark to Your PDF in Adobe Acrobat
The following steps will help you add a text watermark to your PDF in Adobe Acrobat.
Step 1: Open the Adobe Acrobat Program
Simply click the Adobe Acrobat program on your desktop. If you don’t have a shortcut to the program on your desktop, search for it in your program files and open it.
Step 2: Open Your PDF Document
Click “Menu” in the top left corner of the page, and select “Open” from the pop-up options. In the dialog box, navigate to the folder where your PDF file is, select it, and click “Open.”
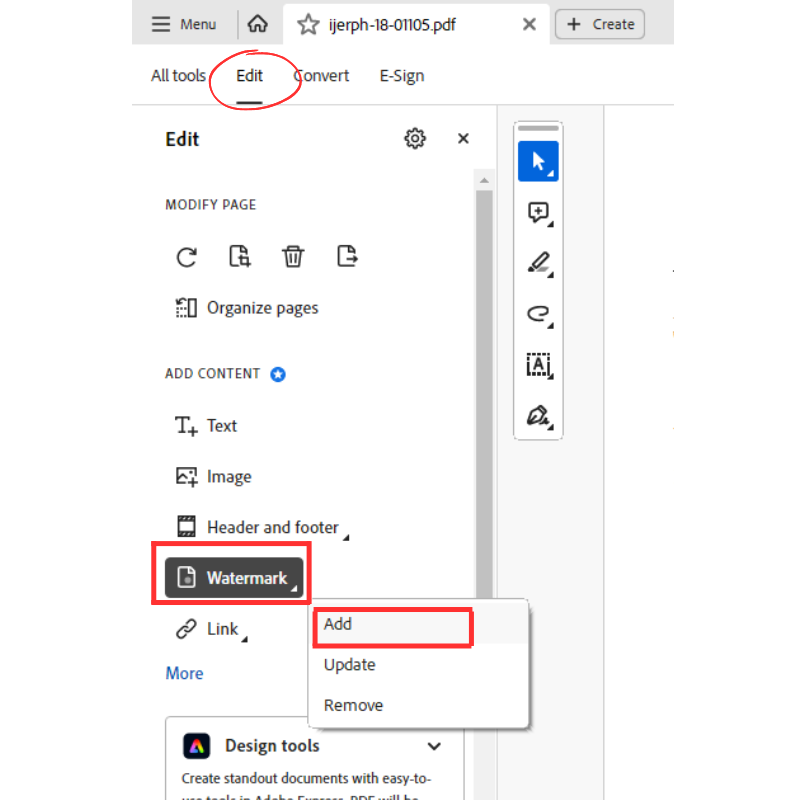
Step 3: Add Watermark from the Edit Tool
Click the “Edit” button at the top of the page. Select “Watermark” from the options. Then, click “Add” from the Watermark options.
Step 4: Choose Text Watermark and Enter Your Text
Locate the “Source” section in the “Add watermark” dialog box and select the “Text” button. Then, type the text you want to use as a watermark into the text box.
If you’ve already created and saved a watermark in the past, you have the option to use it again. Click the “Saved Settings” button at the top of the Add Watermark dialog box. Then, select your watermark from the available list.
Step 5: Modify the Appearance of the Watermark
After entering the text for your watermark, use the different resources below the text box to modify how it appears on your PDF.
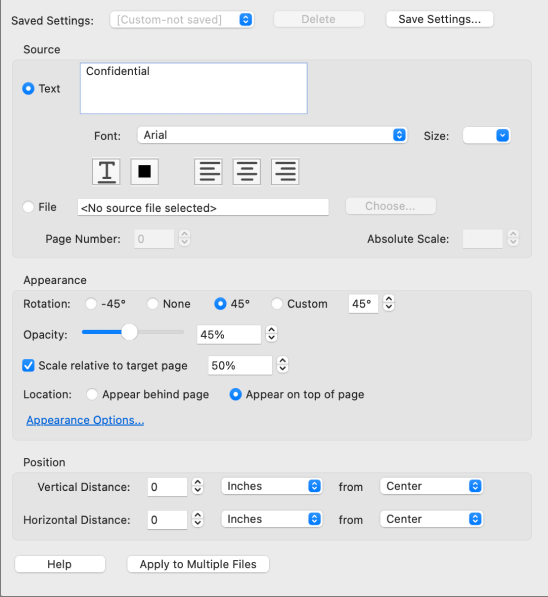
Immediately below the text box, you’ll find buttons to change the font, size, and color of your text watermark.
The appearance section comes next. In it, the “Rotation” tab lets you set the orientation of your text watermark. Choose “None” if you want the watermark to remain horizontal. You can choose a 45-degree orientation or type in a desired degree for a custom orientation.
“Opacity” lets you set your watermark’s degree of transparency. Simply slide the toggle to set your desired transparency. A general rule of thumb is that an opacity of around 30% is appropriate for watermarks.
Pro tip: Ensure your watermark does not obscure your document’s readability.
Next, choose the scale of the watermark relative to the size of your document. Then, use the location tab to choose whether the watermark appears behind or in front of the document’s content.
Lastly, use the “Position” section to adjust the watermark’s position on the page.
Step 6: Preview Your Watermark and Apply Changes
When modifying the appearance of your text watermark, you’ll see the changes in the preview window on the right side of the dialog box. Check that your text watermark is satisfactory.
Then, click “OK” at the bottom of the preview window to apply your changes.
Know that by default, the watermark is added to all pages of your PDF document. However, you can choose to add the watermark to only selected pages.
For this, click the “Page Range Options” above the preview window. Then, specify the pages you want the watermark inserted.
How to Insert an Image Watermark to Your PDF in Adobe Acrobat
You can also watermark your PDF files with an image instead of text. Inserting an image watermark into your PDF in Adobe Acrobat follows the same process as using a text watermark.
Step 1: Open Adobe Acrobat
Open the Adobe Acrobat program.
Step 2: Open your PDF Document
Click Menu > Open. Select your PDF and click “Open.”
Step 3: Add Watermark from the Edit Tab
Click Edit > Watermark > Add.
Step 4: Choose “File” as Your Watermark Source
When you open the “Add Watermark” dialog box, locate the “Source” section and select “File.”
Then, click “Browse” and select one image from your computer to use as your PDF watermark. Then click “Open” to add the image and close the menu.
If you select an image file with multiple pages of images, use the “Page Number” button below the image source box to specify the page in the file you want. The “Absolute Scale” tab helps you resize the image in relation to its original size.
Step 5: Modify the Appearance of Your Image Watermark
Just like you did with text watermarks, you can specify how you want your image PDF watermarks to appear by configuring the settings in the “Appearance” section.
Use “Opacity” to set your image watermark’s desired transparency, “Rotation” to set its orientation, and “Location” to specify whether it should be behind or in front of the PDF content.
Step 6: Preview Your Image and Apply Changes
Check how the image watermark appears in the preview window. If it’s satisfactory, click “OK” to apply changes.
How to Insert a Watermark to a PDF in Microsoft Word
The following steps will help you insert a watermark to a PDF in Microsoft Word:
Step 1: Open the Microsoft Word Program
Click the Word icon on your desktop or select Word in your program files.
Step 2: Open Your Document
Click “File” at the top right corner of the page, then select “Open.” Select your document and click open in the dialog box that pops up.
Step 3: Select Watermark from the Toolbar
Click “Design” in the toolbar, and select “Watermarks.”
If your Word version does not have “Design” in the toolbar, click “Page Layout.” Go to the Page Background section and click the “Watermark” tab.
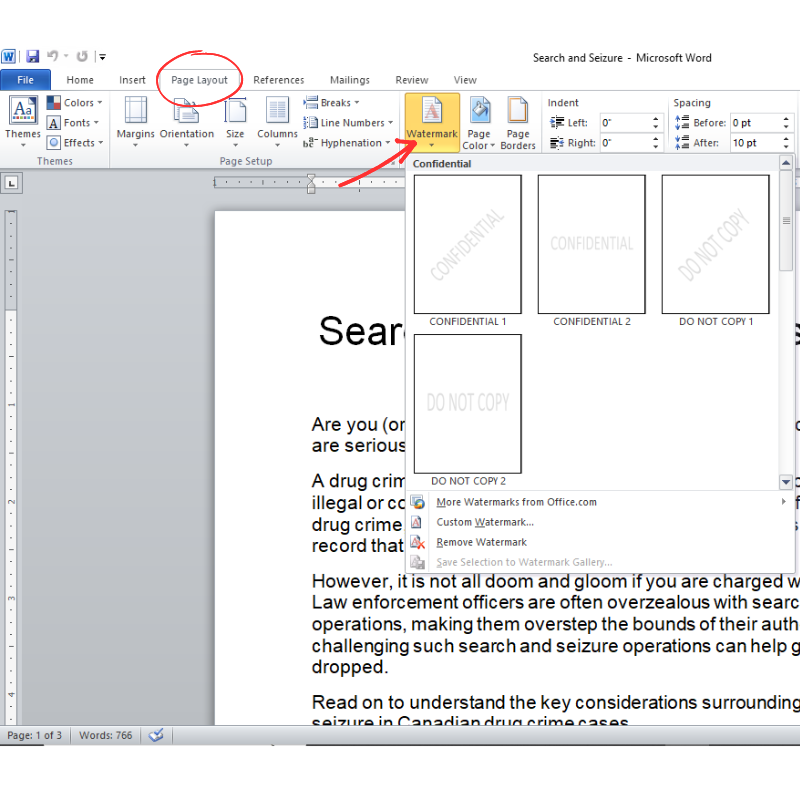
Step 4: Choose Custom Watermark
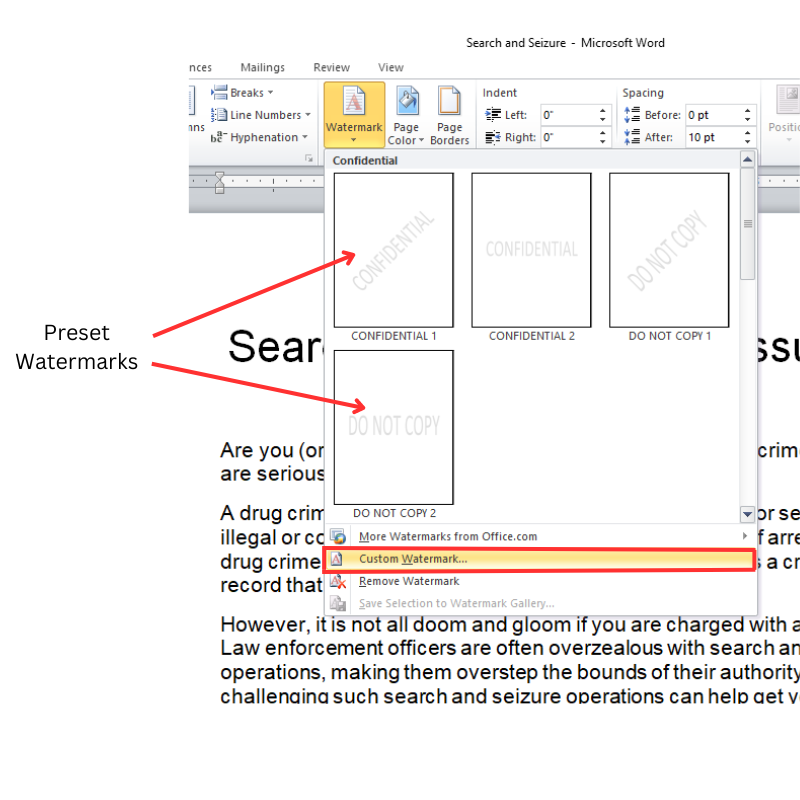
Clicking “Watermarks” opens a selection of preset watermarks (like DO NOT COPY and CONFIDENTIAL). If any of these aligns with your needs, select it.
If not, go to the bottom of the preset watermarks and select “Custom Watermark.”
Step 5: Choose Between Text or Image Watermark
In the custom watermark dialog box, check the Picture Watermark to insert an image watermark or the Text checkbox to use text as your watermark.
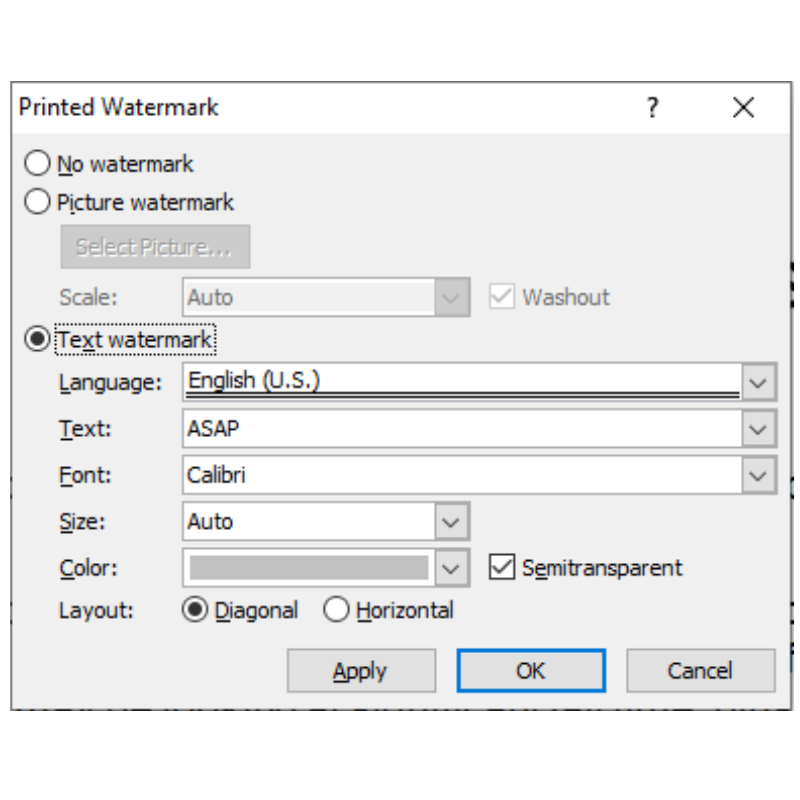
If you choose “Picture Watermark,” click “Select Picture.” Select the right image from your computer, then click “Insert” to insert it as the watermark and close the dialog box.
If you choose “Text Watermark,” type your text into the text box. Modify its appearance with the Font, Size, Color, and Layout buttons.
Lastly, click “OK” to insert the watermark and save changes.
How to insert a watermark to your PDF in Preview
Preview does not directly support watermarking, but you can use it to edit a PDF file and embed a text-based watermark on it in the process. Follow these steps to watermark your PDF in Preview.
Step 1: Open your PDF in Preview
Open the Preview app on your Mac. Click “File” and then “Open.” Then, choose the PDF document you want to watermark.
Step 2: Go to the Markup Toolbar
Click “View.” Then, select “Show Markup Toolbar” from the options.
Step 3: Enable the Text Mode
Click the “Text” icon. This opens a text box. Type the text for your watermark into the box.
Step 4: Format Your Watermark Text
Adjust the text font, size, color, opacity, and location to make it look like a watermark.
Step 5: Save Your Watermark
After editing the text, click “File” and select “Export” from the options. That saves a copy of your PDF document with the newly created watermark.
How to Permanently Watermark a PDF
These days, it is easy to remove watermarks. Want to prevent this? Follow these steps to add watermarks that cannot be easily removed from your PDF:
Step 1: Open Your PDF
Open Adobe Acrobat and open the PDF document that you want to watermark.
Step 2: Access the Secure Watermark Tool
Click the “Tools” tab, then select “Protect a PDF.” Locate and select “Watermark.”
Step 3: Add Watermark
Select whether you want to insert a text or image watermark.
Step 4: Customize Your Watermark
Customize how you want the watermark to appear on the page. Use the sizing, opacity, location, and other buttons in the “Add Watermark” dialog box.
If you don’t want the watermark on every one of your PDF pages, select the specific pages to watermark.
Step 5: Preview and Apply
Check the watermark on the preview window to ensure it looks as expected. Lastly, click “OK” to apply changes.
When adding a permanent watermark to a document, it may be wise to keep a copy of the original file.
What is the Best Alternative to Add a Watermark to PDF?
Watermarking a PDF is a simple process. However, when you’re running an email campaign that requires sending watermarked PDFs, the standard watermarking process can easily become another unwanted task and negatively impact productivity.
A better alternative to adding a watermark to email PDF attachments is Mailsuite. It allows you to add the watermark at the moment you send the file without leaving Gmail, thereby streamlining the process of sending watermarked documents.
How to Add Watermark to PDF with Mailsuite
Follow these steps to add watermark to PDF with Mailsuite:
Step 1: Get the Mailsuite Addon
If you’ve not installed Mailsuite, go to the Chrome web store and hit the blue “Install” button to install the Chrome extension.
Step 2: Compose Your Gmail Message
Open Gmail. Click the “Compose” button at the top right corner of the page to start a new message.
Step 3: Set up Your Email
Enter your email subject, recipients’ email addresses, and your message.
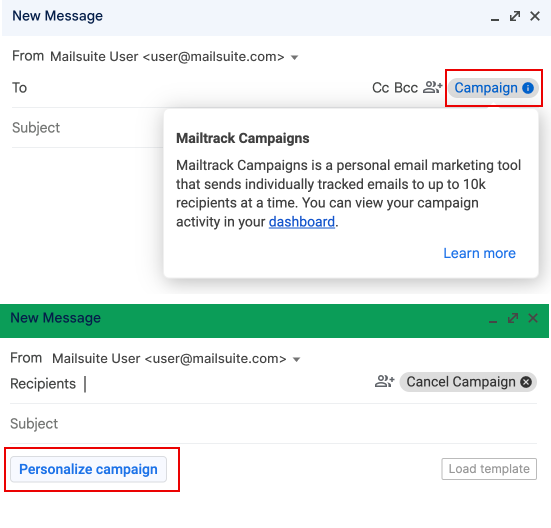
You can use Mailsuite’s Campaign feature to quickly add contacts from a mailing list, saving yourself the stress of typing in recipients’ email addresses.
Hit “Campaign” in the “To” section. Next, click “Personalize Campaign.” Then, from the “From Google Sheets” tab, select the file containing your recipients’ contacts.
Gmail automatically adds the contacts to the “To” section.
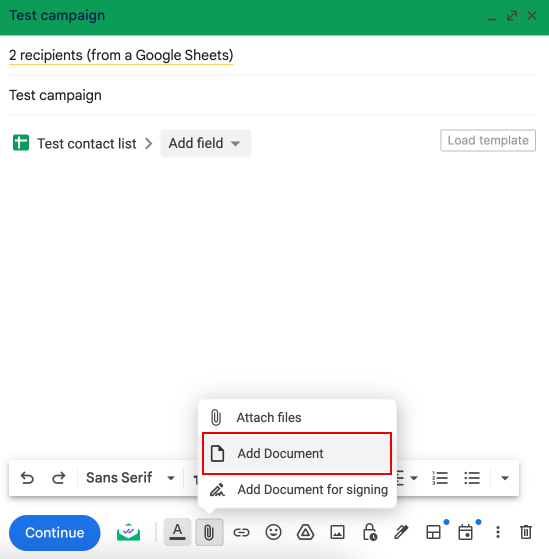
Step 4: Watermark Your PDF File and Attach it
After setting up your email, click the “Attach” icon at the bottom of the page. Then, select “Add Document.”
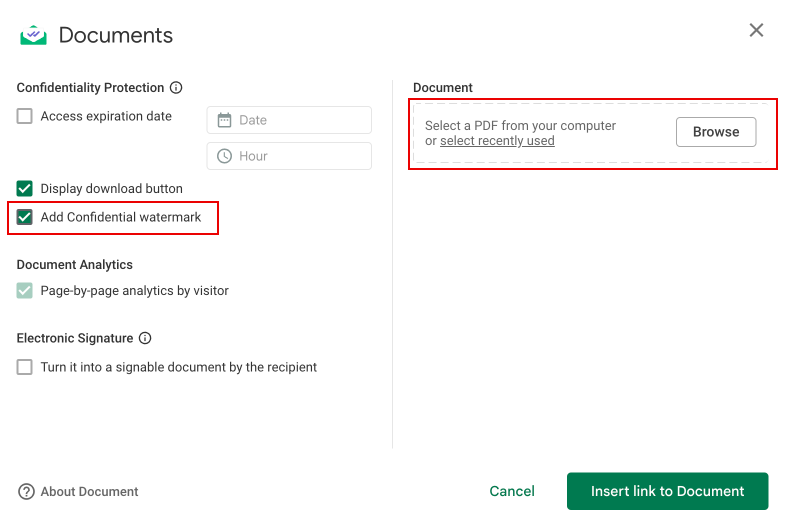
In the “Add Document” dialog box, check the “Add Confidential Watermark” checkbox. Then, click “Browse” at the top right corner of the page to select your PDF. Lastly, click the “Insert Link to Document” button to close the dialog box.
Step 5: Send Your Email
Closing the “Advanced Document” dialog box takes you back to the compose window. Hit “Continue” to send your email.
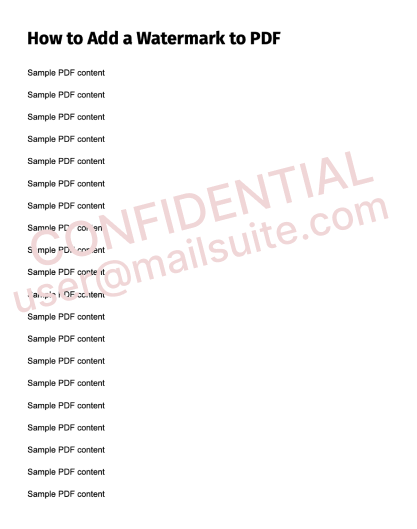
Gmail will send your email with the attachment having a “CONFIDENTIAL” watermark across it (along with your identifier). Know that you’ll have your original PDF on your computer.
Now, that’s how to add a confidential watermark in PDF email attachments without stress.
Comparing the Different Processes of Adding a Watermark to Your PDF
How do the different methods of adding a watermark to a PDF compare?
| Adobe Acrobat | Microsoft Word | Preview | Mailsuite | |
|---|---|---|---|---|
| Dedicated watermarking feature | Yes | Yes | No | Yes |
| Allows custom watermark | Yes | Yes | Yes | No |
| Streamlines email sending | No | No | No | Yes |
| Allows document tracking | No | No | No | Yes |
When it comes to the singular action of watermarking a PDF, Adobe Acrobat is a good resource, especially as it offers text and image watermarks and allows customizing how a watermark appears on the document. However, it is not efficient for sending watermarked PDFs in email campaigns.
Mailsuite rules in this regard. Mailsuite streamlines the emailing process, as it lets you add a confidential watermark to a PDF with just one click at the moment of attaching it to the email. It also lowers the risk of sending your confidential document to the wrong email recipient.
Mailsuite’s mail tracking features also shares additional data with you, like when your recipient opens your email and clicks the PDF attachment.
Benefits of Adding a Watermark to Your PDF
Watermarking your PDF documents has many benefits, including:
- Identifying a document’s originator: A watermark can tell the source of the document, as seen with Mailsuite’s confidential watermark.
- Authenticating a document: A watermark can signify the legitimacy of important documents.
- Preventing unauthorized use and reproduction: It can serve as a visual cue that a document is protected, discouraging people from using or reproducing it without authorization.
Takeaway: Add a Watermark to Your PDF Email Attachment with a Single Click
Since a watermark adds a level of authenticity to PDF attachments, it can be the difference between a successful and failed email campaign.
This article discusses how to add a watermark in PDF, revealing that you can do it using Adobe Acrobat, Microsoft Word, and Preview.
But when watermarking PDFs to send as email attachments, these techniques can prolong the emailing process, reducing efficiency.
This is where Mailsuite comes in! Mailsuite is a Google Chrome Extension you can use to turn your Gmail account into a powerful email marketing tool.
It lets you add a watermark to your PDF with just a single click at the point of attaching the document to your email. Also, it lets you track the sent email to know when recipients open the mail and click your PDF attachment. Optimize your important emails with Mailsuite and grow your business.