

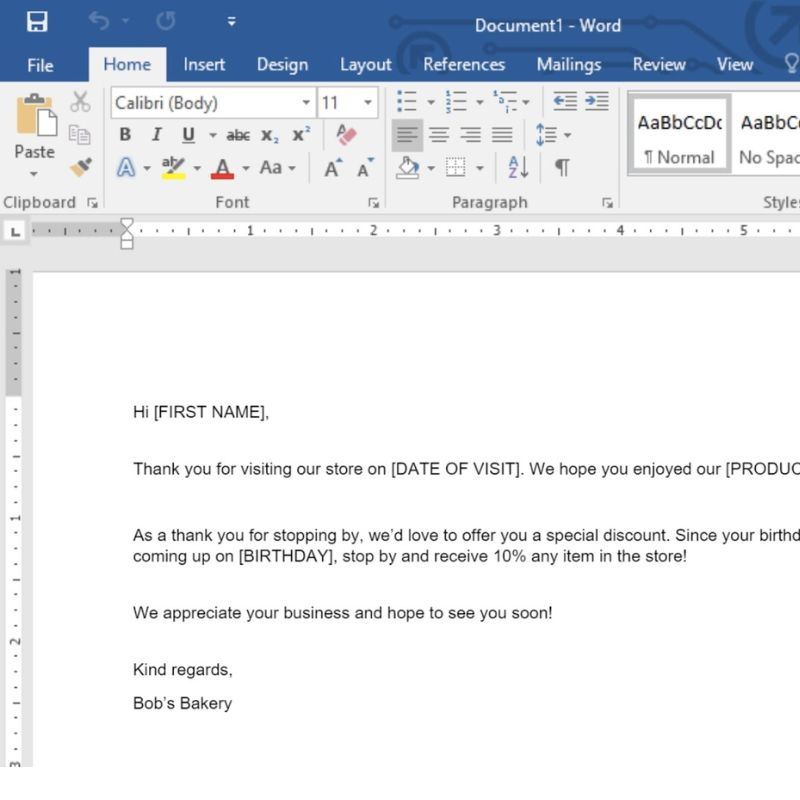
In our fast-paced, tech-driven era, personalization is an absolute must-have. Whether you are crafting marketing flyers or sending out event invites, there is undeniable value in addressing each individual personally. After all, who doesn’t like being called by their name?
But here is where it gets a tad tricky – imagine individually tweaking each of countless documents to give them that warm, personalized feel. Sounds tedious, right?
This is where knowing how to merge mail from Excel to Word saves the day.
Mail merge is a tool embedded in your Microsoft Office suite that turns the seemingly Herculean task of personalizing emails into a walk in the park. Using this tool, you can extract data from an application like Excel and seamlessly incorporate them into a series of letters or certificates in Word.
This article is your guide in mastering mail merge, offering clear, easy-to-follow steps to ensure you harness the full potential of this tool.
Let’s get started!

Mail merge overview
Among office productivity tools, few features have left an imprint as profound as the mail merge.
Think back to a time when personalizing bulk correspondence meant tediously typing each letter or spending hours copying and pasting details.
But with the advent of mail merge, that time-intensive chore transformed into a streamlined process, allowing you to communicate more personally and effectively.
Using Mailsuite has also made Gmail mail merge super easy.
While the mail merge concept spans various softwares, the synergy between Excel and Word has proven to be most exciting.
Let’s delve into why this combination is a game-changer and how it continues to redefine the boundaries of office software.
Personal touch at scale

Understanding how to use mail merge in Excel is about marrying efficiency with personalization. It’s about addressing John, Jane, and Aisha in their letters rather than resorting to the impersonal “Dear Customer.”
It’s a simple gesture, but this personal touch goes a long way in a world drowning in generic content.
Using an Excel document as the database backbone, you can store vast arrays of information—from names and addresses to specific preferences or past purchase details.
When merged into Word, each row of data can be turned into personalized content that speaks directly to the recipient.
Ease of use and integration
It’s essential to address the simplicity of this integration. Microsoft has made the process of connecting data from an Excel spreadsheet to Word surprisingly intuitive.
Even those who consider themselves technologically challenged can, with a bit of guidance, master mail merge.
Flexibility and customization

Another noteworthy advantage of knowing how to create a mail merge from Excel is the flexibility offered. Perhaps you are sending out event invites today, monthly newsletters tomorrow, and festive greetings next month.
The template remains in Word, while the data in the Excel file can be tweaked and adjusted to fit varying needs.
It means your outreach can constantly evolve without reinventing the wheel each time.
This feature bridges raw data and human interaction, and while there might be a few steps to complete along the way, the journey is undoubtedly worth it in the long run.
How to do a mail merge from Excel to Word
Translating your Excel spreadsheet data into personalized mail merge Word documents can seem daunting, but we promise it is not that difficult with the proper guidance.
Here is a step-by-step guide on how to mail merge in Word from Excel, ensuring every communication feels tailor-made!
1. Prepare your Excel data source
Before you discover how to do a mail merge in Word from an Excel document, the first step is to prepare your data source. Here is how you can go about doing it:
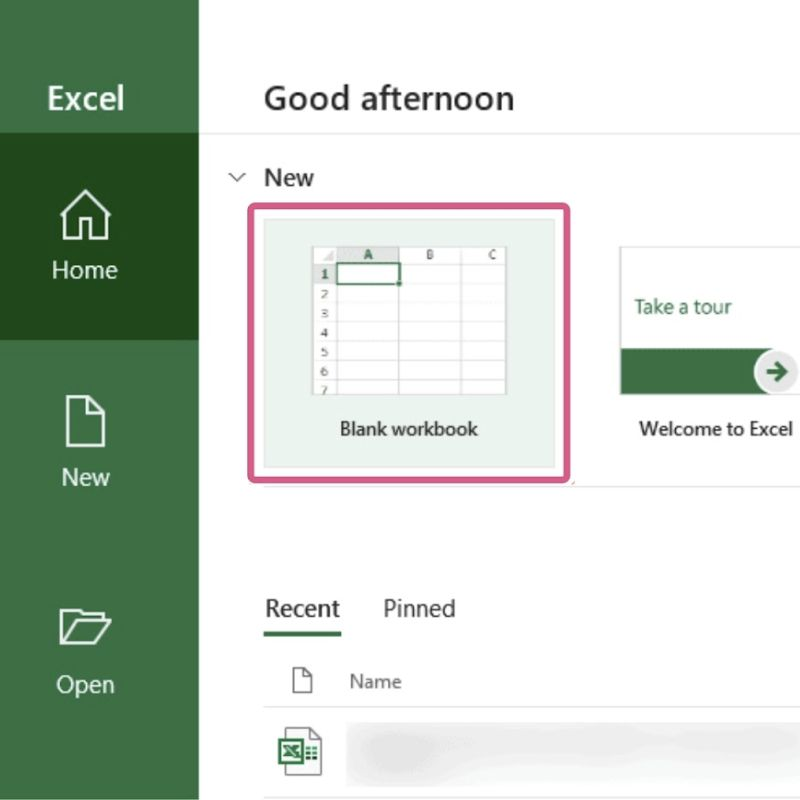
- Open Microsoft Excel and create a new Excel Spreadsheet to start mail merge.
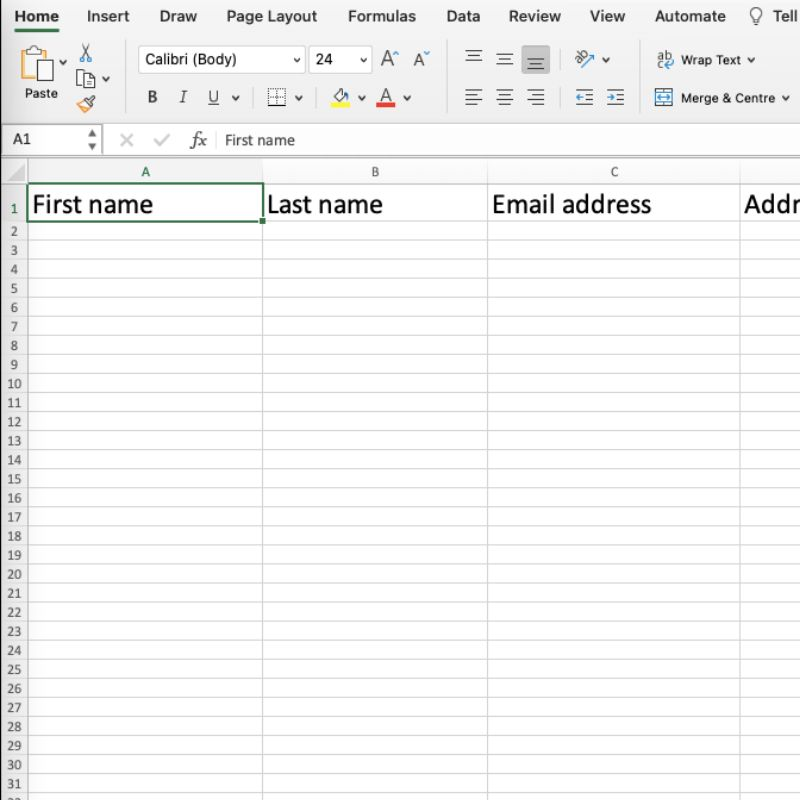
- The first row is crucial; it should contain column headers for each column. Examples of headers include: ‘First Name,’ ‘Last Name,’ ‘Address,’ ‘Email,’ ‘postal codes’, etc. These headers will become ‘field names’ in Word, helping identify which piece of data you wish to merge.
- Input the data under each header. Ensure consistency in your entries (e.g., if you use dates, maintain a single format throughout).
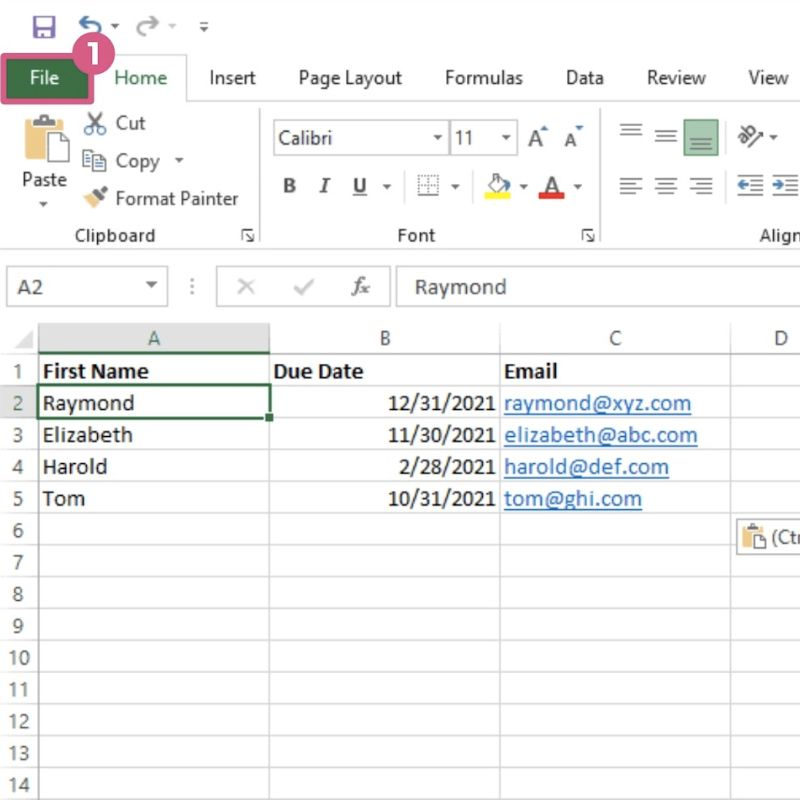
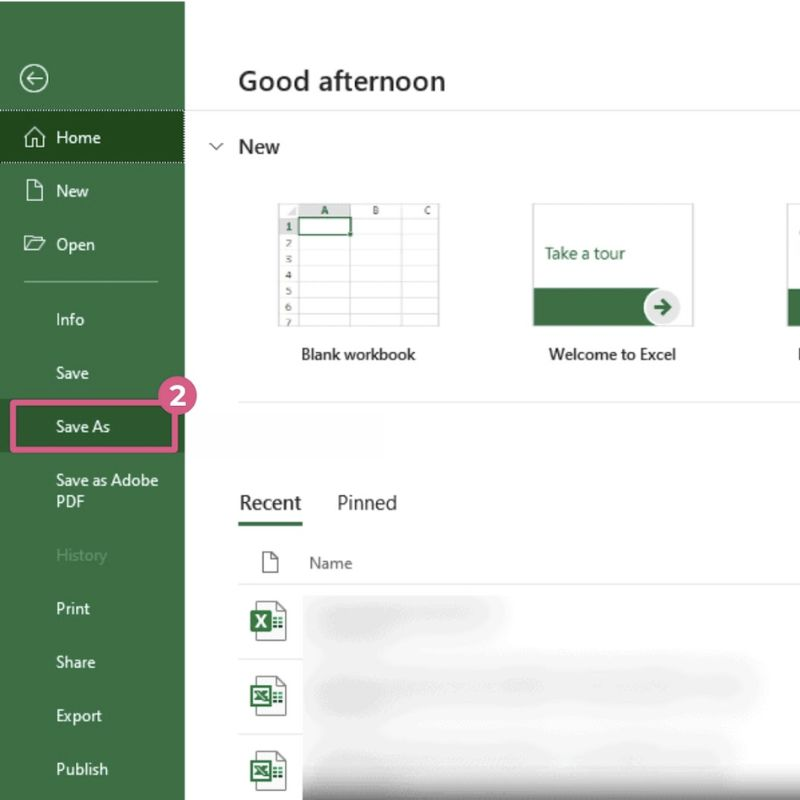
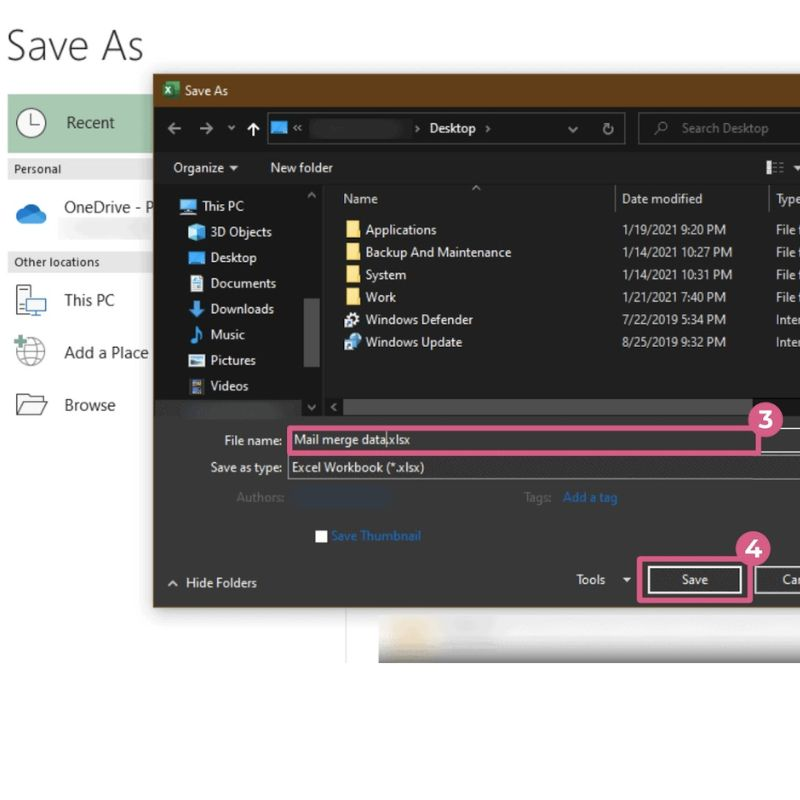
- Save the mail merge Excel file and close it. Make sure you remember the location where you saved it.
2. Launch Microsoft Word
Once your Excel spreadsheet is ready, it is time to start on Microsoft Word. Here is what you will need to do:
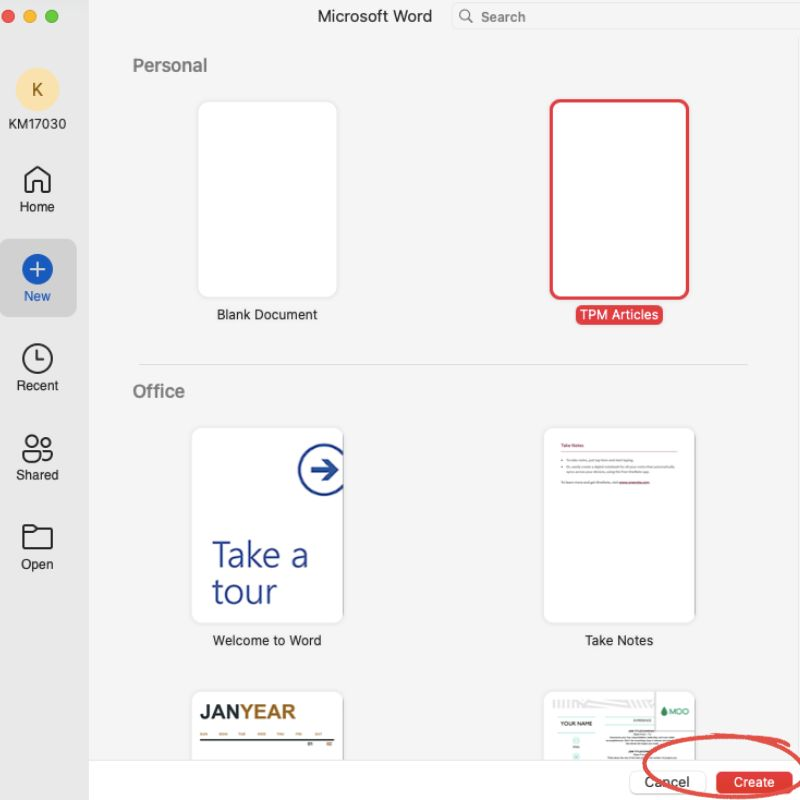
- Open a new blank Word document.
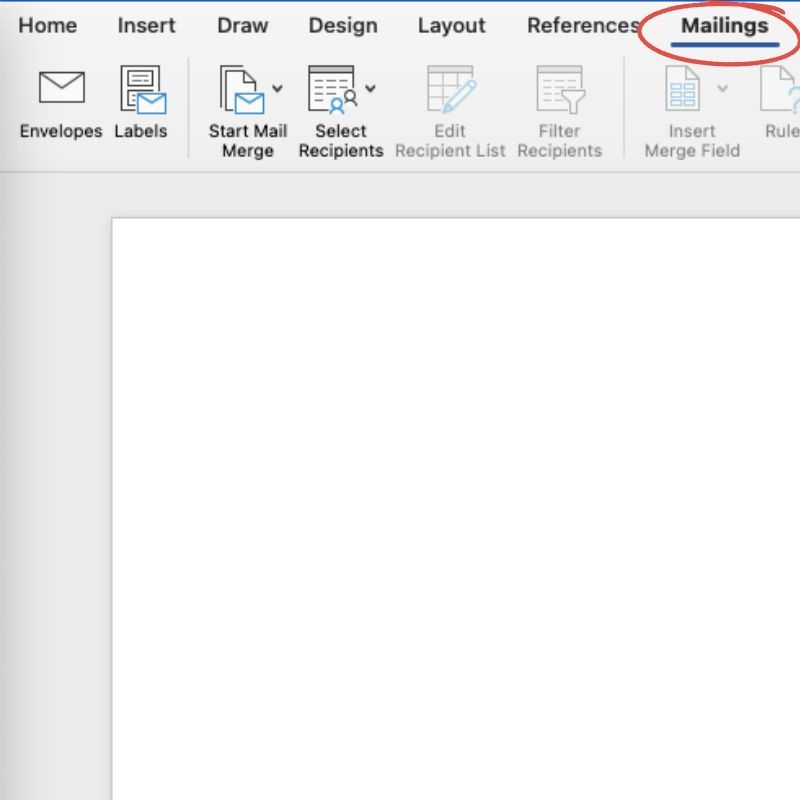
- Navigate to the ‘Mailings’ tab in the ribbon.
3. Select the data source
The next step in our journey on how to do a mail merge in an Excel document is to tell Word where to get all the data from. Here is how you can do it:
- Click ‘Start Mail Merge’ in the ‘Mailings’ tab. A drop-down menu will appear.
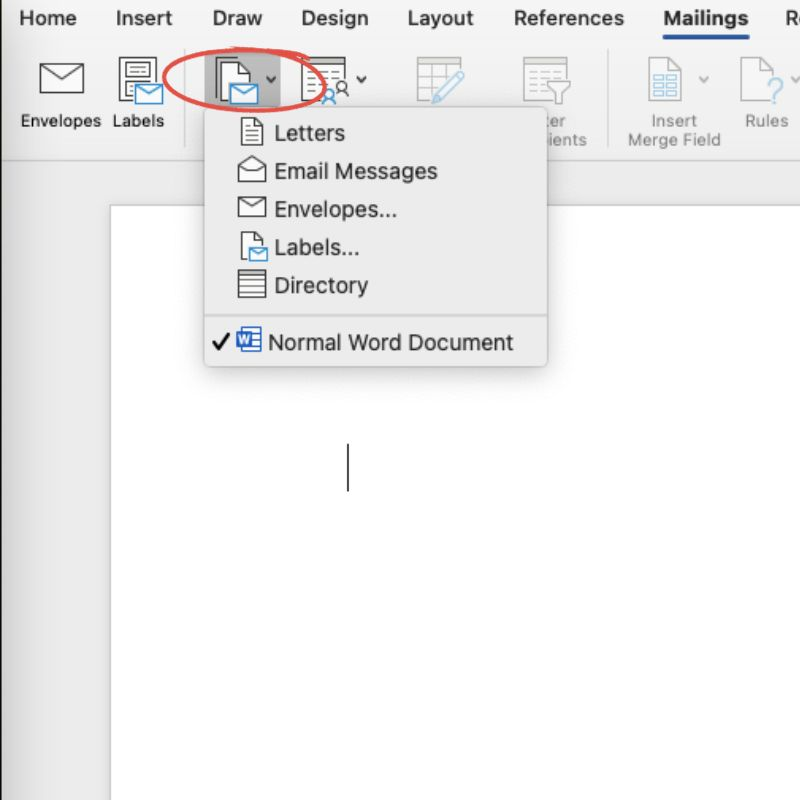
- Select the kind of new document you wish to merge, like ‘Email Messages,’ ‘Letters,’ ‘Envelopes,’ or ‘Labels.’ Now, click ‘Select Recipients,’ then choose ‘Use an Existing Recipient List.’

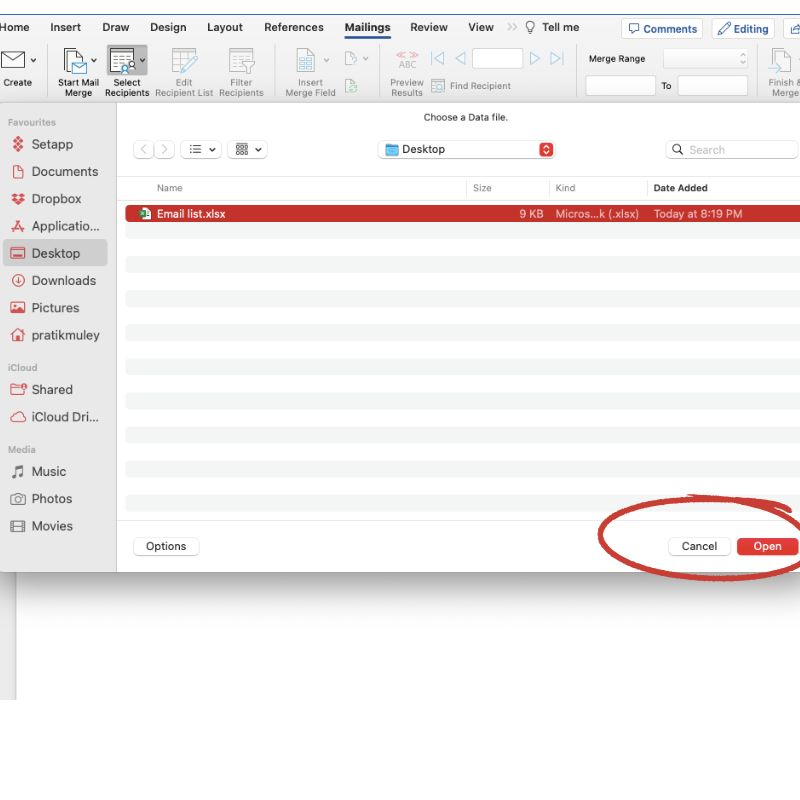
- Browse to the location where you saved your email merge Excel file, select it, and click ‘Open.’
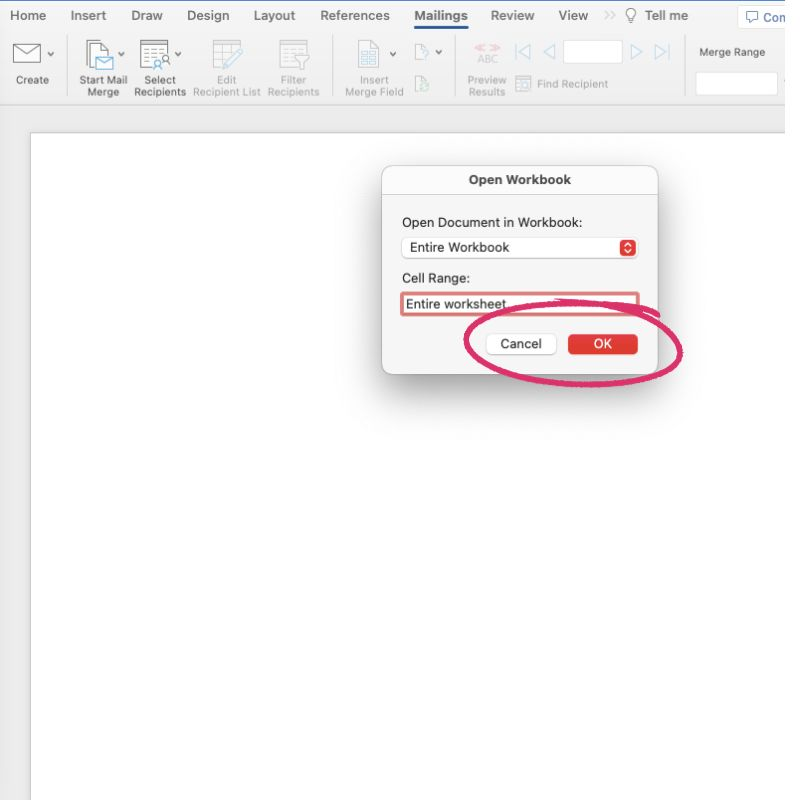
- A popup might appear, asking you to select the table or Excel spreadsheet from your workbook. Choose the relevant Excel spreadsheet and click ‘OK.’
4. Insert merge fields
This step will dictate where each piece of information should appear.
- Place your cursor where you want the data from the Excel file to be inserted in the Word mail merge document.
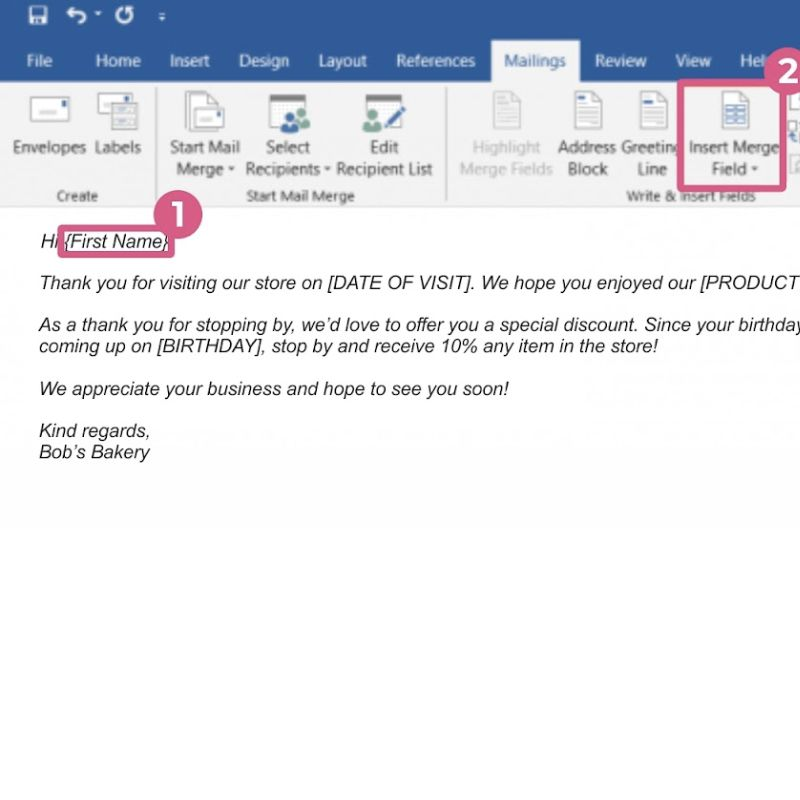
- Click the Insert Merge Field button in the ‘Mailings’ tab.
- A drop-down menu dialog box will showcase all the headers from your Excel file. Choose the one you’d like to insert. Repeat this step for all pieces of data you wish to include.
5. Preview the document
One of the best things Microsoft does is allow you to sneak a peek before finalizing your mail merges. Once you follow the steps on how to create a mail merge from Excel, here is what you will need to do to preview:
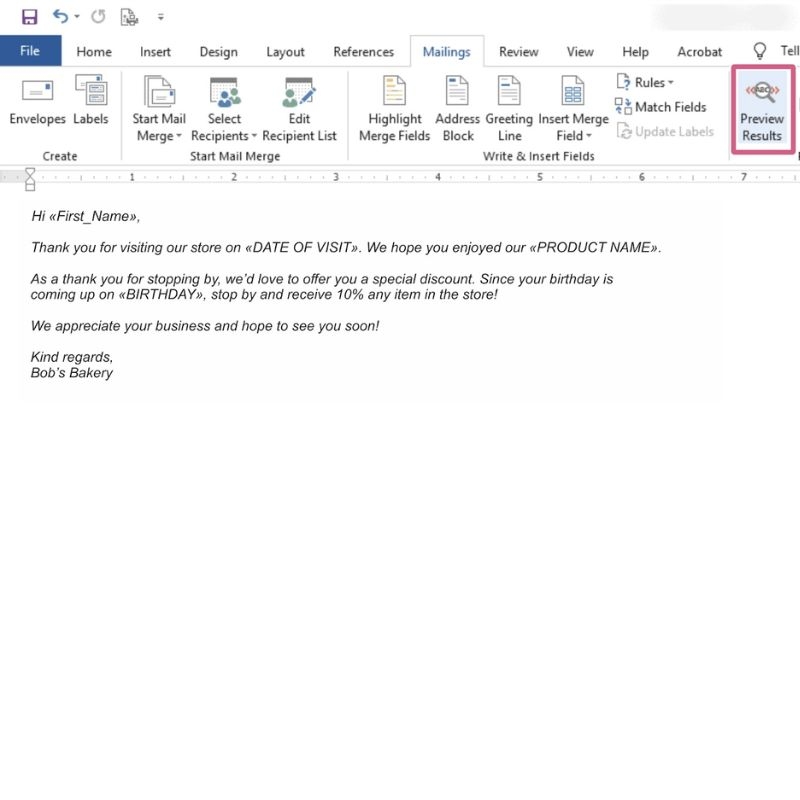
- Click on ‘Preview Results’ in the ‘Mailings’ tab.
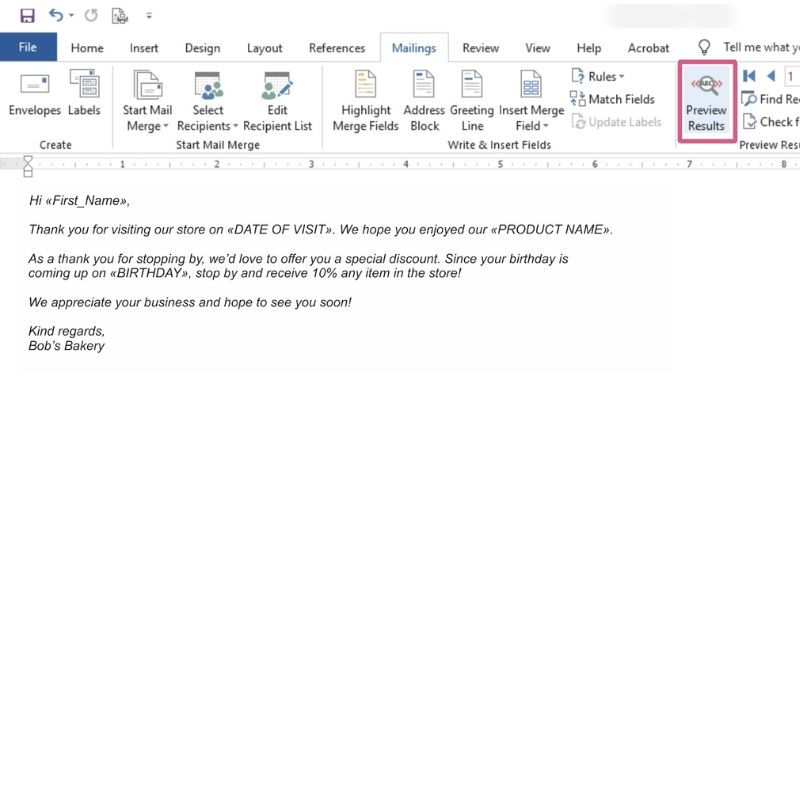
- Navigate through records using the arrow buttons to ensure the data is correctly placed and the formatting is intact.
6. Complete the merge
In this last step, it’s time to wrap it up:
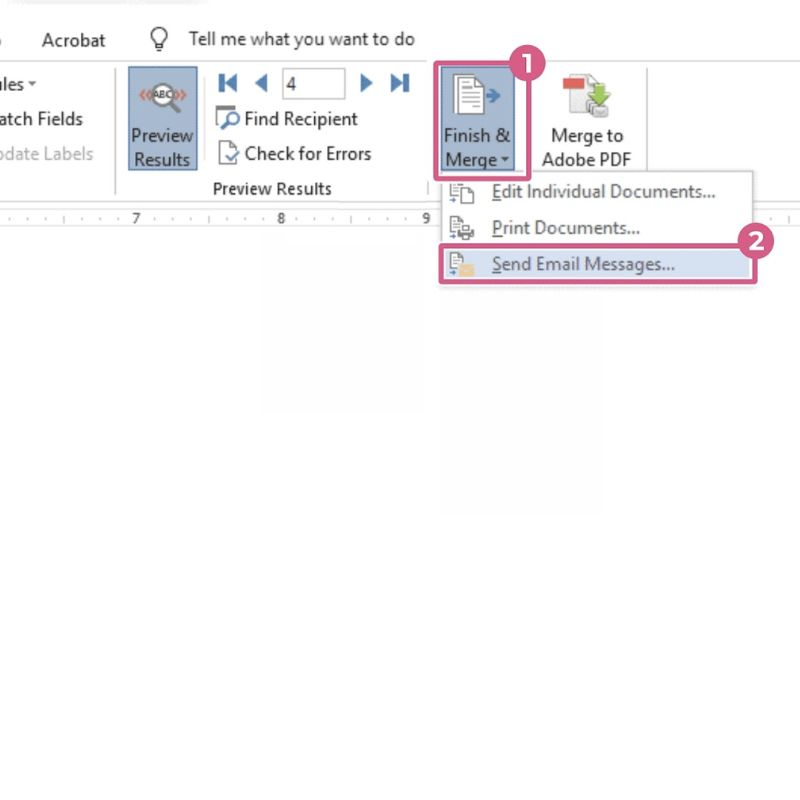
- Once satisfied with the preview, click ‘Finish & Merge’ in the ‘Mailings’ tab.
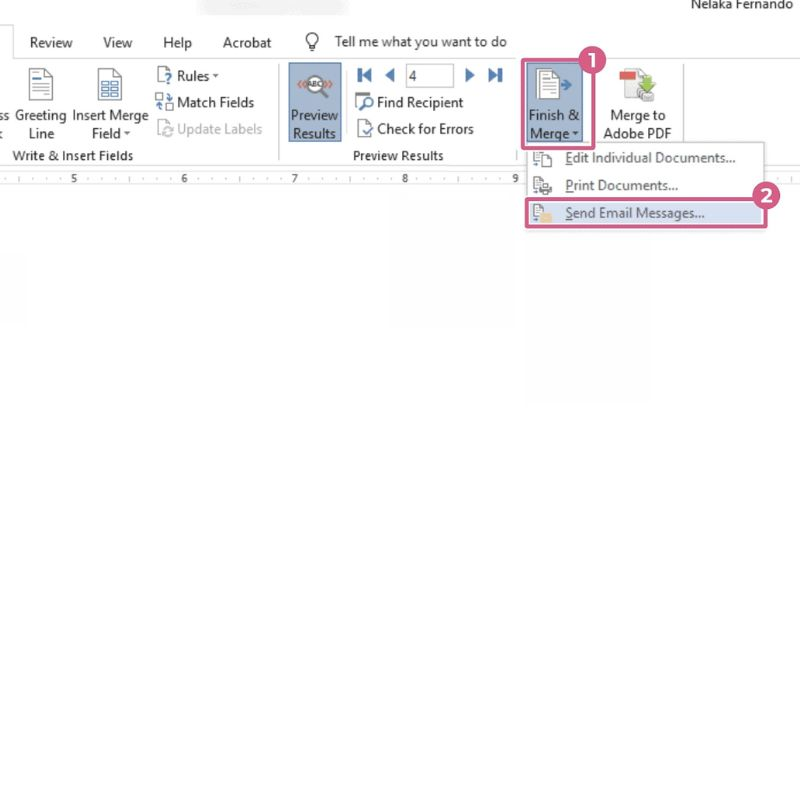
- Three options will appear:
- Print Documents: Sends the merge data directly to the printer.
- Send Email Messages: If your Excel data contains email addresses, use this to send mass emails.
- Edit Individual Documents: This creates a new Word mail merge document, allowing you to see and save every document.
- Select the option that best fits your needs.
Automatically pull recipient data from a spreadsheet
Skip the back-and-forth between Word and Excel for mail merge
How to troubleshoot common issues

Roadblocks happen. Here is how to tackle them.
- If data isn’t merging correctly, ensure no extra space or unusual characters are in your Excel headers.
- If Word doesn’t recognize your Excel mail merge file, ensure it is closed and not being used by another program.
- Consider setting up the format in Word before inserting mail merge fields for formatting issues.
Mail merging from Excel to Word might seem difficult, but as with any skill, each merge will make the process more intuitive, and the output will resonate more effectively with your recipients.
Mailsuite can supercharge the efficiency and effectiveness of mass communications when combined with mail merge from Excel to Word.
As you create personalized letters or emails using the merged documents, Mailsuite tracks each recipient’s engagement.
This amalgamation of tools allows you to personalize content and measure its impact. Knowing who has opened your emails can guide follow-ups, ensuring a more targeted and effective communication strategy.
In essence, Mailsuite makes the mail merge process smarter and more insightful.
Also read: Mail Merge into Outlook using Word and Excel (Pros and Cons)
How to make mail merge to match fields
From event invitations to marketing campaigns, mail merge options allow for mass customization that doesn’t compromise the personal touch. However, many users face a stumbling block: correctly matching mail merge fields.
The process ensures that the data from your source document (an Excel spreadsheet) correctly aligns with your destination document (a Word document).
Let’s delve into how to match fields in the mail and merge fields in an Excel file.
Field matching involves linking the column names in your data source (like ‘First Name’ or ‘Address’ column headers) to the corresponding mail merge field in your document (e.g., where you want the first name or address to appear).
Ensuring that the column headers and names in the spreadsheet match is crucial for the mail merge to run smoothly.
1. Preparing your data source
Before beginning the mail merge from the Excel worksheet, it’s essential to ensure your spreadsheet is well-organized.
- Defined Headers: Each column should have a clear header, which will later be used as the field name in the Word document. For instance, if you have a column of first names, the header should simply be ‘First Name.’
- Consistent Data: The data under each of the column headers should be correctly formatted. For example, if you note down dates, decide on a single format (e.g., MM-DD-YYYY) and stick to it.
2. Matching fields
Once your data source is linked to Word, the next step is to match fields, ensuring the data in your source corresponds to the right spot in your destination document.
- Place your cursor in the new Word document where you want a piece of data to appear.
- Under the ‘Mailings’ tab, click the ‘Insert Merge Field’ button. A drop-down menu will appear, displaying the headers from your Excel spreadsheet. These are what Word recognizes as mail merge fields.
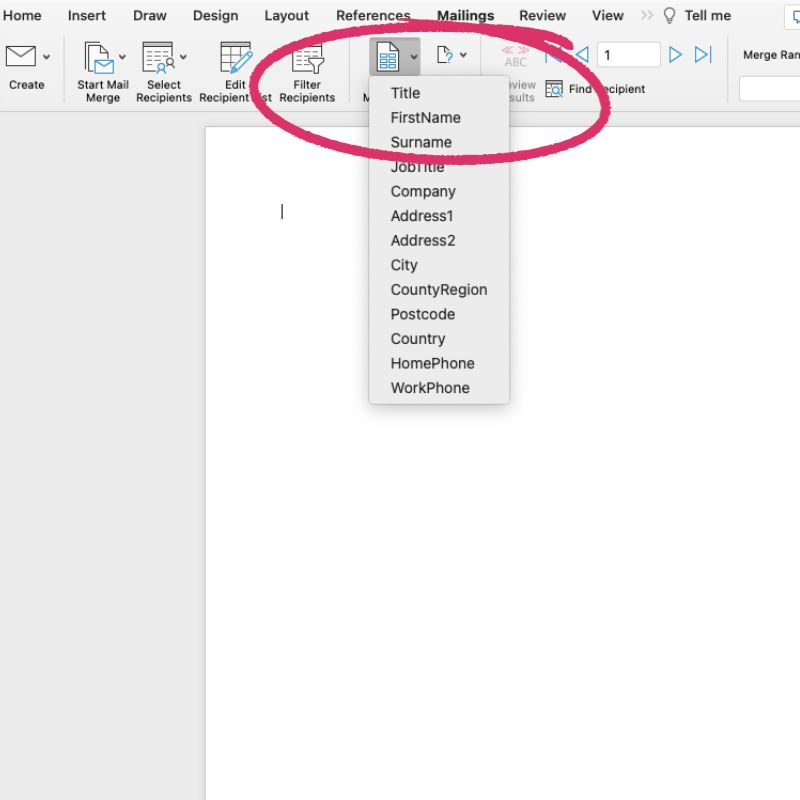
- Insert mail merge field. For example, if you placed your cursor where you want the recipient’s first name to appear, you would choose the ‘First Name’ field.
- Repeat this process for all column names you want to include in your new document.
3. Adjusting field matches
Sometimes, other mail merge fields in your Word document and the column names in your Excel spreadsheet might not align perfectly due to naming discrepancies or other issues.
Here is what you can do to correct the problems regarding mail merge with the Excel worksheet:
- To adjust, go to the ‘Mailings’ tab and click ‘Match Fields.’
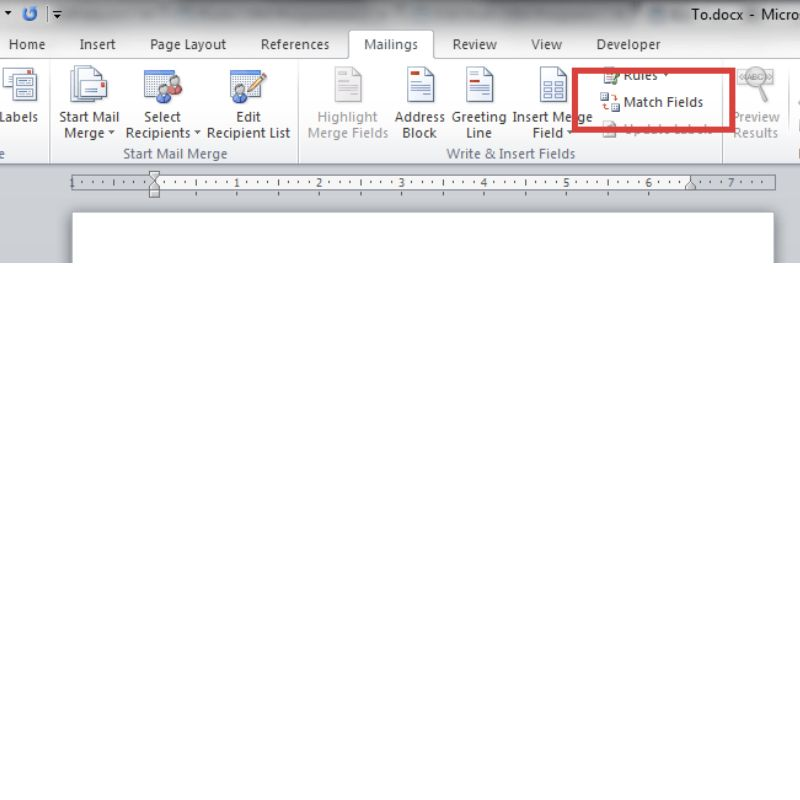
- A dialog box will open, showing an existing Excel mailing list of standard fields on the left (like Address, City, etc.) and drop-downs on the right.
- Use the drop-down to select the corresponding header from your Excel spreadsheet for each standard merge field. For instance, if Word’s standard merge field says ‘First Name,’ but your Excel header is ‘Given Name,’ use the drop-down to match ‘First Name’ to ‘Given Name.’
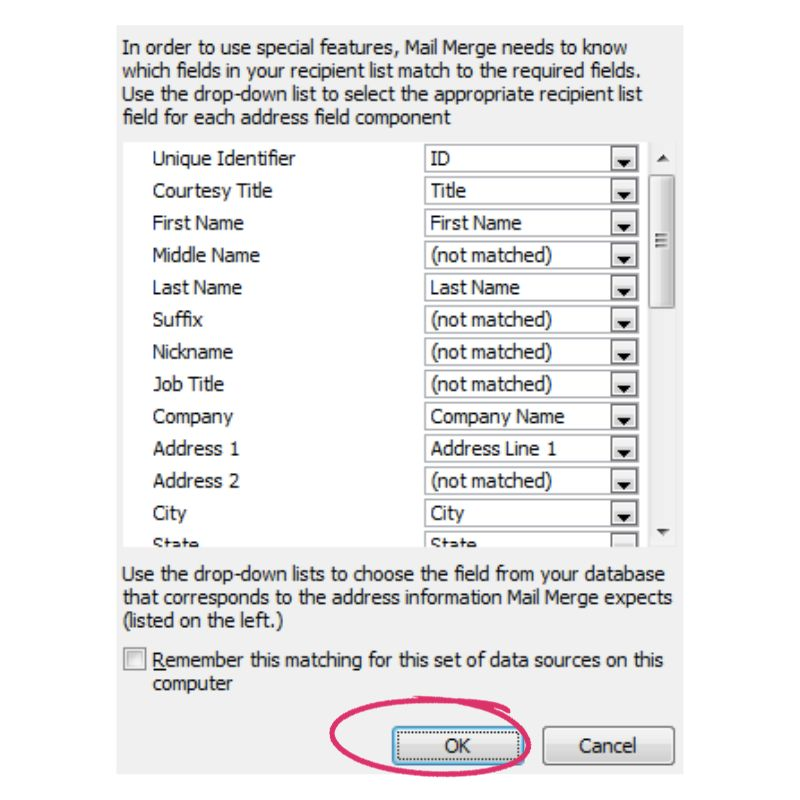
- Once all fields are appropriately matched, click ‘OK.’
4. Final steps and verification
After matching all fields, here is what you need in order to finalize the mail merge from Excel:
- Preview your merged document using the ‘Preview Results’ option. It lets you see how the merged document will look and verify that mail merge fields are matched correctly.
- Navigate through several records to ensure consistency.
- Once satisfied, proceed to complete the merge.
By paying attention to the preparation of your data source (the Excel spreadsheet), understanding the mail merge document field-matching process in your Word document, and taking the time to verify the fields, you can harness the full power of mail merge.
How to mail merge with mail merge wizard
The mail merge wizard is a user-friendly assistant within Microsoft Word that guides you through creating personalized emails, letters, labels, and more.
Whether you are sending newsletters or an email blast to your existing list, learning how to use mail merge in Microsoft Word document using the wizard ensures your message is tailor-made for each individual in your recipient list.
Here is a step-by-step guide on how to create a mail merge in Word document using the mail merge wizard:
Launch a blank Word file. Go to the ‘Mailings’ tab and click ‘Start Mail Merge.’ From the dropdown, click on ‘Step-by-Step Mail Merge Wizard.’
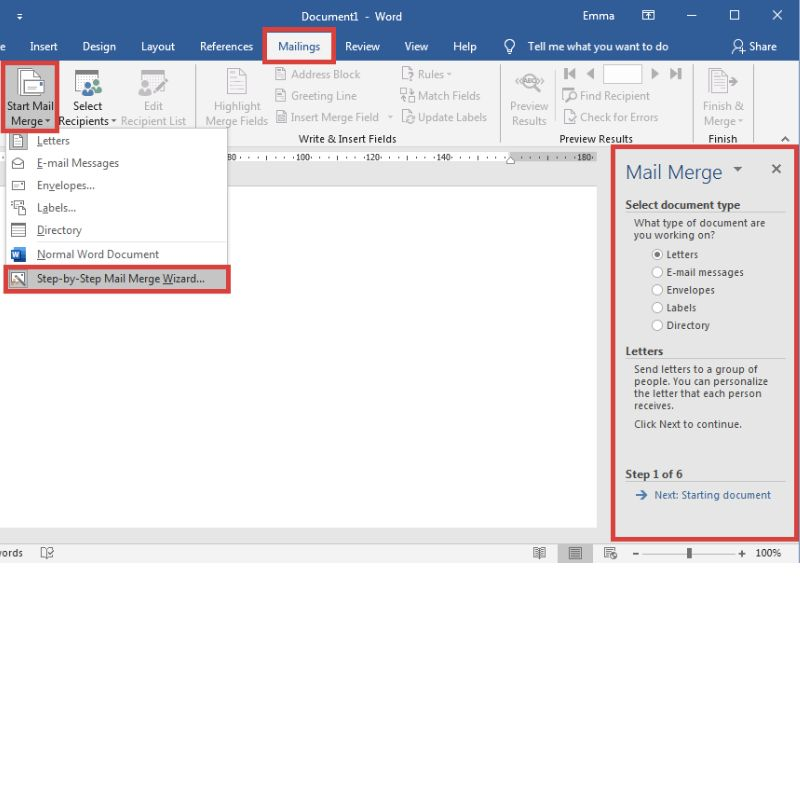
This action will open a panel on the right side of your screen that will guide you through the mail merge process.
1. Choose the document type
You will be prompted to select a type of document. Do you want to create letters, email messages, envelopes, labels, or a directory to edit individual documents? Make your selection and click ‘Next’ at the bottom of the panel.
2. Select the starting document
Now, you need to choose a starting point. You have three options:
- Use the current document: Start with the blank document you’ve just opened.
- Start from a template: Select a pre-existing Word mail merge template file.
- Start from an existing document: Browse and open a previously crafted document.
After making your selection, click ‘Next’ to start the mail merge.
3. Choose mail merge recipients
This step is where the personalization magic happens. You will be asked to select your mail merge recipients. Again, you have three main choices to select recipients:
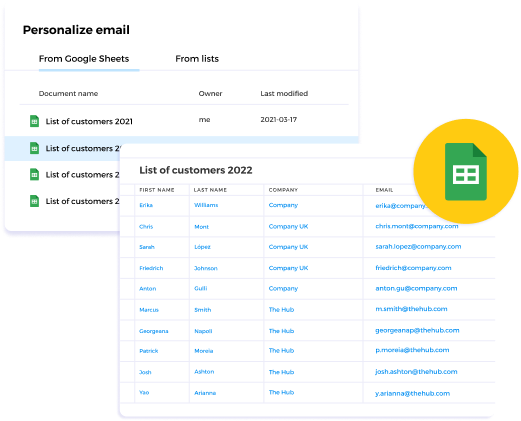
- Use an existing list: This is where you would link a Microsoft Excel spreadsheet or another data file that houses your recipient’s details.
- Select from Outlook contacts: If you use Outlook, you can directly pull contacts from there.
- Type a new recipient list: Manually input the recipient list.
The first option in the Word mail merge will be the go-to for most users. When selecting this, you will be prompted to find and open your Excel source file.
Ensure your data source has clear column headers (like ‘First Name,’ ‘Last Name,’ etc.).
Once you select recipients, click ‘Next.’
4. Craft your document
Now, onto the creative part! You will draft your email template. The trick here is to add a ‘Merge Field’ where you want personalized data to appear.
For example, if you start your letter with “Dear [First Name],” you would place your cursor where [First Name] is, go to ‘Insert Merge Field’ at the top, and select ‘First Name’ from the dropdown.
Do this for any piece of data you want to be personalized.
Draft the rest of your document as you would any other. When ready, click ‘Next’.
5. Preview your documents
An essential step! It allows you to see how each recipient’s final document will appear. You can navigate between records to see different personalizations.
If something feels amiss, you can always click ‘Previous’ to make adjustments.
Once satisfied, click ‘Next’.
6. Complete the merge
You have reached the finish line! Depending on your initial document choice, you will print multiple documents, send, or save your personalized communications.
Follow the on-screen dialog box prompts, and your mail merge will soon be complete.
Essential shortcuts for performing a mail merge
If you are currently working on a mail merge, familiarizing yourself with some essential shortcuts can significantly enhance your efficiency. Here’s your guide to these time-saving gems.

Before diving deep into mail merge-specific shortcuts, it is worth noting that the ribbon (the menu bar at the top of Word) houses many of our essential tools.
Here are some of the shortcuts you can utilize:
To quickly access the ribbon
- Press Alt: Pressing ‘Alt’ will highlight letters and numbers over each tab and tool in the ribbon. For Mail Merge, you would press “Alt” then “M” to jump to the “Mailings” tab. Note: This shortcut won’t work on the Mac version of Microsoft Word.

Starting the mail merge document
Instead of manually navigating through the menus press:
- Alt + M + S: This combination will initiate the ‘Start Mail Merge’ process. You can quickly select your desired mail merge document type using the arrow keys and hit ‘Enter.’

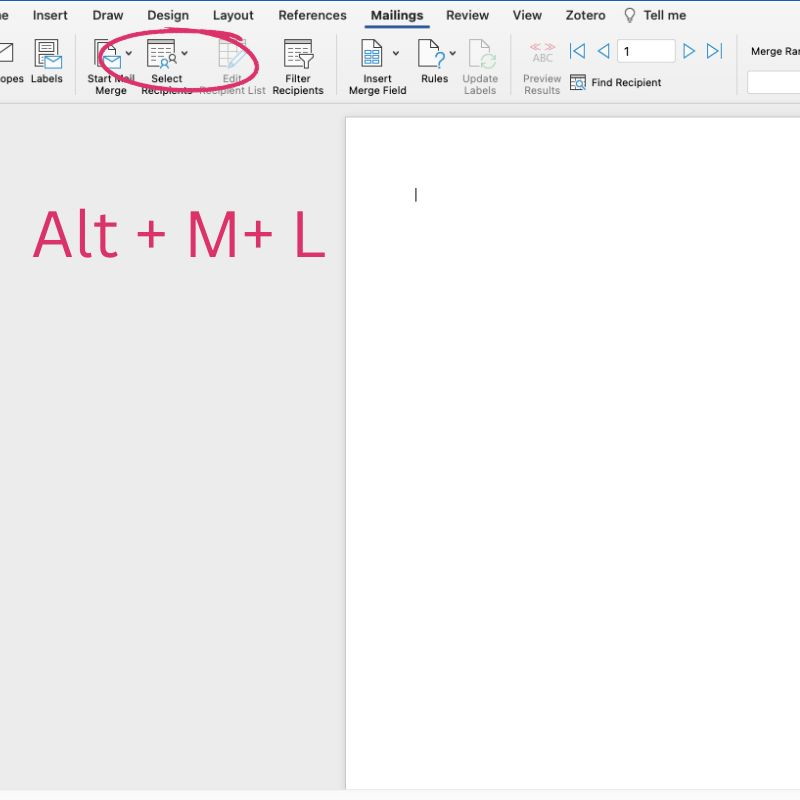
Selecting mail merge recipients
This step is where you select the list or database that contains the details of the recipients:
- Alt + M + L: This shortcut allows you to swiftly select recipients for mail merge. If you are using an existing list (like a Microsoft Excel spreadsheet), after this command, you just hit ‘E,’ and a dialog box will appear to select your file.
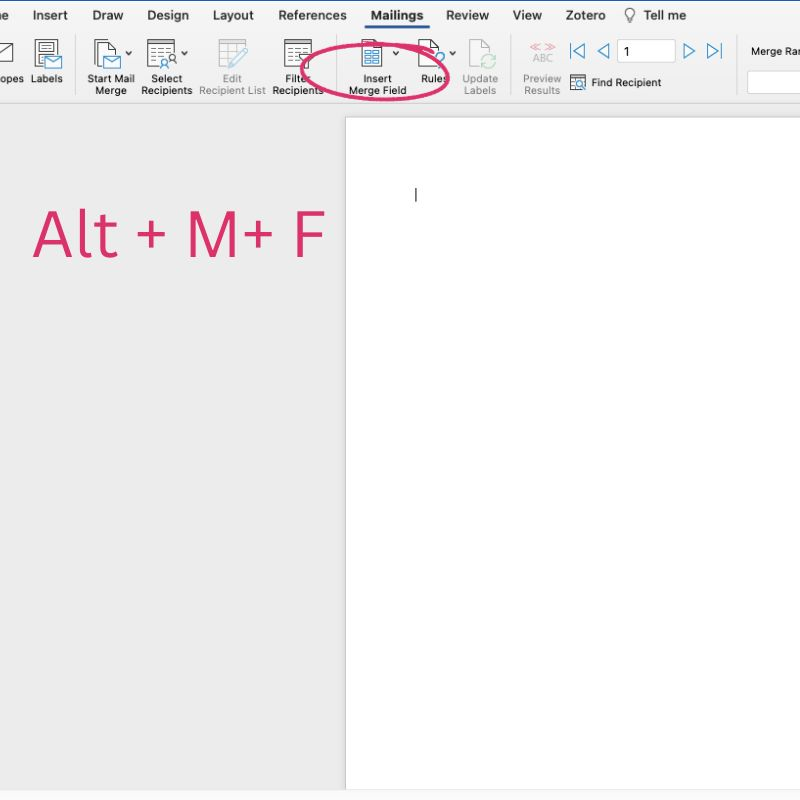
Insert mail merge fields
Once you have prepared your document and are ready to ‘Insert Merge Field,’ do the following:
- Alt + M + F: This opens the ‘Insert Merge Field’ dropdown. Use the arrow keys to navigate through your available fields and the ‘Enter’ key to insert merge fields into the mail merge document.
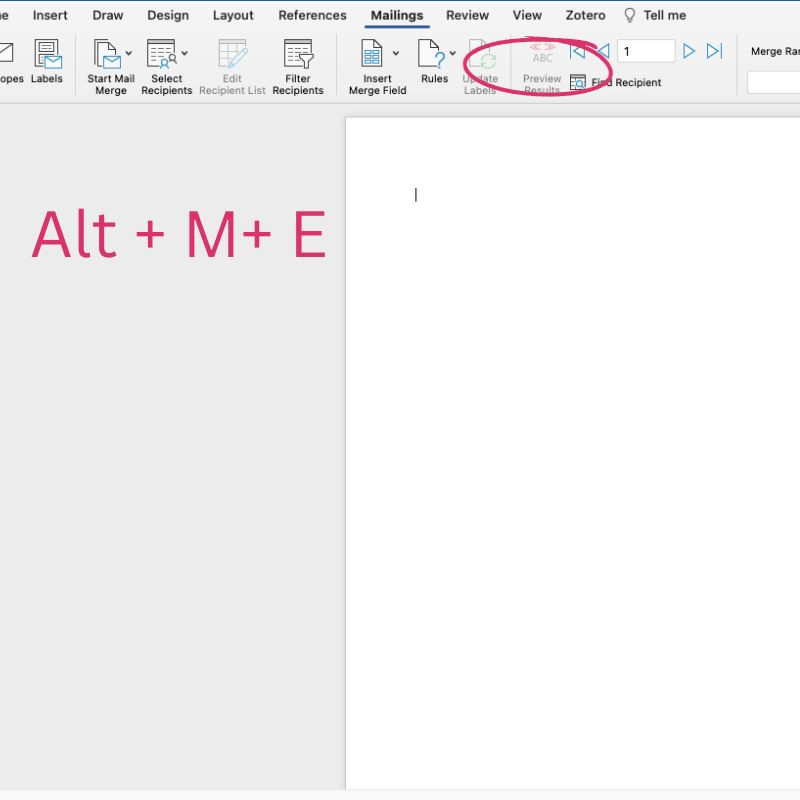
Preview results
It is always wise to preview how your final document will appear for each recipient:
- Alt + M + E: This shortcut will toggle the ‘Preview Results’ option on and off. It is advantageous when you want to shift between viewing your mail merge document with placeholders and seeing it with the actual data.
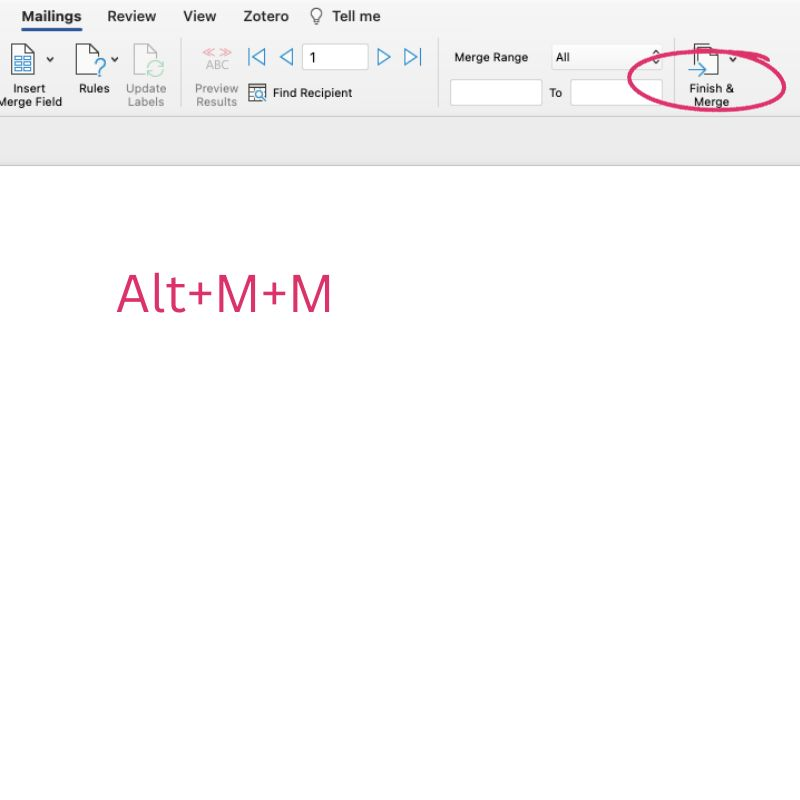
Finish and merge
When all looks good, and you are ready to finalize:
- Alt + M + M: Initiates the ‘Finish and Merge’ process. Again, use the arrow keys to select how you wish to finish: print documents, send by email, or just create a mail merge document.
If you are a beginner or just prefer a more structured approach:
- Alt + M + W: This initiates the step-by-step Mail Merge Wizard, guiding you through the process.
Additional tips for enhanced efficiency
- Quick Save: Whether you are in the midst of your mail merge or any other task, remember the power of “Ctrl + S” – a quick save. It’s always good practice to save your progress frequently.
- Undo Action: Did you make an error? “Ctrl + Z” is your universal undo action. It can be a lifesaver in many scenarios, not just mail merge.
- Redo Action: If you undo something and want to revert the change, “Ctrl + Y” will redo the action.
Mastering these shortcuts for how to do mail merge in Excel might seem like a small effort, but the seconds you save here, and they can quickly add up, streamlining your workflow and reducing potential frustration. As with any shortcut, the key is consistent use.
What is the purpose of mail merges
Email merge from an Excel sheet facilitates the creation of multiple individual documents from a single mail merge template document and a structured data source.
It transforms one general mail merge template file into a multitude of personalized versions, each catering to an individual from your database.
Here are some reasons why you should consider learning how to do a mail merge from Excel to Word:
Efficient and time-saving

Imagine manually typing out 1,000 invitations for a corporate event, each addressed to a different guest. This would be painfully time-consuming, and the chances for errors would also be high. With mail merge using Excel sheets, what might take hours or days can be condensed into mere minutes.
Consistency with personal touch
While each of the mail merge documents or emails produced through a mail merge is personalized, the overall structure, format, and content remain consistent. It ensures that everyone receives the same information but with that special touch just for them.
Enhanced engagement
We have all experienced the delight of receiving a letter or email message addressed directly to us rather than a generic “Dear Customer.” The simple act of personalization can drastically increase engagement rates, making the recipient feel recognized and valued.
Error reduction
When tasks are automated, the potential for human error diminishes. Using mail merge significantly reduces the risk of sending out incorrect or mismatched information.
Versatility in application
Mail merge is not just limited to personalized letters or email messages. They can be employed in creating personalized certificates, labels for mailing, or even directories. This versatility makes it a valuable tool across various sectors, from education to business.
Improved data management
To perform a mail merge, one typically requires a structured data source, often in the form of spreadsheets or databases. This indirectly encourages better data management practices, as having well-organized data entries is pivotal for a successful merger.
Cost efficient
Especially in business scenarios, time is money. By drastically cutting down the man-hours needed for tasks, mail merges represent a saving of time and financial resources.

Knowing how to mail merge in Excel will help you add a personal touch to the vast sea of generic content. It upholds the adage that small details often make the most significant difference.
Eliminate manual steps in the mail merge process
Mail merge in a few clicks without leaving your inbox
Takeaway: Invoke a personal touch in today’s digital avalanche with mail merge
In the age where generic messages overflow our inboxes, the desire for a touch of personalization grows ever stronger.
Creating mail merge emails from Excel seamlessly blends wide-reaching efficiency with that heartwarming personal touch.
It’s more than just a tech trick; it’s the future of thoughtful communication.
Whether you are sending out event invites or corporate announcements, mail merge ensures each recipient feels exclusively addressed, transforming ordinary messages into memorable moments.
Mailsuite elevates mail merge by providing real-time tracking for your mass email campaigns. It ensures your email messages are delivered and shows who has opened them, offering invaluable insights.
Integrating Maillsuite with your mail merge process can refine your strategy, enhance engagement, and optimize your outreach for maximum impact.
Read more about mail merge:
Mail Merge with Attachments: Is Outlook or Gmail Better?