
When you have to send the same email to multiple recipients, it can be stressful to send each person a separate email. Want to be more efficient when emailing your audience? This article will teach you how to create and use email groups in Gmail.
How Email Groups Work
An email group is a feature in Gmail that allows you to group several email addresses together under a single label. Think of it as a specific name you assign to a group of email contacts that allows you to email everyone in the group at once without having to enter each address individually.
Anytime you want to email those contacts, enter just the assigned group’s name, and everyone will get the message.
For example, if you regularly email a particular group of recipients, you can create an Email Group like ExampleGroup and add everyone’s email addresses. Then, when you need to send the group members an email, compose your message and enter the group’s name in the recipient’s field. Gmail will automatically populate everyone’s email addresses, and when you hit send, everyone will get the email.
Benefits of Creating Email Groups
Using Gmail groups offers your emailing process many advantages, such as:
Saves You Time When Mass Emailing
With email groups, you enter the contacts’ email addresses just once – when creating the email group in Gmail. Afterward, you can use the label whenever you need to email the group instead of manually entering their email addresses. Eliminating the need to manually type each email address streamlines the process of sending mass emails, saving you time you can channel into more productive activities.
Saves You The Hassle of Entering Multiple Recipients
Entering individual recipients every single time is not only time-consuming but also draining and can make the emailing process more difficult than it should be.
With Gmail groups, group emailing is as easy as mailing one recipient. You enter just “one recipient” (the group label) in the “To” field, and Gmail will automatically include the email addresses of everyone in that group.
Reduces Errors in the Emailing Process
When entering the email addresses of multiple contacts into the “To” field, errors are also possible. For example, you can make a typo or mistakenly leave an email address out. When errors occur, your email will not reach the intended recipients, undermining the email campaign.
Email groups reduce these errors because the email addresses are pre-defined. After creating the group, you’ll review it to ensure it is complete and each contact is correct. After this one-time confirmation, there’s no need for future checks, and you can be sure your message reaches your intended recipients.
Allows for Better Contacts Management
Email groups allow you to organize your email contacts into logical categories. Instead of just a long list of contacts, you can create groups of contacts such as prospects, customers, suppliers, and employees. After setting up these groups, you can add contacts to each group as needed.
With this organization, you won’t need to search through all your contacts for specific addresses whenever you need to communicate with specific segments of your contact list.
How to Create Email Groups in Gmail
Creating email groups in Gmail is a simple process, as follows:
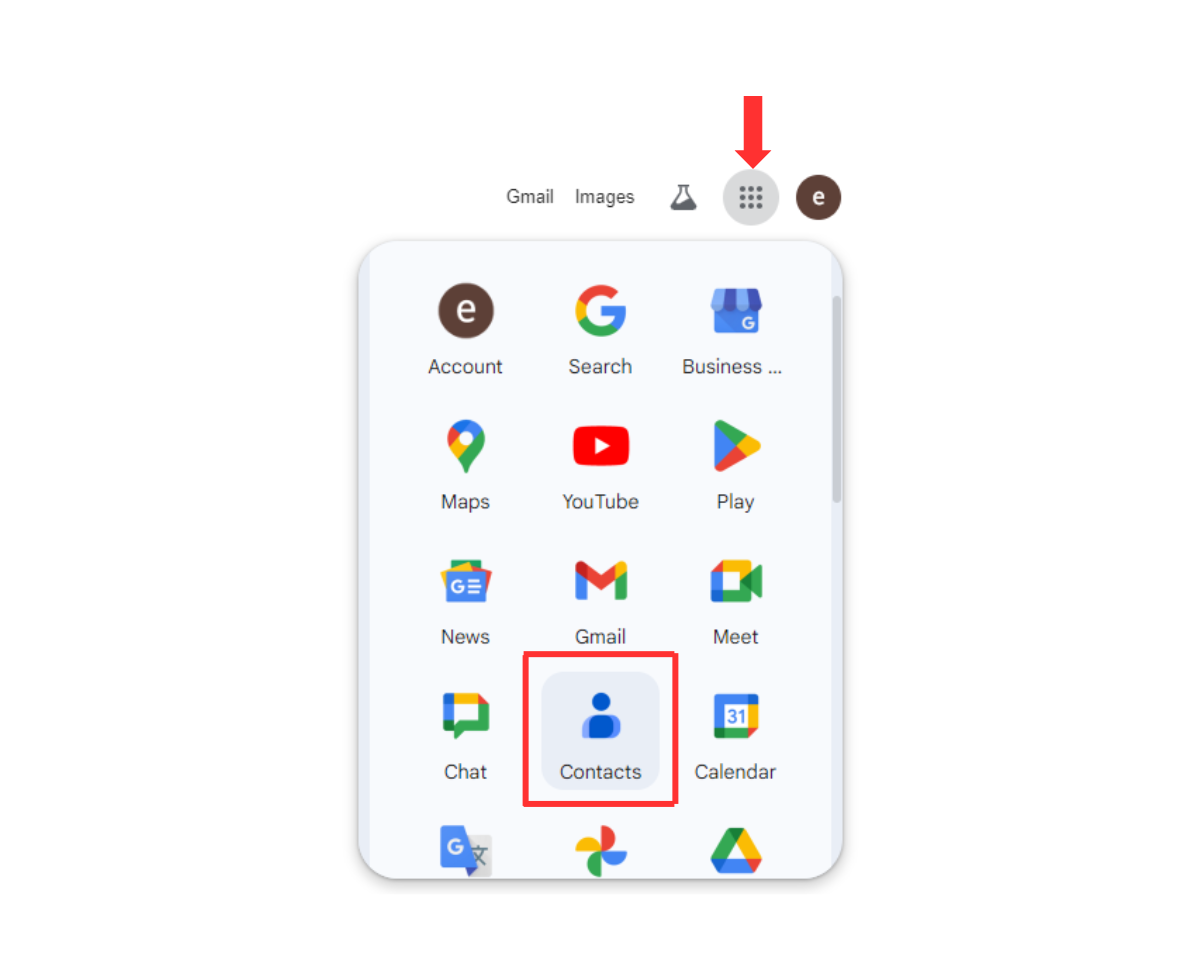
Step 1: Open Google Contacts
Click the Google Apps icon at the top right end of a Google page. Scroll down the list of apps. Find and select Contacts.
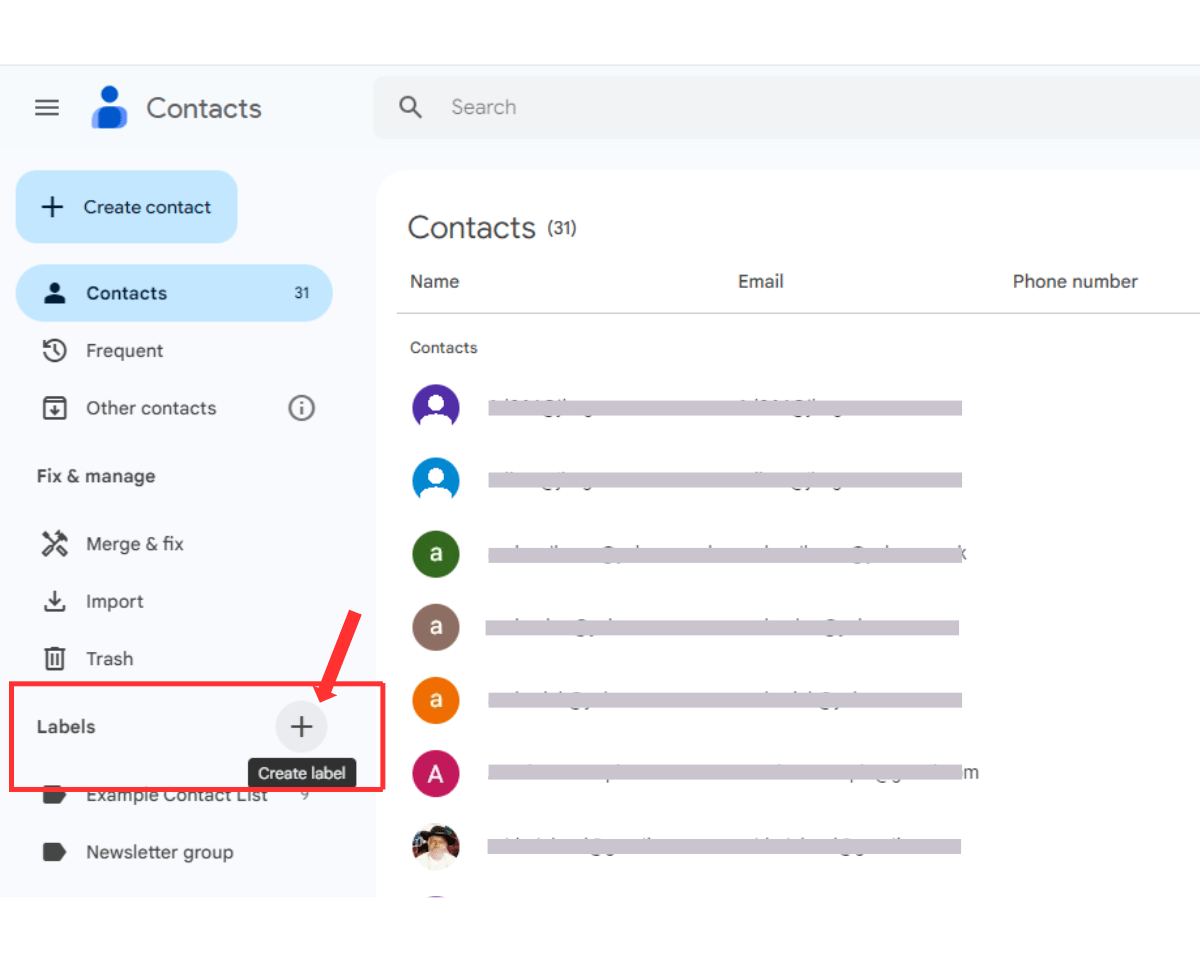
Step 2: Create a Label
In the left sidebar of the page, go to the Label section and click the Create Label icon – the plus sign in front of Label.
Step 3: Name your Label
Enter a unique name for your label in the Create Label window that appears. Then, click Save.
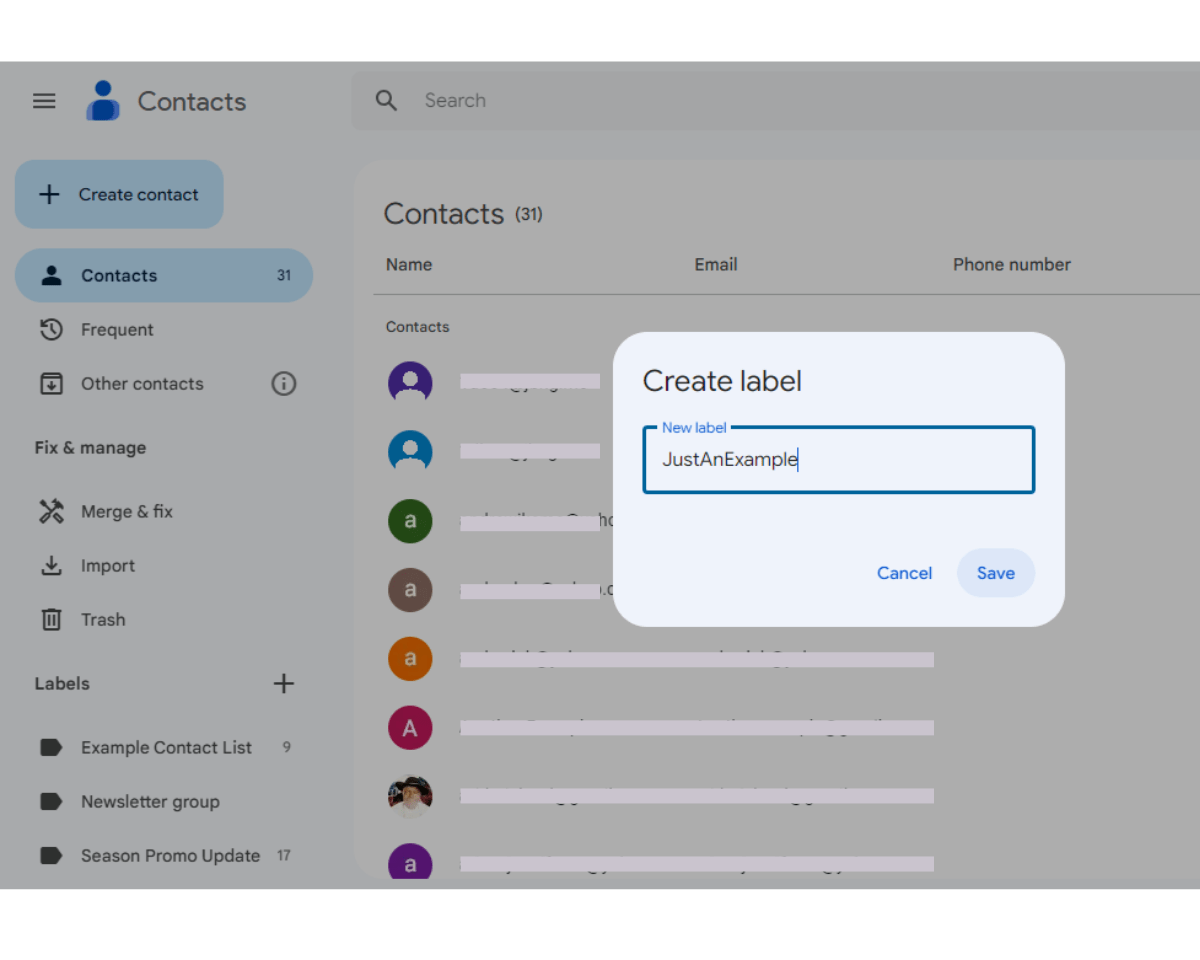
Your newly created label will now be added to your list of labels in the left-hand pane of the Google Contacts page.
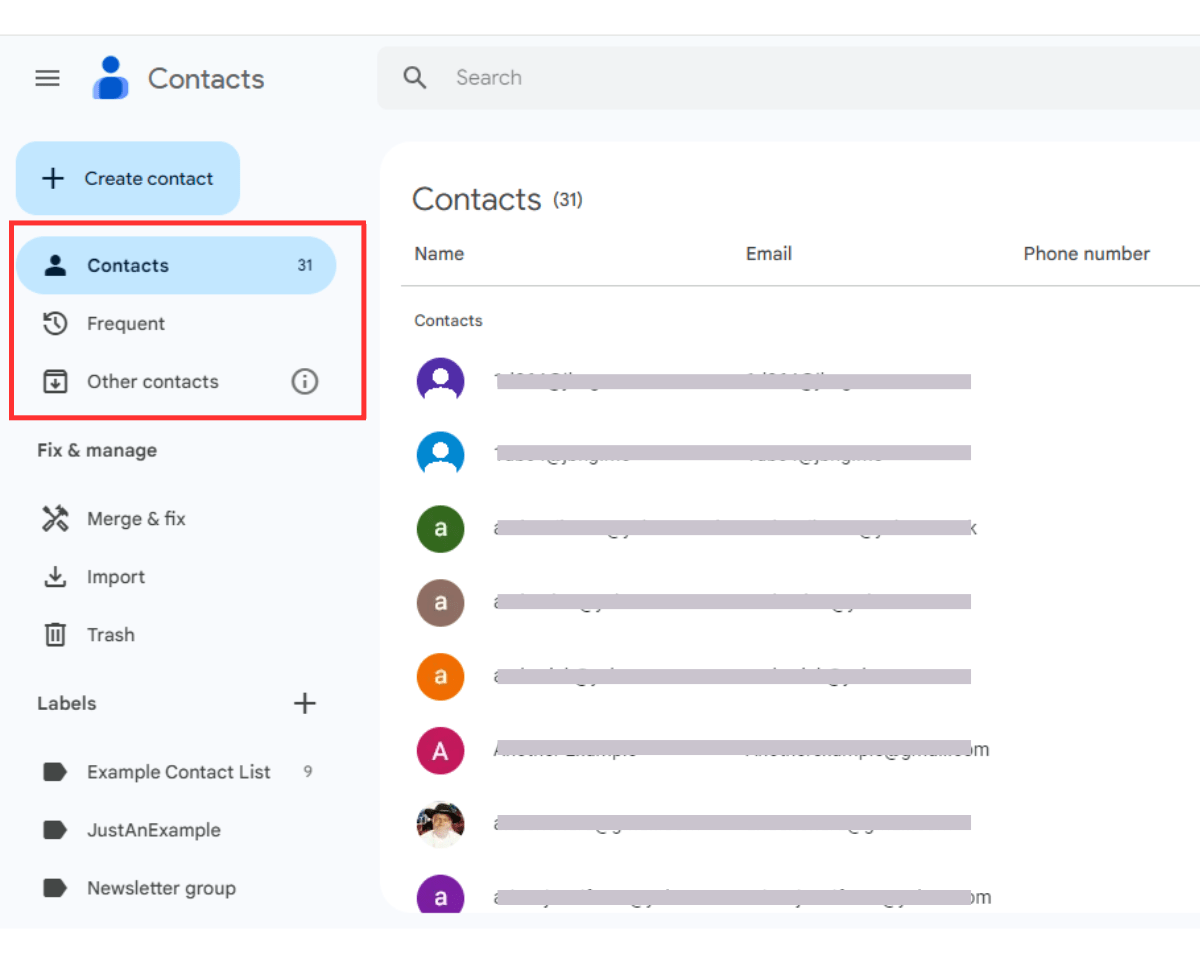
Step 4: Go to Contacts, Frequent, or Other Contacts
After you create a group, the next step is to add contacts. You start by going to where your contacts are saved. This would be in Contacts in the left-hand pane of the Google Contacts page. If you don’t have contacts saved, click Frequent to open the Frequently contacted page, which lists email addresses you frequently send messages to.
For a more holistic list, click Other contacts. This list includes all contact addresses that Gmail collects as you send and receive emails, allowing it to keep track of everyone you’ve ever interacted with via email.
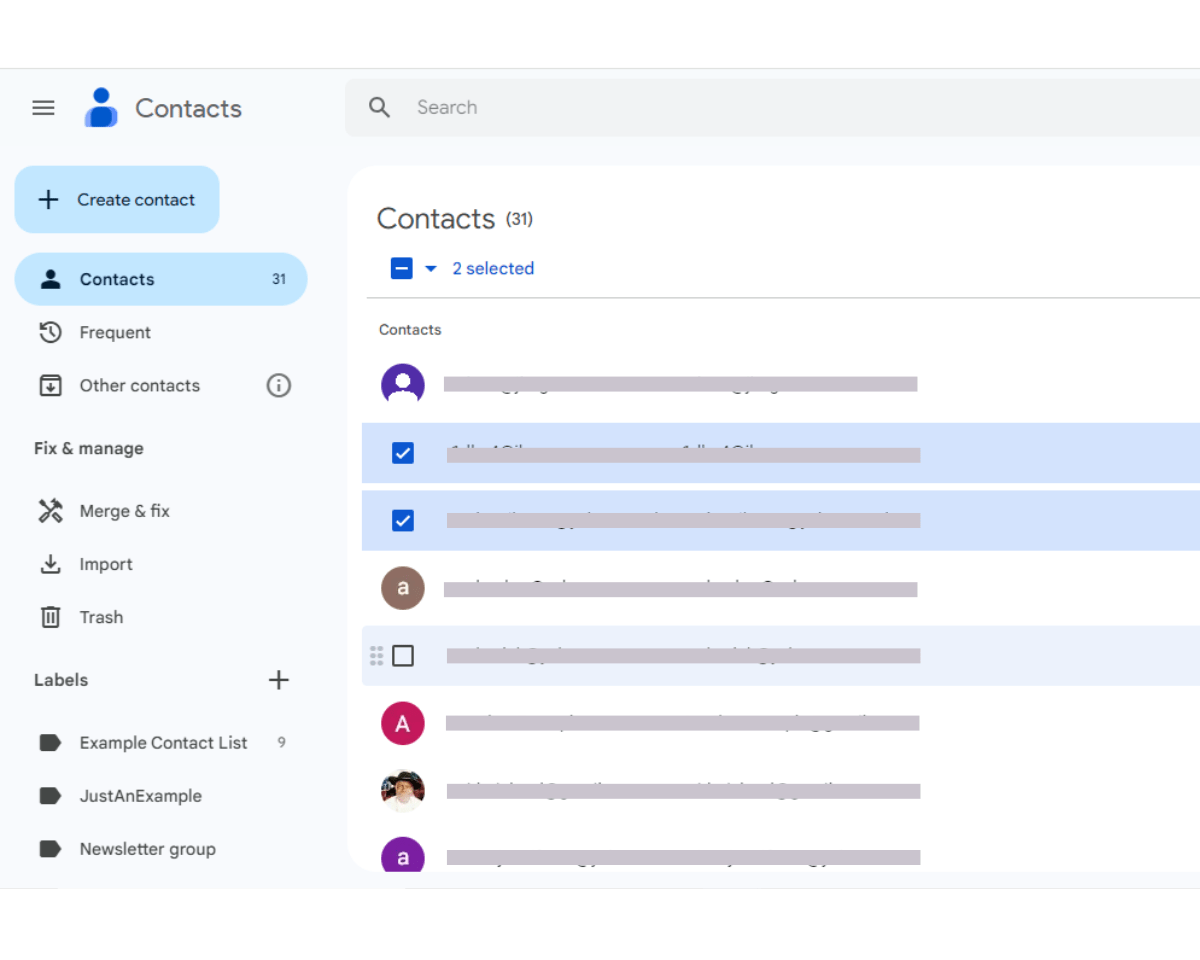
Step 5: Select all the contacts you want to include
In your Contacts, Frequently contacted, or Other contacts page, find and select the contacts you want to add to your newly created label. Do this by hovering over the contact and ticking the selection box that appears on it.
Step 6: Add them to the newly created label
After selecting all the contacts you want to add to the label, click the Manage labels icon at the top right of the page. This opens a list of all your labels. Click the newly created label to which you want to add the selected contacts. Then, click Apply.
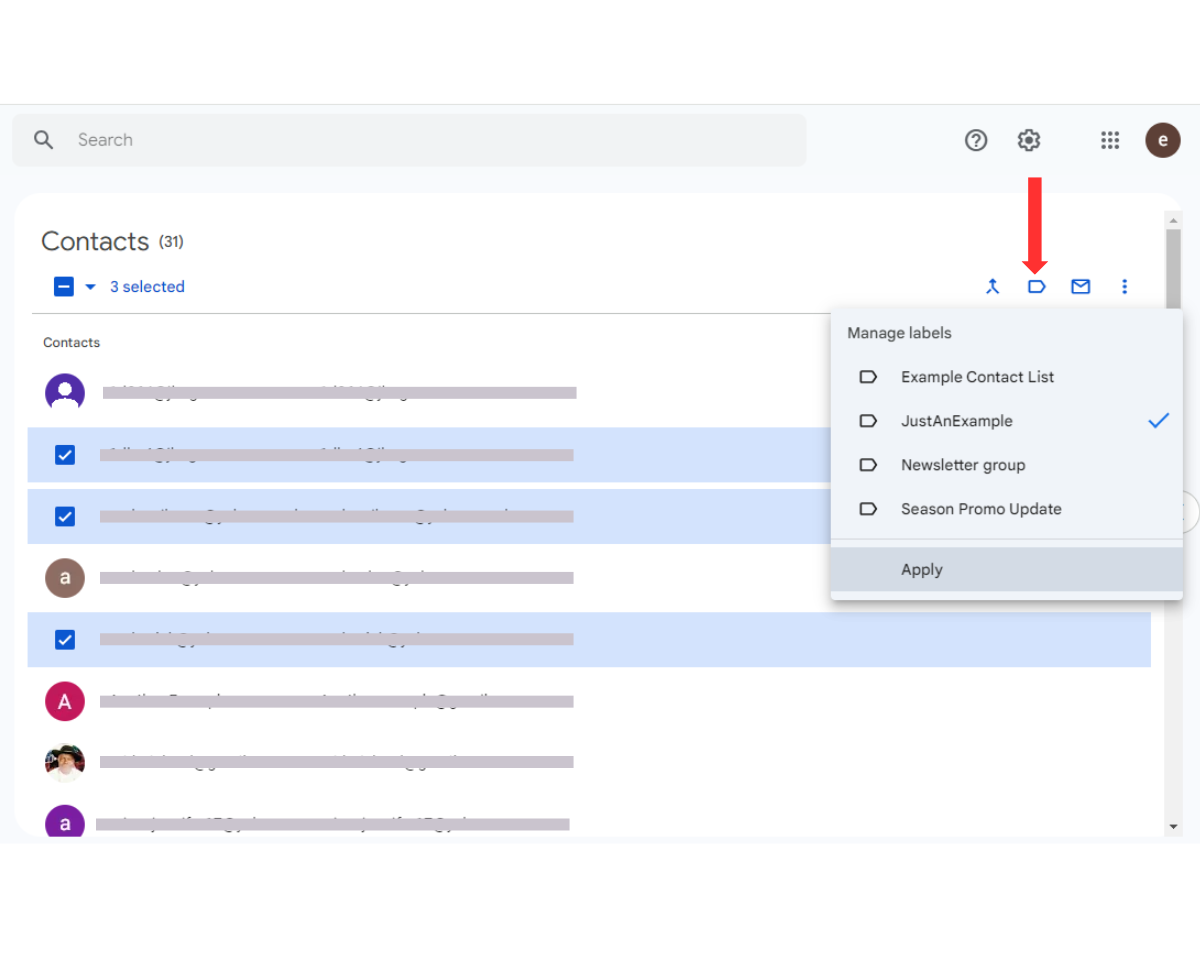
You’ll get a confirmation pop-up at the bottom of the page telling you that the selected number of contacts has been added to the specified label.
Note: You can create multiple Gmail groups using the above steps.
How to Use Email Groups in Gmail
Using an email or contact group in Gmail is also very simple. Follow these steps:
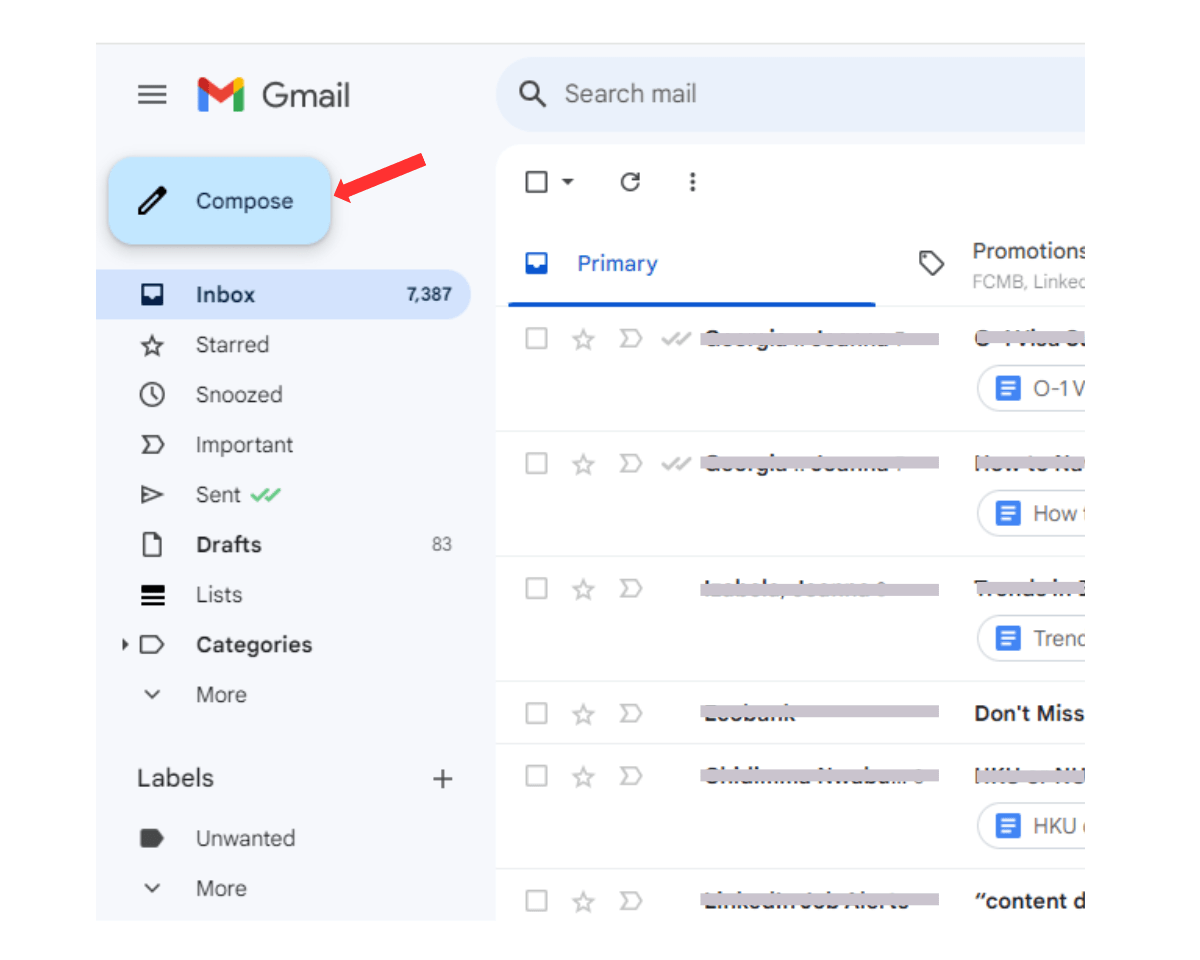
Step 1: Start a new message in Gmail
Open your Gmail account. Next, click the Compose button to start a new message.
Step 2: Enter your group name in the recipient’s field
Sending an email to Google Groups is similar to sending one to a single recipient. Start typing the name of the email group you want to message. Then, select the name from the pop-up list that appears.
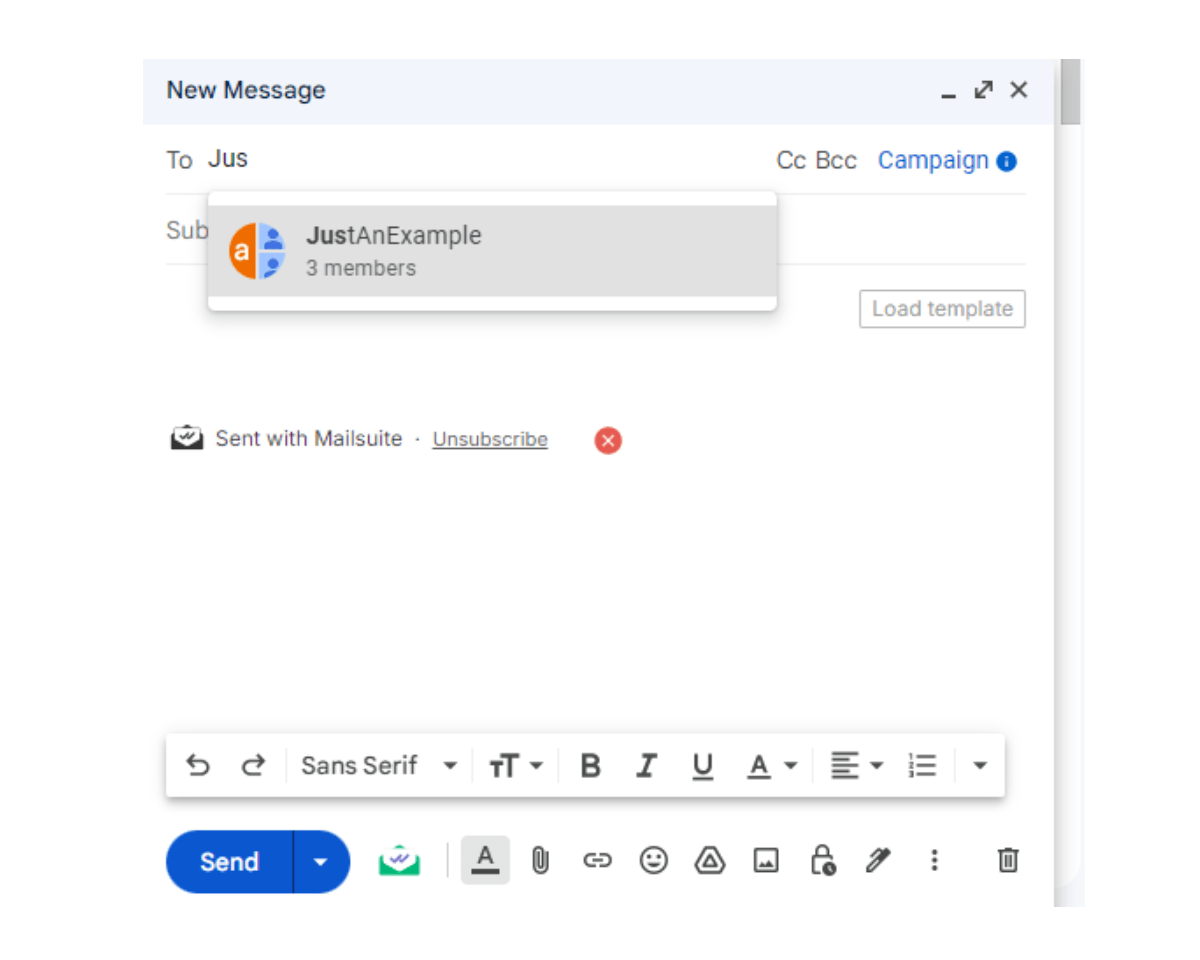
Gmail will populate the email addresses of everyone in the email group in the To field.
Step 3: Set up your email
You can now add your subject line and email message to the body of the email.
Step 4: Review your email and send your email
Proofread your email to ensure it is free of errors. Then, click the Send button. Gmail will send the message to everyone in the email group you selected.
How to Create and Use Email Groups in Gmail with Mailsuite
Want to supercharge your mass emails and make them more effective? The best way to do this is to use Mailsuite Contacts instead of Gmail’s email groups. Mailsuite’s Contact feature (also called Mailsuite Lists) lets you turn your Gmail into a robust email marketing tool by streamlining mass emailing.
Follow the steps below to create email groups in Gmail with Mailsuite:
Step 1: Install Mailsuite
Go to the Chrome Web store, click Add to Chrome, and follow the on-screen prompts.
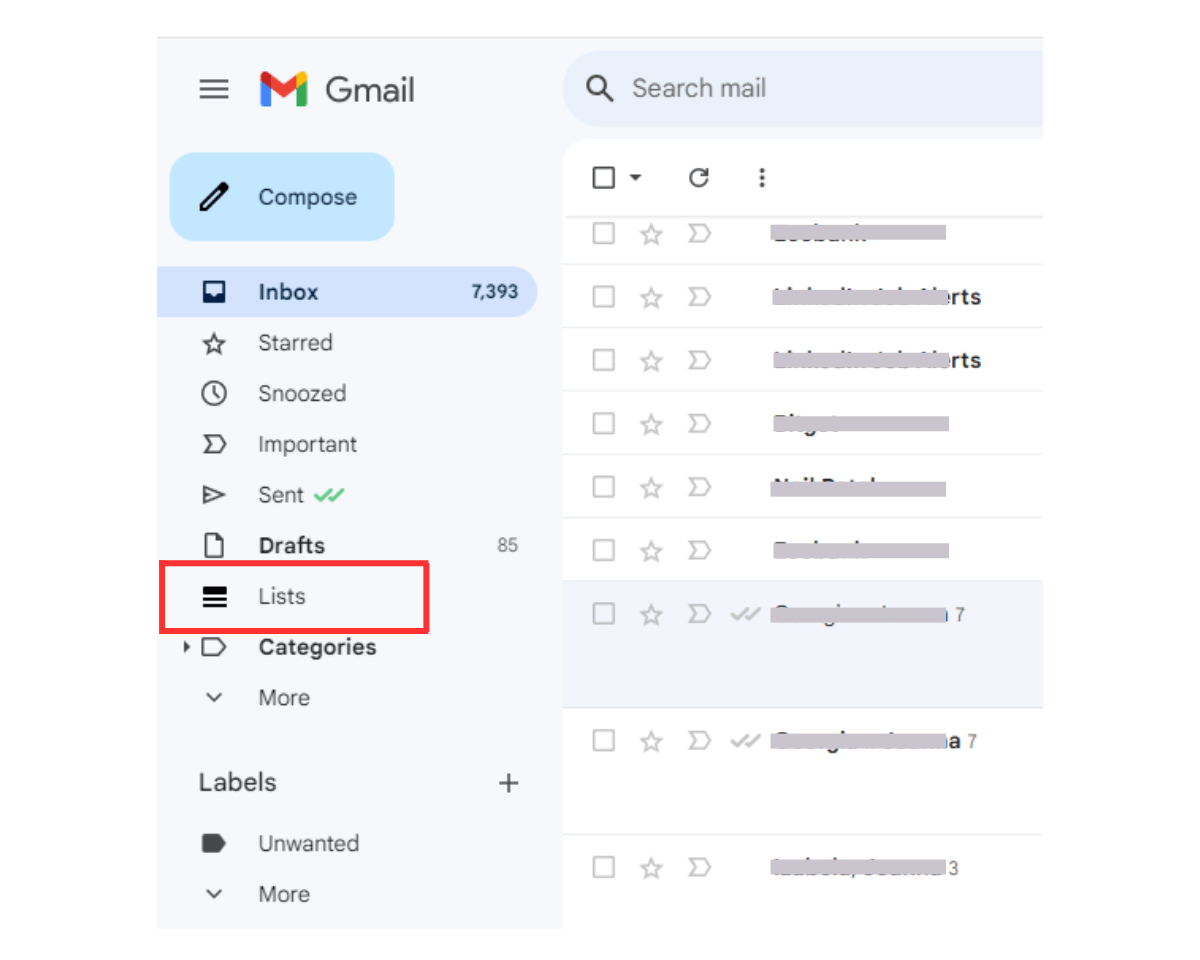
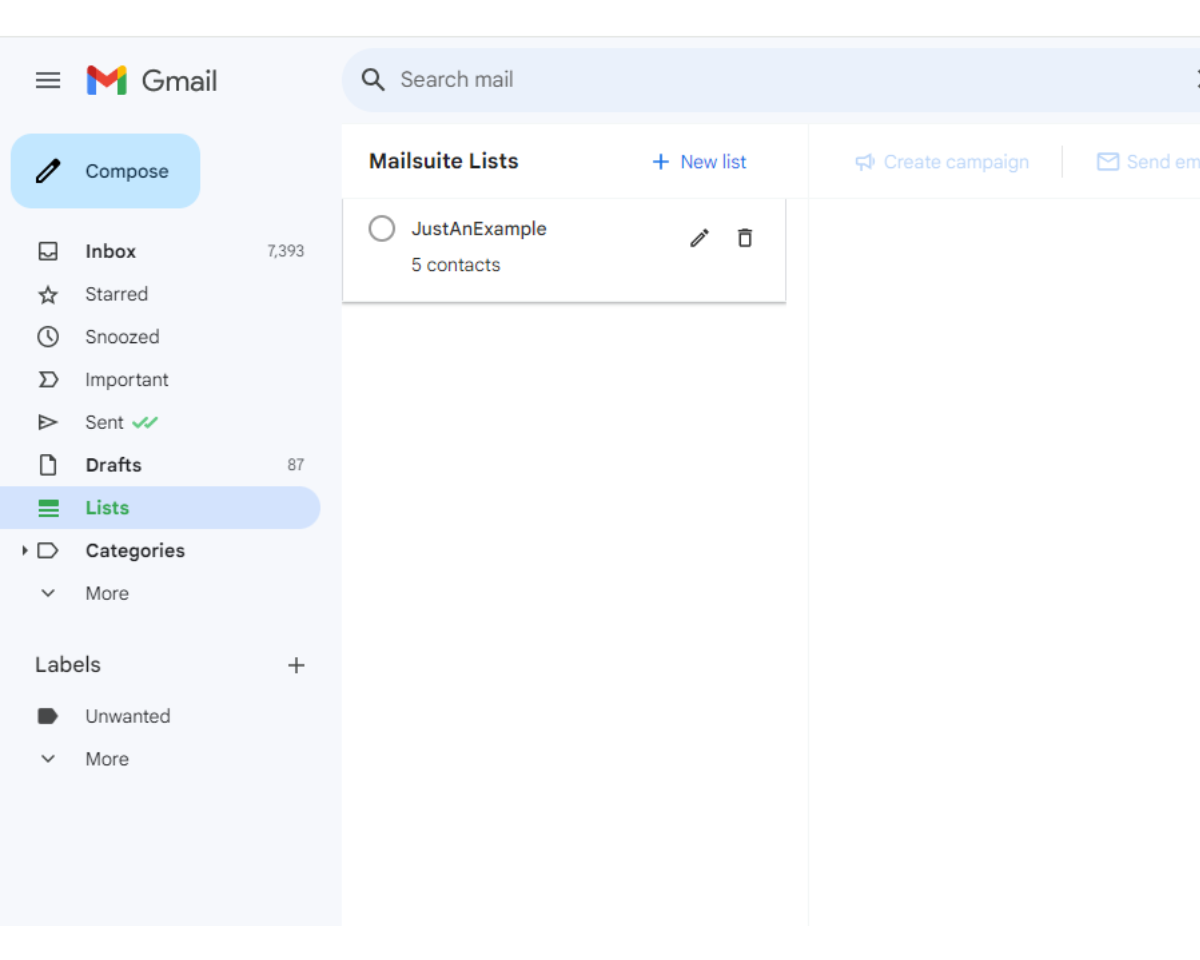
Step 2: Go to List in Gmail
Open your Gmail account. In the left sidebar, find and click List.
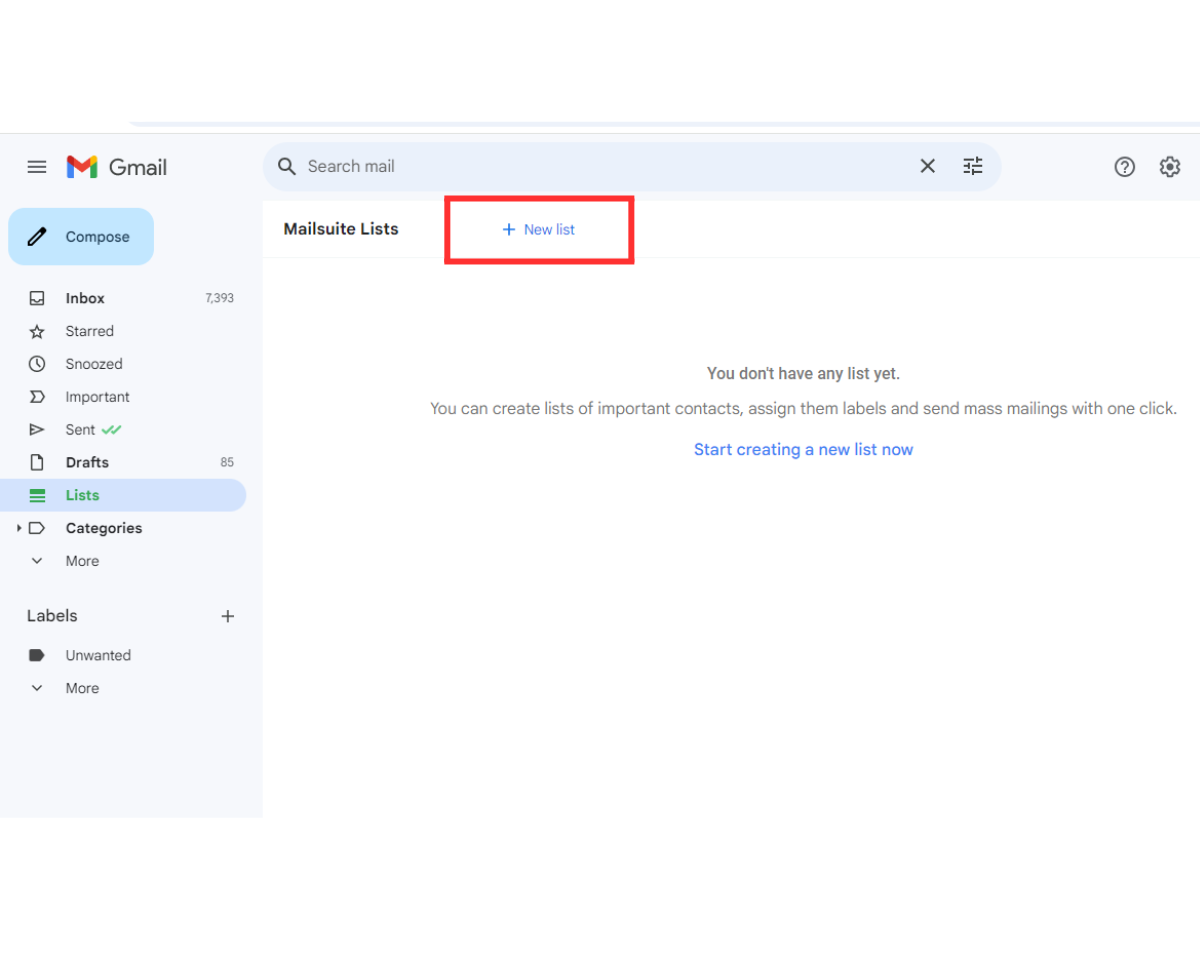
Step 3: Click New List
When the Mailsuite List window opens, you’ll see that you don’t have any lists yet. Click the New list button at the top of the window to create your list. If you have created a Mailsuite list before, you’ll see all of them in this window.
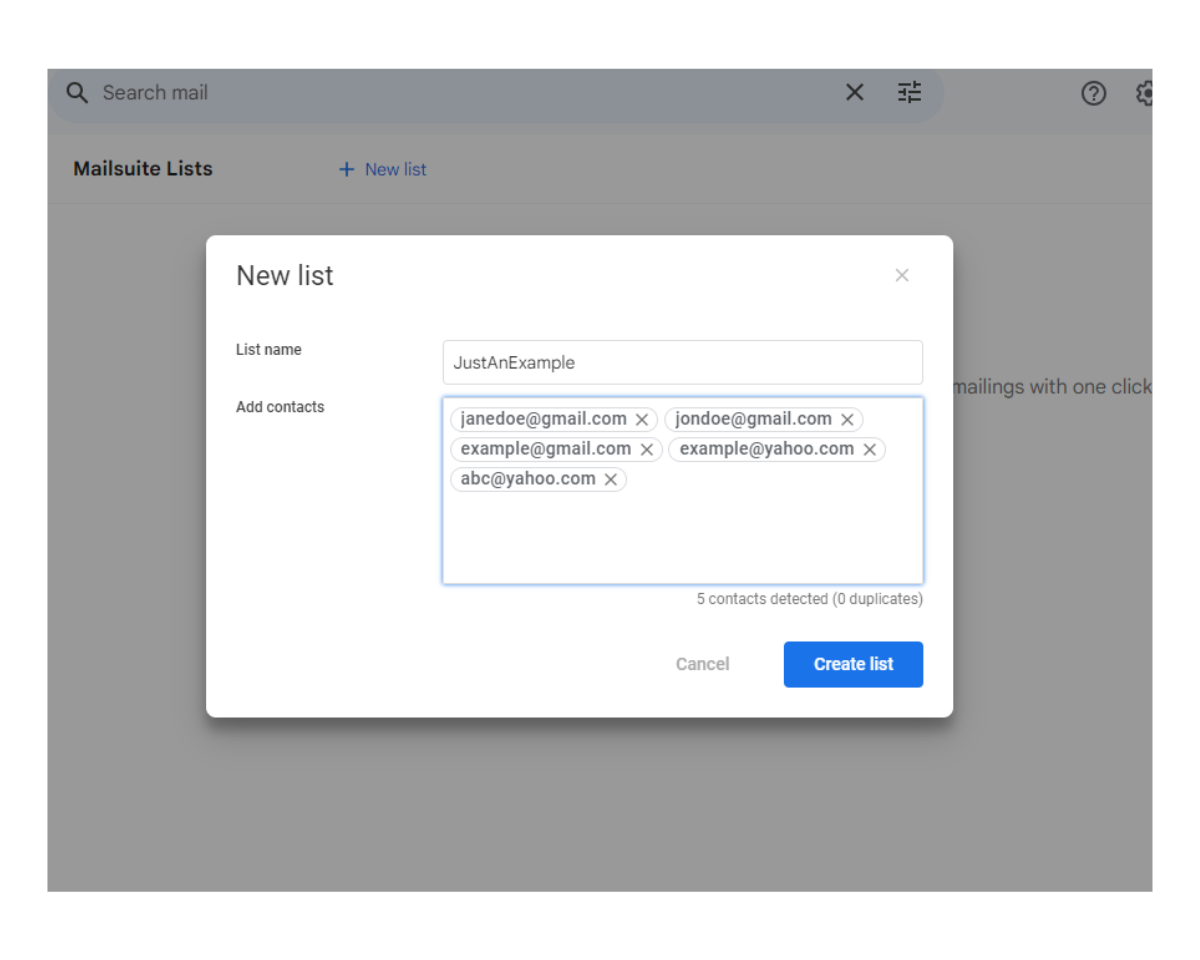
Step 4: Create your Mailsuite List
In the New List window, enter a unique name for your contact list in the List name field, and enter the email address of individuals you want to add to the group in the Add contacts field.
As you add the contacts, Mailsuite displays the number you’ve added and whether there are any duplicates. After adding all the contacts you want to add to the group, click Create list.
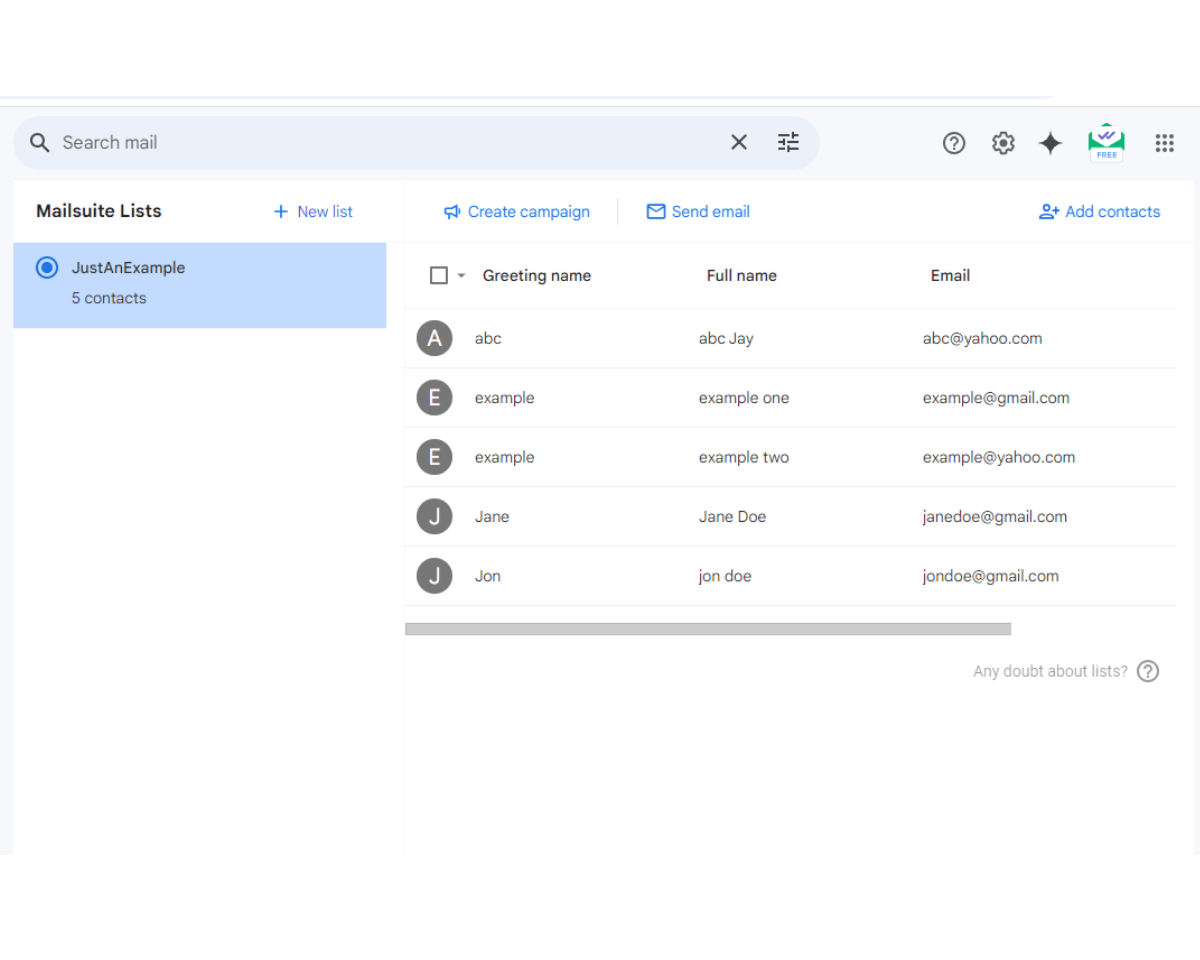
Step 5: Edit relevant fields (Optional)
Mailsuite will automatically create your list or email group with three fields: email, greeting name, and full name. However, remember that you entered only your contacts’ email addresses when creating the list.
Mailsuite uses the email data to automatically populate the Greeting name and Full name fields, but always double-check these because you may need to update these fields manually. To edit them, hover your mouse over each contact and click the edit icon that appears. Then, enter the correct information for the contact and click the Save button to the right.
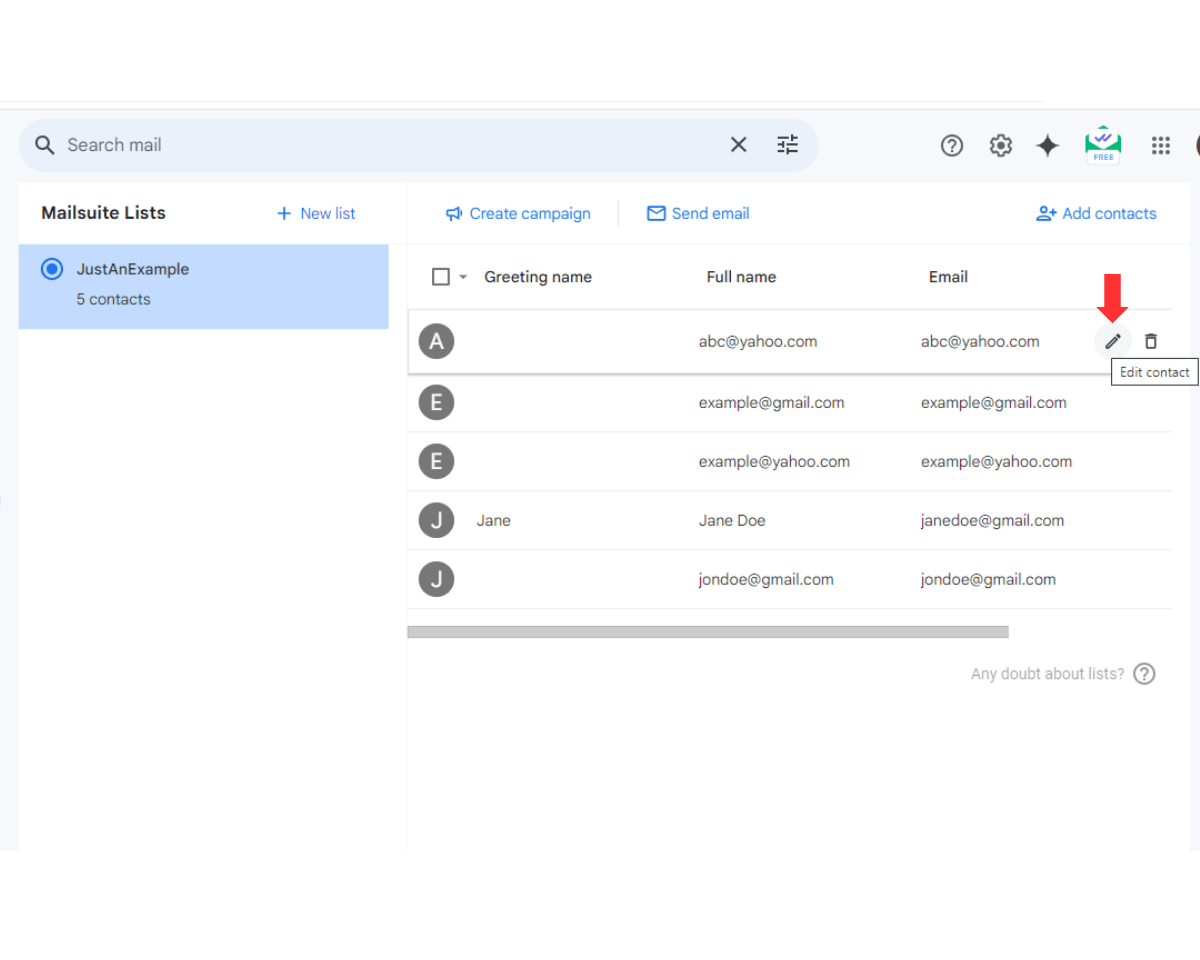
Do that for each contact in your list until you have the correct details for everyone.
When you’re ready to use email groups in Gmail with Mailsuite, follow these steps:
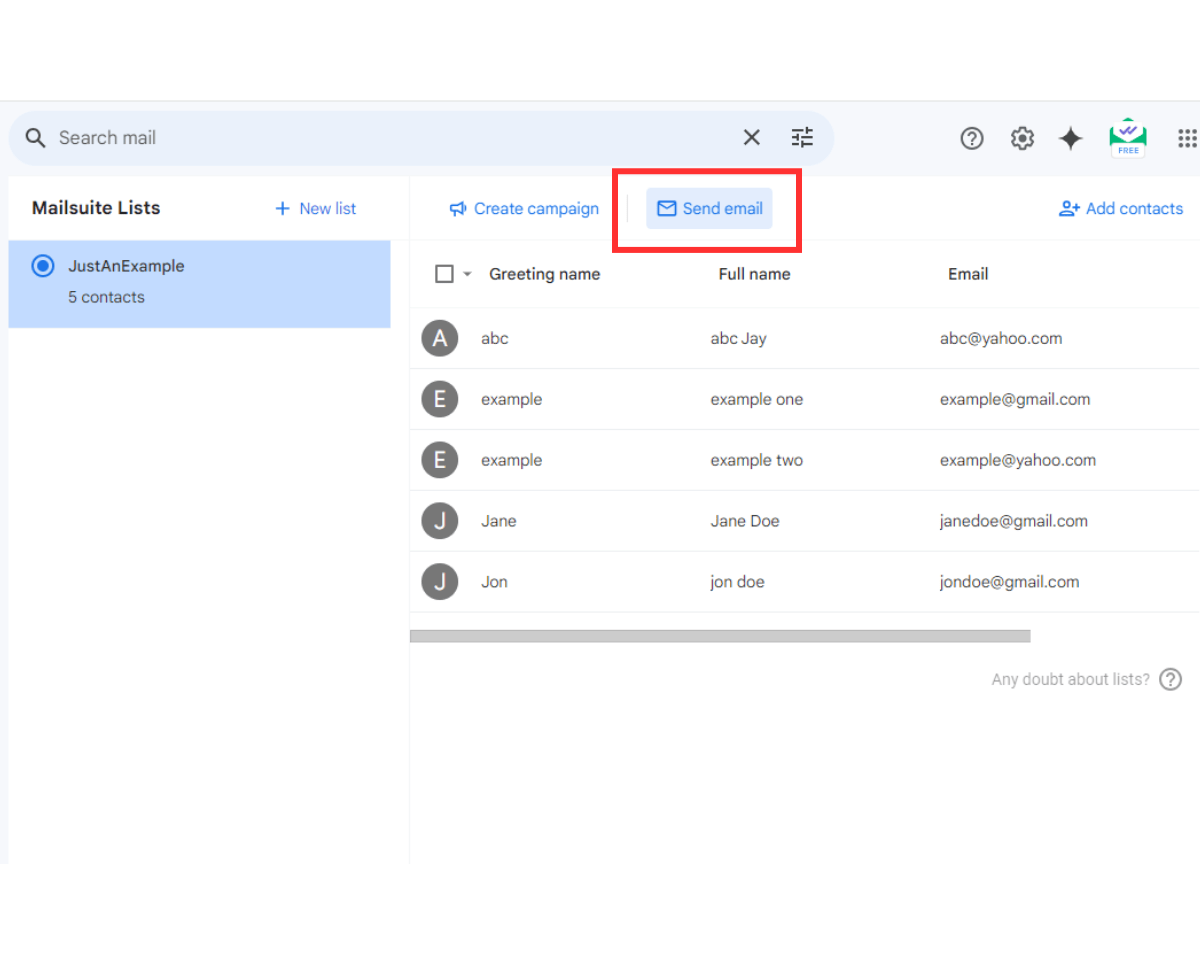
Step 1: Go to List in Gmail
Step 2: Select the email group (Mailsuite list) you want to email
Step 3: Click Send Email
Click Send Email to open the Gmail compose window and set up your email.
Mailsuite will open the Compose window and automatically populate the To field with the email addresses of everyone in the selected email group (Mailsuite list).
Step 4: Set up your email
Enter your email subject line and the email message in the body of your email.
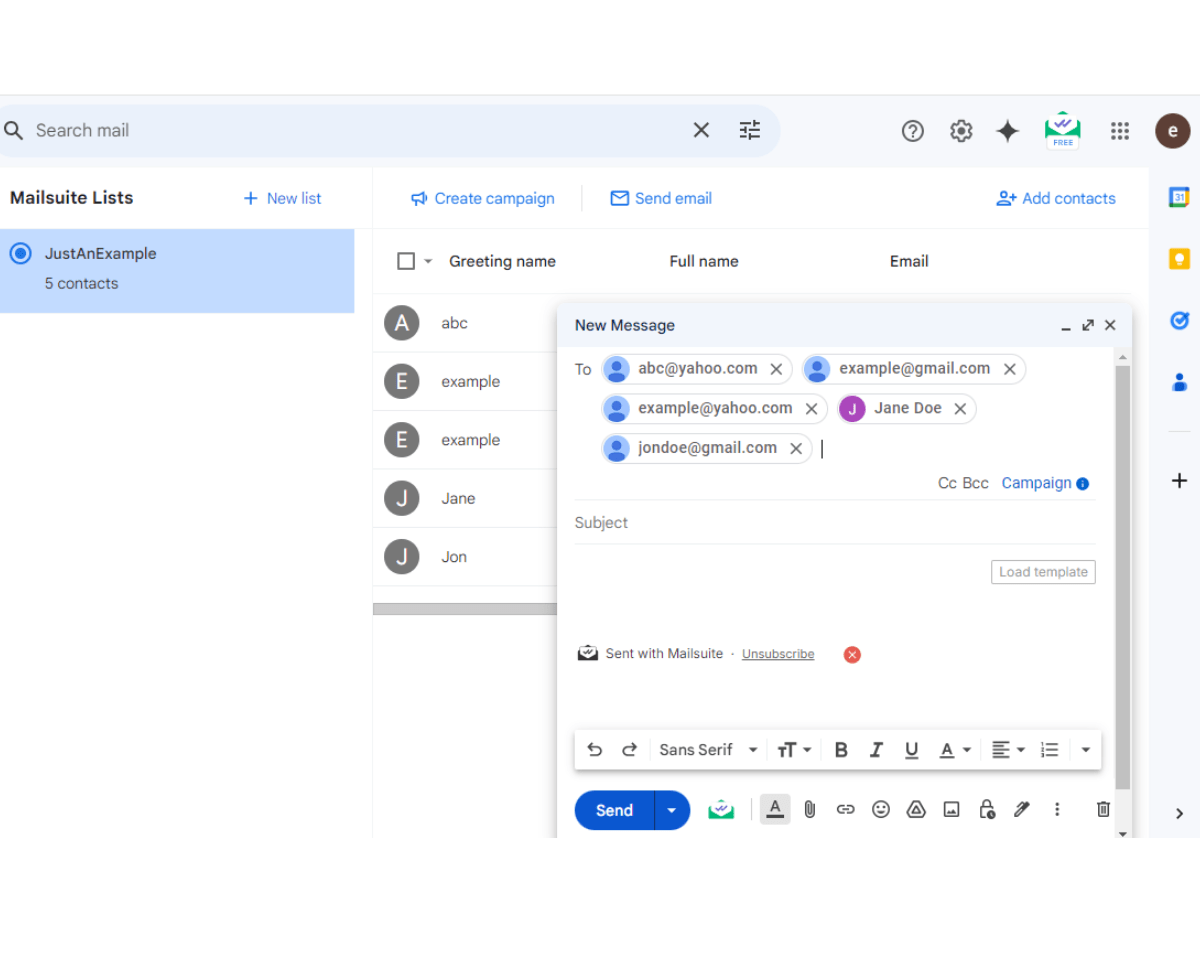
Step 5: Send your email
After setting up your email, proofread it to ensure it is error-free. When you are satisfied, click the Send button. Gmail will send the email to everyone on your Mailsuite list. To make your email stand out, you can use mail merge to automatically personalize your email by adding in the recipient’s personal information to the text.
How Email Groups in Gmail Compare with the Mailsuite Contact Feature
Gmail’s group email feature lets you send emails to multiple contacts simultaneously without manually entering all their email addresses. The Mailsuite contact feature lets you do this, and more.
First, the Mailsuite contact feature lets you save more information about individuals in your email groups. In addition, Mailsuite offers email tracking with real-time notifications that keep you informed about your campaign’s performance.
With a Gmail group, you do not know what happens to the emails after you send them. However, Mailsuite will alert you when your recipient interacts with the email, such as when they open it and click on any links. This way, you’ll know how best to follow up.
| Gmail group | Mailsuite List | |
|---|---|---|
| Automatically populate recipients’ email addresses | Yes | Yes |
| Allows additional detailed contact information | No | Yes |
| Offers email tracking | No | Yes |
Essential Tips for Managing Your Email Groups in Gmail
Here are some things to keep in mind when sending emails to group contacts:
Update Your Groups Consistently
Contacts in email groups are not static. With time, you gain some contacts that need to be added to your Gmail group. Similarly, some contacts in your groups may lose relevance and need removal.
So, you need to regularly review your email groups in Gmail and adjust them to reflect current times. Add new contacts and remove contacts when necessary to clean up your list. This way, you avoid sending emails to inactive contacts and ensure all relevant contacts receive important communication.
Use Descriptive Names for Your Email Groups
When you create a group in Gmail, give it a name that clearly describes its purpose. This is especially important if you create multiple groups.
Descriptive names help you quickly identify the right group when emailing, avoiding the confusion of sending emails to the wrong group. They also make managing your groups easier, as you’ll not waste time looking for the right group when you need to update it.
However, being descriptive does not mean being overly elaborate. A clear and concise name like “Marketing team” instead of a generic one like “Group 1” is fine.
Ensure Compliance with Relevant Regulations
When mass-emailing using Google Groups, you must still comply with email marketing regulations like the CAN-SPAM Act.
Non-compliance with these laws can result in huge fines and legal consequences. This is another reason to use Mailsuite for your mass emailing. It has features that help you comply with relevant regulations, such as enabling you to add a one-click unsubscribe button to your emails.
Personalize Your Mass Emails
72% of consumers say they only engage with marketing messages tailored to their interests. Thus, personalizing your emails can increase your engagement rate.
While personalizing an individual email is straightforward, personalizing mass emails is less so. This is another reason you should use Mailsuite for mass emailing. Its mail merge feature allows you to personalize your mass emails for each individual recipient in the group.
Use Compelling Subject Lines
The subject line can determine whether or not your recipients open your email. Since you want your recipients to read the email and take action, write a compelling subject line. Some strategies for creating catchy and compelling subject lines include addressing a pain point, generating curiosity, posing a question, or creating a sense of urgency.
Takeaway: Manage Gmail Inbox Efficiently Using Email Groups
Email groups are necessary if you send certain emails to multiple recipients. It saves you the hassle of manually entering multiple email addresses, streamlines your emailing process, reduces data entry errors, and helps keep your inbox organized.
Follow the steps in this article to create and use email contacts in Gmail to email multiple contacts simultaneously. While Gmail groups are easy to create and use, Mailsuite Lists offers more value when sending group emails.
The Mailsuite Lists feature not only lets you email multiple contacts simultaneously, but it also provides more information about the contacts while offering email tracking and much more. Mailsuite lets you create more impactful mass emails and track their performance to follow up effectively, ultimately resulting in more effective campaigns.
Ready for more effective mass emails? Install Mailsuite today and create and use email groups in Gmail efficiently.