
Apple has finally brought back the mail merge feature in its in-built word processing app, Pages, and it has got everyone talking.
If you have used Pages before 2015, you might be familiar with the mail merge feature. However, in true Apple style, the tech giant suddenly pulled the feature from subsequent Pages editions.
Thankfully, mail merge gets its due credit in the latest iteration of Apple Pages, and it packs quite a punch.
Mail merge in Pages 12.1 enables you to create a personalized batch of emails for each recipient. The feature has been redefined and simplified in Pages, ensuring that your communications, whether newsletters, invitations, or business correspondences, are tailored and impactful.
Understanding how to use this feature properly can make sending bulk messages easy and efficient. We won’t blame you if you need a bit of a refresher after waiting for it all these years, though!
That’s where this article comes in. We will navigate through the steps, from the initial setup of your document to the seamless integration of data from your contacts, ensuring each message is uniquely customized.
So, let’s get started!
Building your contact list for mail merge
Creating a robust contact list is pivotal to executing a successful Pages mail merge, and doing so assures that your targeted communications get to the intended recipients effectively.
Using mail merge, you can put your contact list into Pages documents quickly and smoothly.
It helps you personalize them for each individual or organization on that particular list. This process saves time and effort in customizing manually.
There are two ways to create a contact list for Apple Pages mail merge:
Using Contacts application
You already have a Contacts application on your Mac and can use the contacts saved to create a list. However, it makes more sense to group them first to create a contacts database that categorizes specific groups of people.
Here is a detailed, step-by-step process on how to get it done:
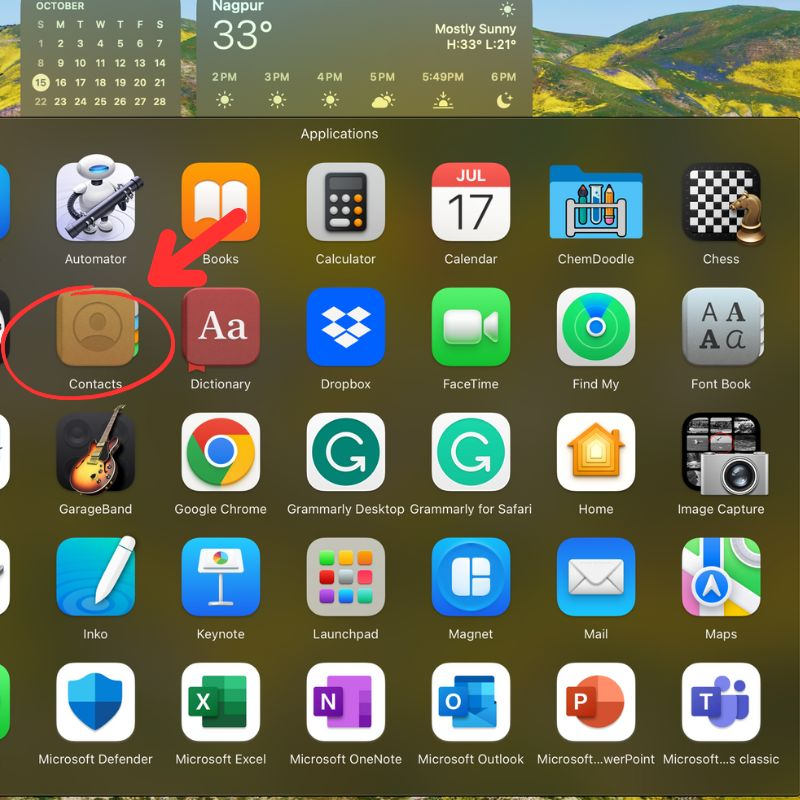
Step 1: Organize your contacts
Open the Contacts app on your Mac, checking that all contacts you wish to include in the mail merge have accurate and complete information.
Make necessary adjustments or additions to other contact details, ensuring no essential data is missing. It is an important step, as messing this up will create further problems.
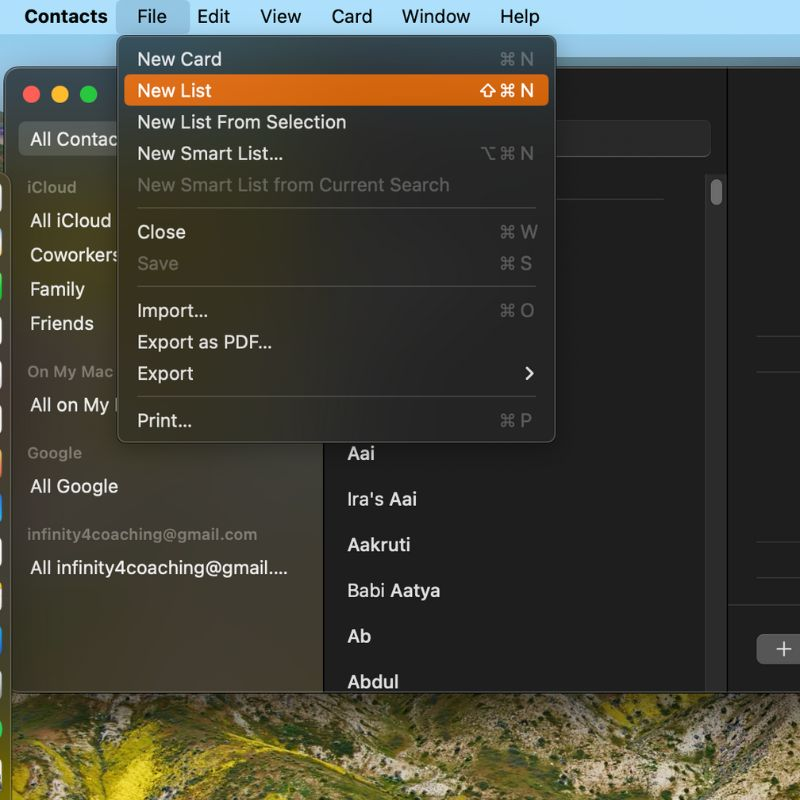
Step 2: Create a new group
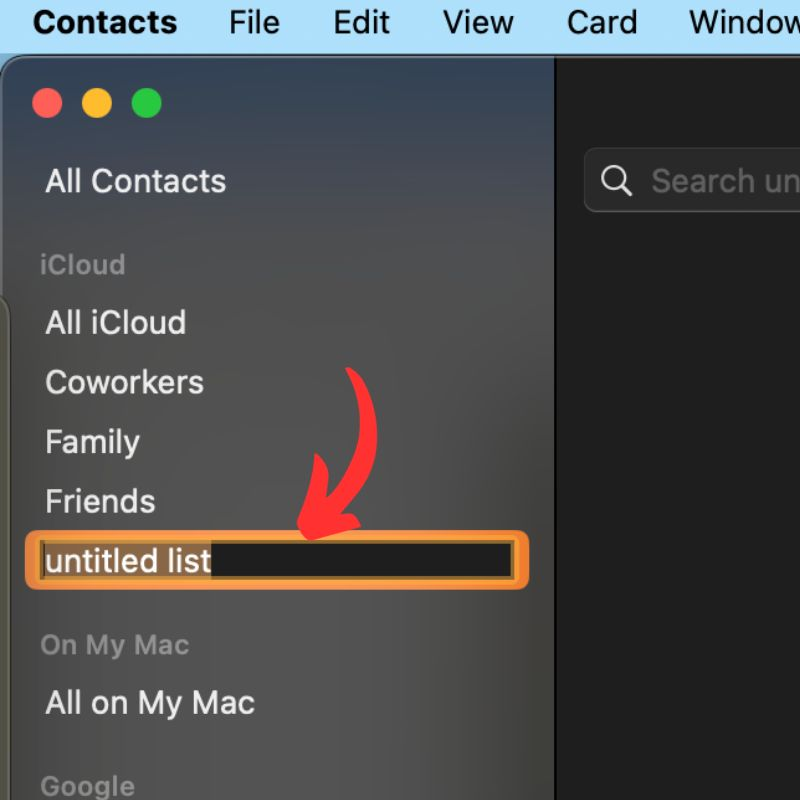
Navigate to “File” in the menu bar within the contacts app, select “New List,” and give it a relevant name.
Drag and drop the contacts you want to include in the mailing and merge them into your new group. This ensures multiple records for the same person are avoided.
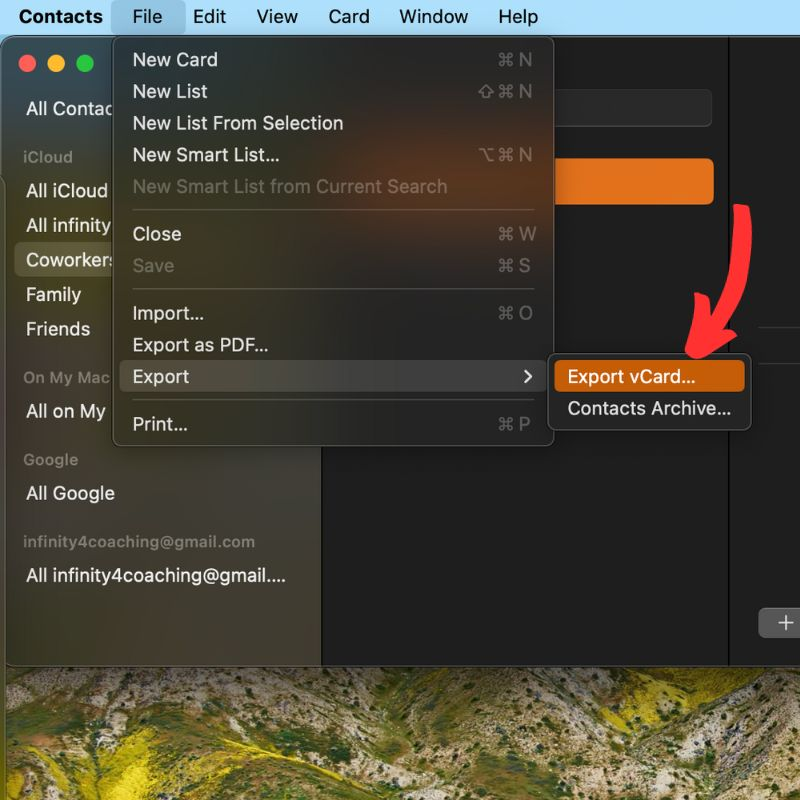
Step 3: Export the new group
Highlight the group you created, navigate to “File” > “Export,” and choose “Export Group vCard.”
Ensure the file is saved in a location that is easily accessible, using an identifiable name.
Step 4: Convert vCard to CSV
Utilize an online vCard to CSV converter or software to transform the exported vCard file into a CSV format compatible with the Pages mail merge feature.
This CSV file will be your contacts database for mail merge in Pages, so keep it saved on your computer.
Using Numbers spreadsheet
If you don’t want to create your contact list using the Contacts app and prefer to do it manually, there is another way that’s just as efficient: Make your list using the Numbers spreadsheet app on your Mac.
Here is how you can get it done:
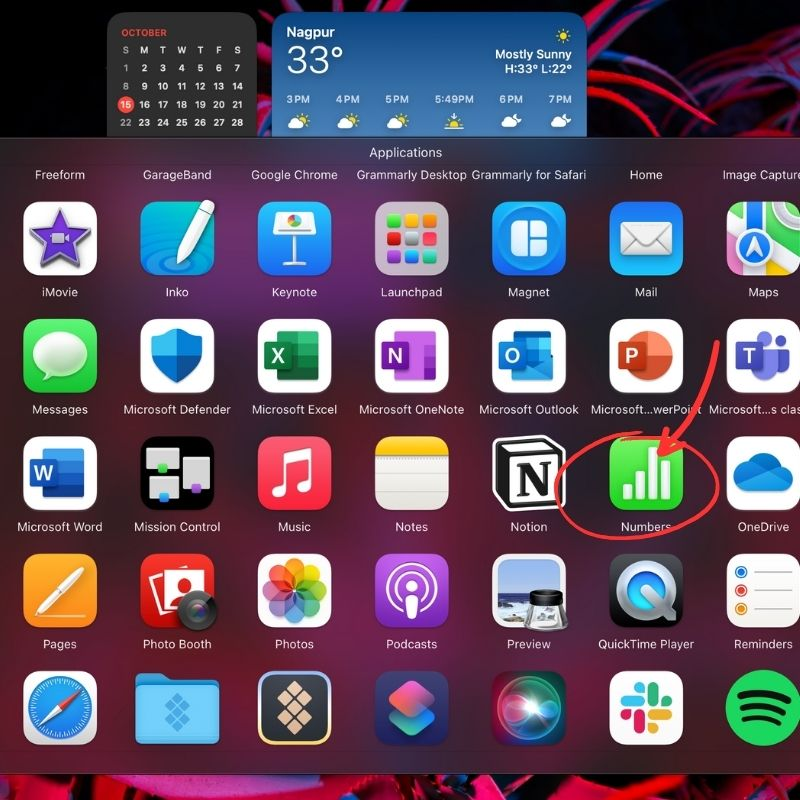
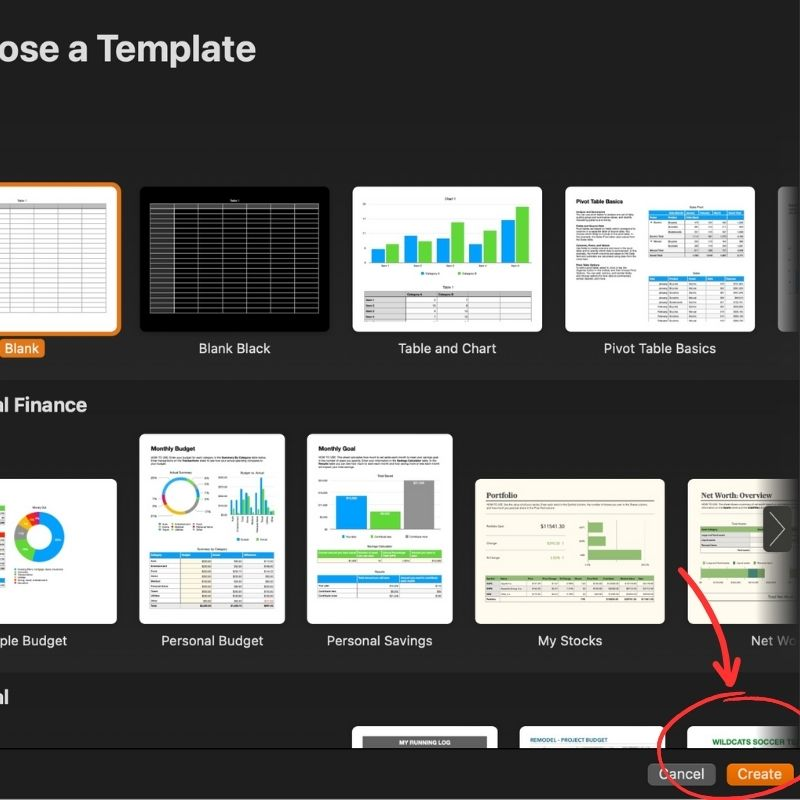
Step 1: Create a spreadsheet
Open “Numbers” and create a new Numbers spreadsheet, ensuring it is structured to host your contact data
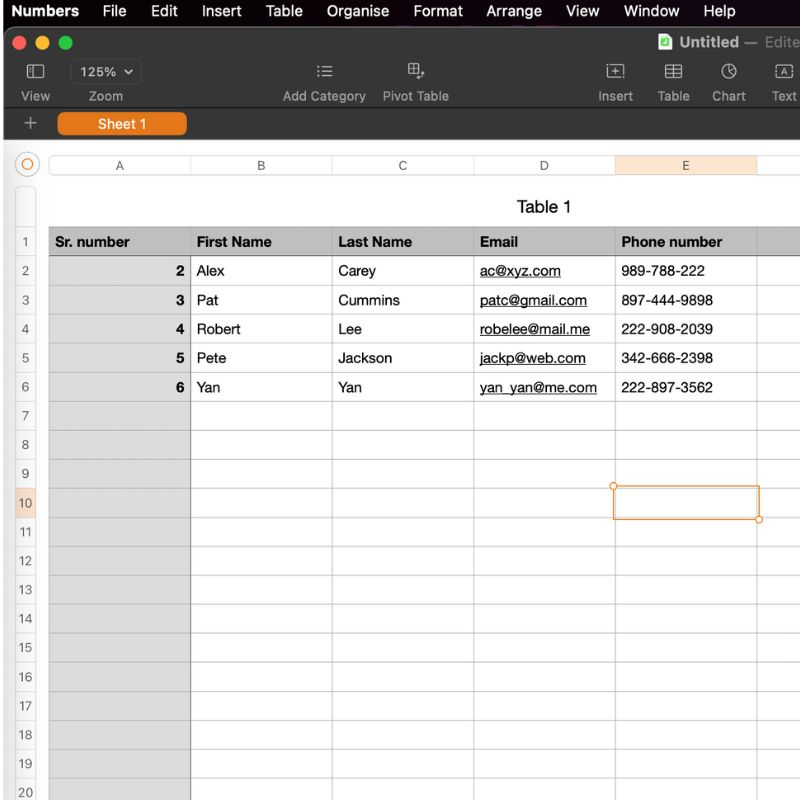
Designate column headers with relevant field names, such as [First Name], [Last Name], and [email Address] to organize your data effectively.
Step 2: Enter the data
Populate the rows beneath each column header with the respective contact information, ensuring accuracy and completeness for effective communication
Step 3: Export as CSV
Within the menu bar, select “File” > “Export To” > “CSV.”

Choose a recognizable name and save the file in an easily retrievable location.
The CSV file will serve as your contact list in the mail merge.
How to use Pages templates for mail merge
Using the Pages templates while mail merging eases the process of sending bulk but targeted emails to different recipients.
Whether you are sending newsletters, invitations, or business correspondences, the use of a template document coupled with mail merge ensures uniformity in addition to a personal touch.
Here is how to go about using the templates:
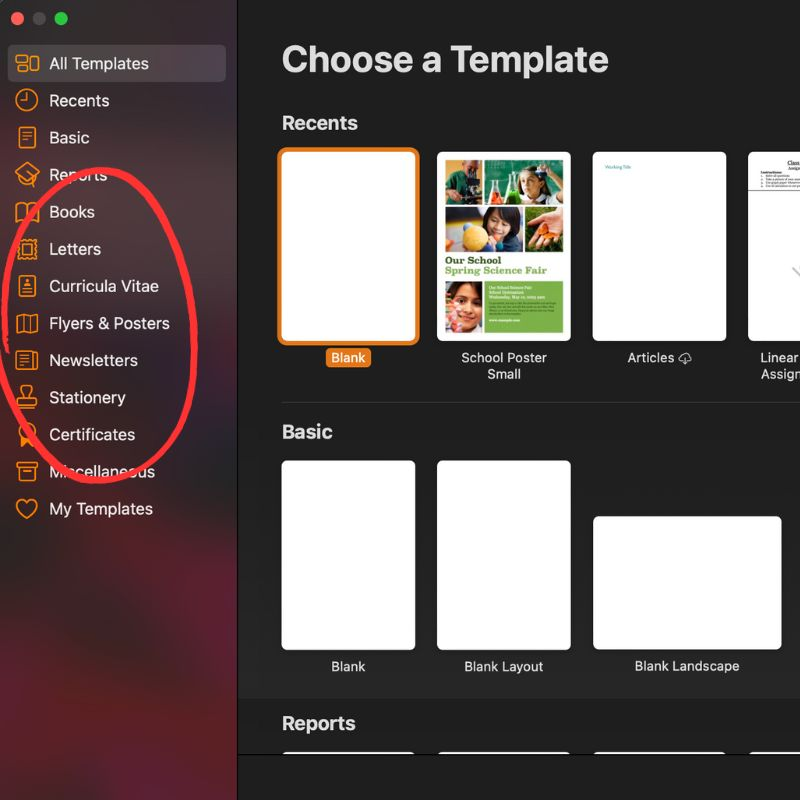
Step 1: Choose an appropriate template
Open the Pages template menu in word processing mode and browse through some of the pre-loaded professionally designed templates. Several templates, such as letterheads, certificates, and even specialized envelope templates are available in Pages for varied communication purposes.
Select Create Labels or any template that best serves your needs and open it.
Step 2: Prepare the template to make it your own
Customize the template to suit your needs. Modify the text, font, color, and so on to adhere with your brand or purpose.
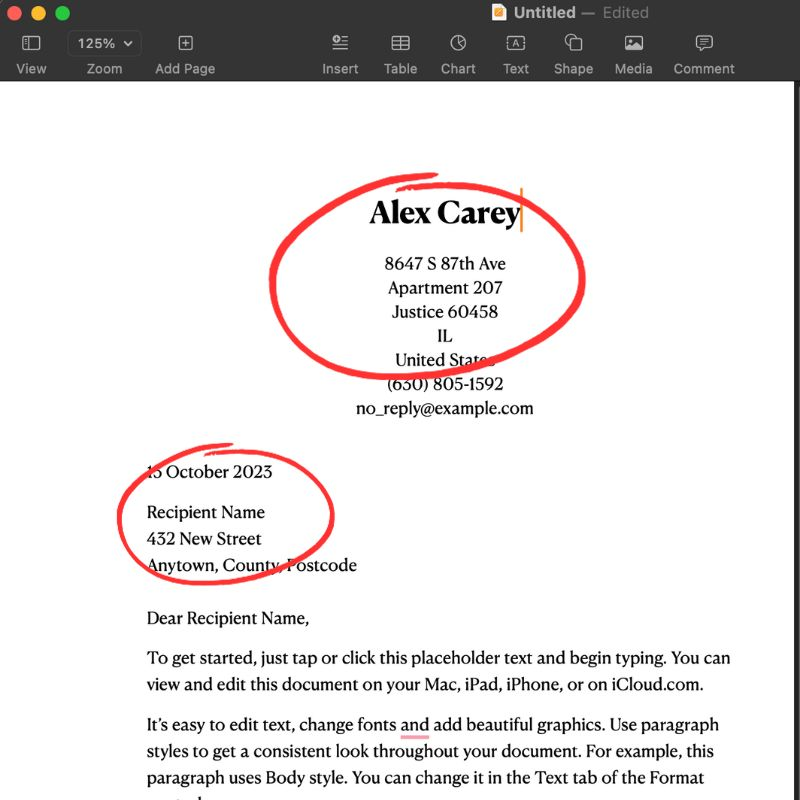
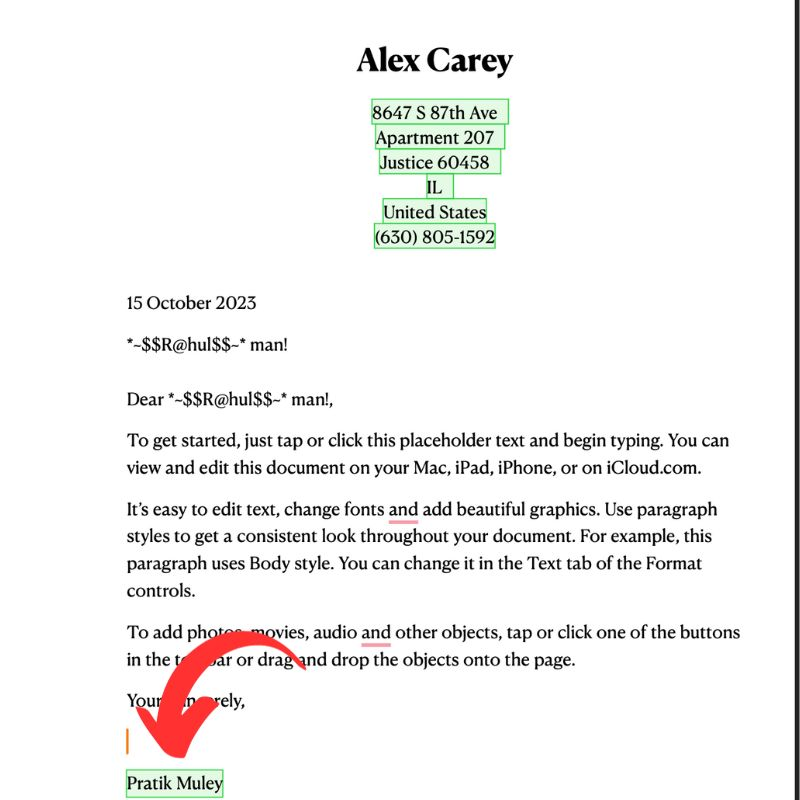
You can do this by identifying places in your existing document where you want to have some personalized information (such as name or street address) inserted and putting some placeholders. For example, use [First Name], where the recipient’s first name should be.
Step 3: Create your data source
Use the data you prepared in a CSV file as your data source. Ensure all your columns are well labeled with corresponding placeholders in your template (for instance, First Name, Last Name, Address).
Step 5: Data integration with template
Click on “Insert” then “Choose” – locate your CSV file and import it.
Synchronize all the data fields from your CSV file with the placeholders in your template. Map each placeholder with the respective column in your CSV file.
Preview the template to check that data is being placed correctly in the template.
Step 6: Proof and finish
Check the first few merged documents carefully to see if the data placement is as planned and whether formatting consistency has been obtained.
Complete necessary changes so that the merged data will not exceed the page layout done within the template.
Step 7: Click mail merge
Finalize mail merging by producing a new document for each recipient.

Save, print, or email the documents directly.
Using the Pages templates for mail merge will increase efficiency and ensure a professional and consistent look in your emails.
This option allows you to keep the personalized approach in your bulk communications, which will foster an impression that you have thought about every detail of every message.
Always remember to review and test your merge documents properly before sending them out so that accuracy and coherence are kept in your communications.
How to add mail merge fields in Pages
Apple’s Pages is the ultimate tool for creating and editing documents. It has a robust and user-friendly collection of templates and forms that can be customized.
It offers many additional functions as well, but one of the most useful is the option to include merge fields for personal use. It allows you to create personalized documents by automatically inserting certain data inside pre-defined fields.
Whether it’s a personal letter, an invitation to an event, or the issuing of certificates, knowing how to insert the mail merge fields comes in handy in achieving your goal relatively faster.
Here is how you can go about doing just that:
Step 1: Position the insertion point
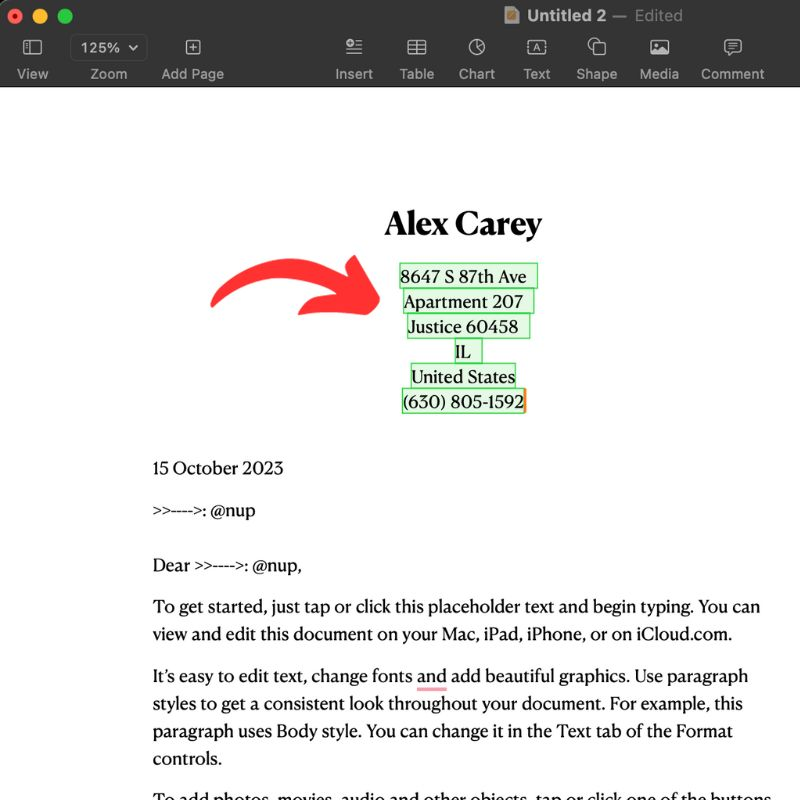
Begin by identifying the location within your new document where you wish to insert the merge field.
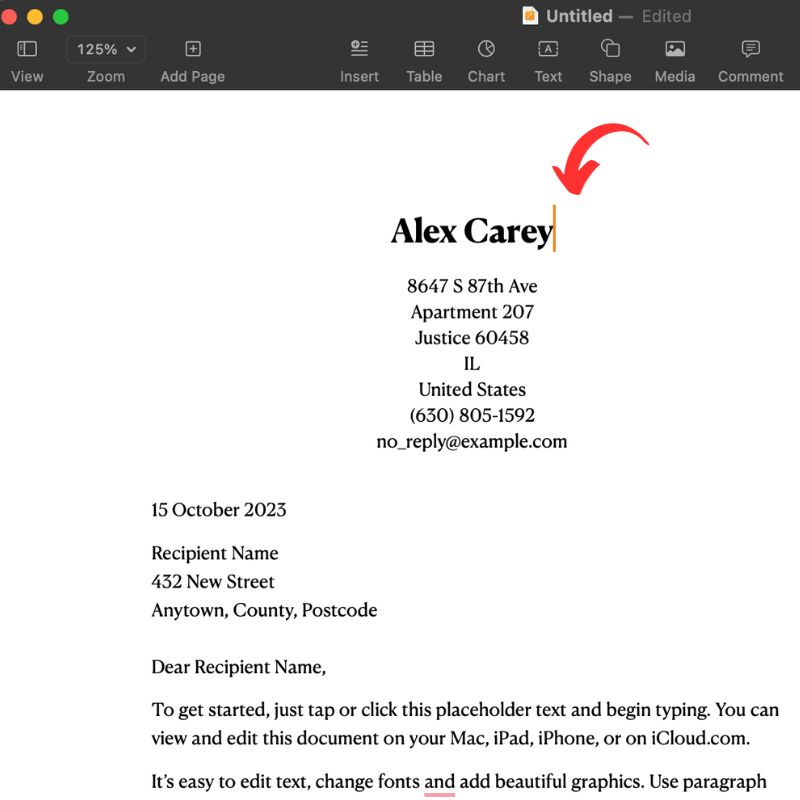
Place your cursor at this location, or select existing text to convert into a merge field.
Step 2: Navigate to the Document Pane
Once your insertion point is set, or your text is selected, navigate to the Document pane by clicking “Document” in the sidebar.
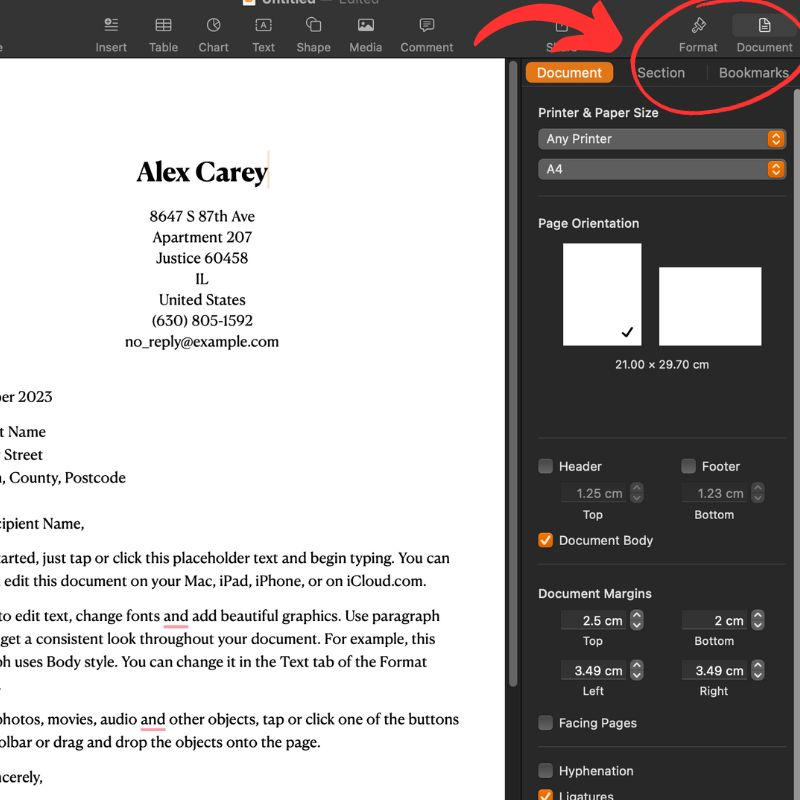
Subsequently, click on the “Document” tab to access further options.
Step 3: Use mail merge options
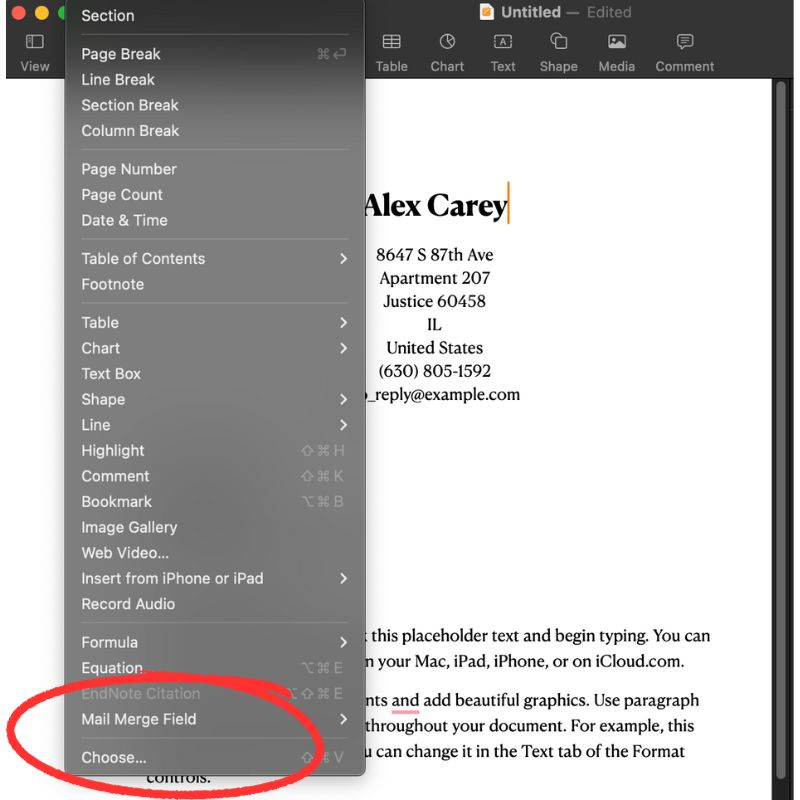
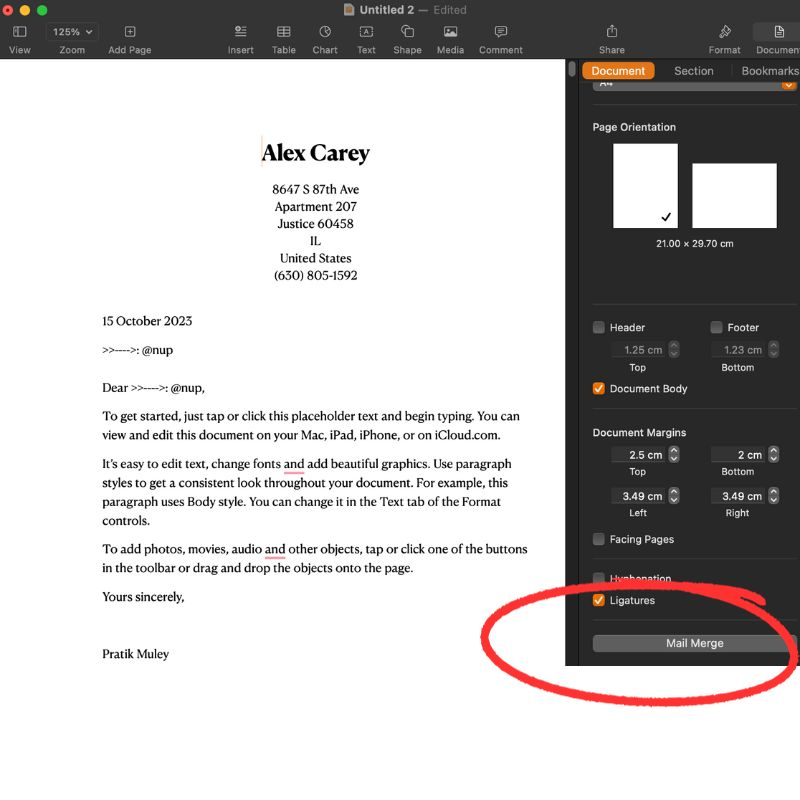
Locate and click “Mail Merge” in the Document tab to unveil the related settings and options.

Step 4: Add a merge field
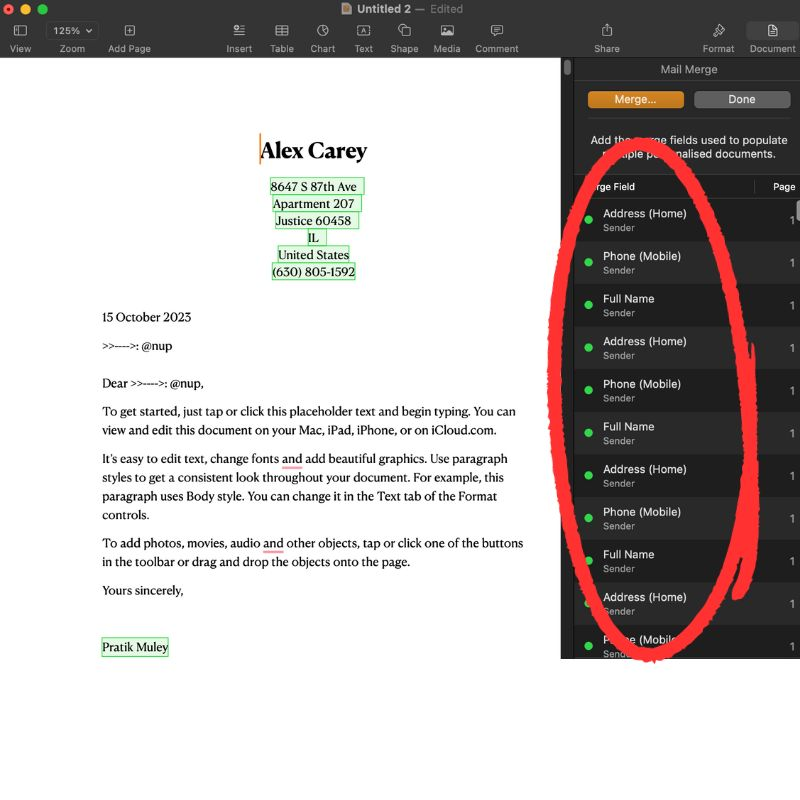
Click “Add Merge Field,” and a list of available fields will appear. Click the mail merge field that aligns with the data you wish to insert, such as first name and address.
Note: To access an extensive list of fields from Contacts, click “More Fields,” which will provide additional options.
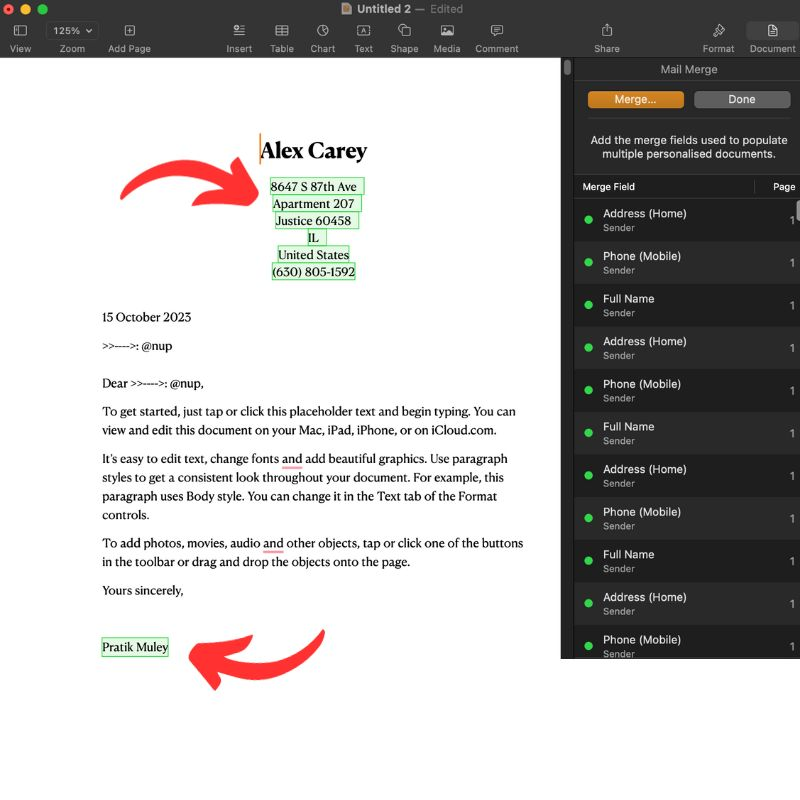
Step 5: Finalizing the merge field
Upon selection, the merge field is added to your document. If you had selected existing text, the content of the text remains unchanged, but the selection is converted into a merge field, which will populate with data when you use the mail merge process.
You can add mail merge field options from a spreadsheet to further enhance your document’s functionality and personalization capabilities.
To do this, you need to add a spreadsheet as a source file, which will serve as the data source during the mail merge process, populating your merge fields with the relevant data from the spreadsheet.
How to change a merge field in Pages
Merge fields, acting as placeholders, are crucial for personalizing documents by automatically populating specific data during the mail merge process.
The ability to modify these merge fields, whether switching between recipient and sender fields, altering the information that populates, or changing the formatting of an address field, is pivotal to ensuring the accuracy and relevance of your documents.
Let’s dive into a detailed guide on how to change a merge field in Pages:
Step 1: Open the merge options
Click “Document” in the sidebar of your Pages document to open the Document pane.
Click on the “Document” tab and select “Mail Merge” to open a list of options regarding the merge fields.
Step 2: Select the mail merge field
Identify the merge field that you need to modify and select.
In the following steps, be particular about what modification you need to make it easy.
Step 3: Specific modifications
Once the merge field is selected, you can implement specific changes as per the following:
Changing between recipient and sender custom fields: To turn the recipient field into a sender field, look for a “Use as sender field” tickbox, which usually lies towards the bottom of the options. It changes the data type that will fill the merge field during mail merge.
Changing the populating information: To change the information that will fill the merge field, control-click (or right-click) on the merge field.
It will bring you a contextual menu from which you can pick a new option in the “Change” menu.
From this, you could choose a different kind of data that should be used in populating the merge field, and this way, their information would be relevant and up-to-date.
To change the merging format of an address field, control-click on the instance of the merge field. Choose “Single Line Address” or deselect from the contextual menu, depending on your formatting needs.
Upon checking “Single Line Address,” it will be formatted as a single line. While unchecking, these will be formatted to appear as multiple lines.
Additional tips for consistency and accuracy
While modifying merge fields, it’s crucial to review the changes in the context of the entire document to ensure consistency and coherence.
Pay attention to the text flow and ensure the modified merge fields integrate seamlessly into the content.
Additionally, consider conducting a test mail merge to verify that the modified fields populate correctly and that the final document aligns with your expectations.
How to copy and paste a merge field in Pages
While adding and modifying merge fields are crucial functionalities, the ability to copy and paste merge fields within the same document or into another Pages document further enhances the flexibility and efficiency of document creation.
Let’s delve deeper into copying and pasting merge fields in Pages.
Step 1: Choose the merge field
Go to the merge field that you want to duplicate and highlight the text of the merge field, being sure to select all of the placeholder or merge field text.
Step 2: Copy the merge field
The next step is to copy the text of the merge field, either using the “Copy” option via right-click or simply applying a keyboard shortcut (Command + C) after selecting.
Step 3: Paste the merge Field
Navigate to the destination where you want to paste the previously copied merge field.
The destination can either be from inside the same document or another Pages document.
Click on “Paste” and add a field using a Paste functionality such as a right click and an option to select Paste if available or simply a keyboard shortcut similar to Command + V.
Step 4: Leave original settings unchanged
When pasted into Pages, the merge field maintains its original settings, enabling it to generate the correct information in the mail merging process.
Such consistency ensures that all the information remains accurate and relevant to the source document.
Considerations when pasting into different file formats
You should note that while copy-pasting a merge field function in Pages documents is done smoothly, pasting a transfer field into the other word processing file formats (for example, Microsoft Word or plain text document) may lead to losing the settings of merge fields.
However, this may cause the field to not work as a mail merge field but rather take the appearance of plain text.
This is because different document creation software and file formats function differently, and content might be formatted differently.
So, if you plan to change formats, keep this information in mind.
How to delete a merge field in Pages
Merge fields serve as placeholders that are automatically populated with specific data when you use mail merge, facilitating the efficient creation of personalized documents.
However, there may be instances where a mail merge field needs to be deleted, whether for document refinement or to correct an error.
Let’s explore how to delete a field in the Pages mail merge feature.
Step 1: Navigate to the merge field
Open your document in Pages and locate the merge field you wish to delete.
Ensure that you review the document to confirm that the deletion of the merge field will not disrupt the flow or coherence of the text.
Step 2: Click on the merge field
Once the merge field is identified, highlight the one you want to delete.
Ensure that you have highlighted the whole placeholder or text for the merge field so that a partial deletion may not leave traces of the placeholder.
Step 3: Delete the merge field
Delete the merge field by pressing the “Delete” key on your keyboard or by right-clicking and selecting “Cut” or “Delete” from the contextual menu.

Make sure that the merge field has been entirely deleted from the document.
Step 4: Review and adjust the document
Delete the merge field and review the text to ensure that it flows properly and that accidental gaps or formatting issues have not been created through the deletion.
Make any necessary adjustments in text and/or page layout in order for the document to maintain a professional appearance and coherence.
Additional tips for ensuring document integrity
You might need to perform some additional steps to ensure that the document is formatted correctly and there are no issues.
Consider doing the following:
- Ensure that the whole document is reviewed when a merge field has been deleted to ensure that its deletion has not affected your content or formatting.
- Check for any placeholder text with a merge field and remove it or modify it if necessary.
- Consider performing a test mail merge to ensure that deleting the merge field does not affect the final output and that there is no error while the merge is done.
- Please consider saving a copy of your original document before making any changes. It will save you additional work if something goes wrong when executing deletions.
Understanding how to delete merge fields in Pages effectively is crucial for maintaining the precision and relevance of your personalized documents.
Whether you are creating marketing materials, personalized letters, or certificates, ensuring that your merge fields are accurate and relevant is pivotal.
How to send a bulk email with Pages documents attached after mail merge
Although the latest Pages update has brought back the much-needed merge feature, sending mass emails with attachments is still quite difficult.
Unfortunately, starting a mail merge with the attached documents within the Pages application is impossible. However, there is a workaround with Mailsuite’s mail merge.
Here is how you can send mass emails that contain Pages attachments after the mail merge.
Step 1: Convert Pages documents to PDFs
Convert the Pages documents you want to attach to the emails into PDF format. You can do this using the built-in export option in Pages or a third-party PDF converter.
Step 2: Upload PDFs to Google Drive
Upload the converted PDF files to your Google Drive. It will allow you to easily link them to your emails during the mail merge process.
Step 3: Prepare your mail merge template
Open a new Gmail draft and compose the email message you want to send to all recipients. Place placeholders for the personalized information you will merge from your spreadsheet.
Step 4: Connect Mailsuite to your mail client
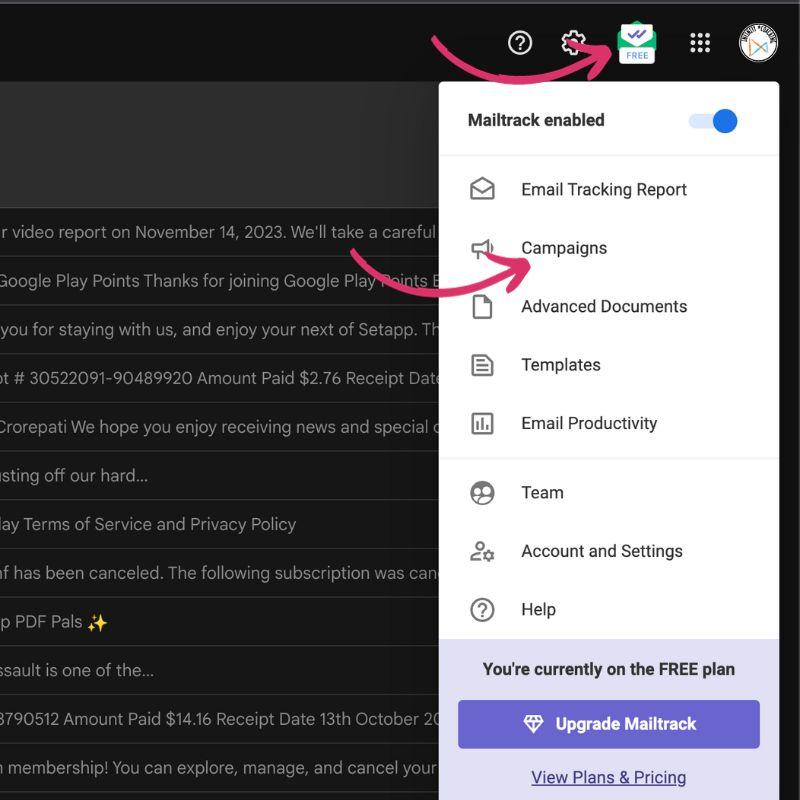
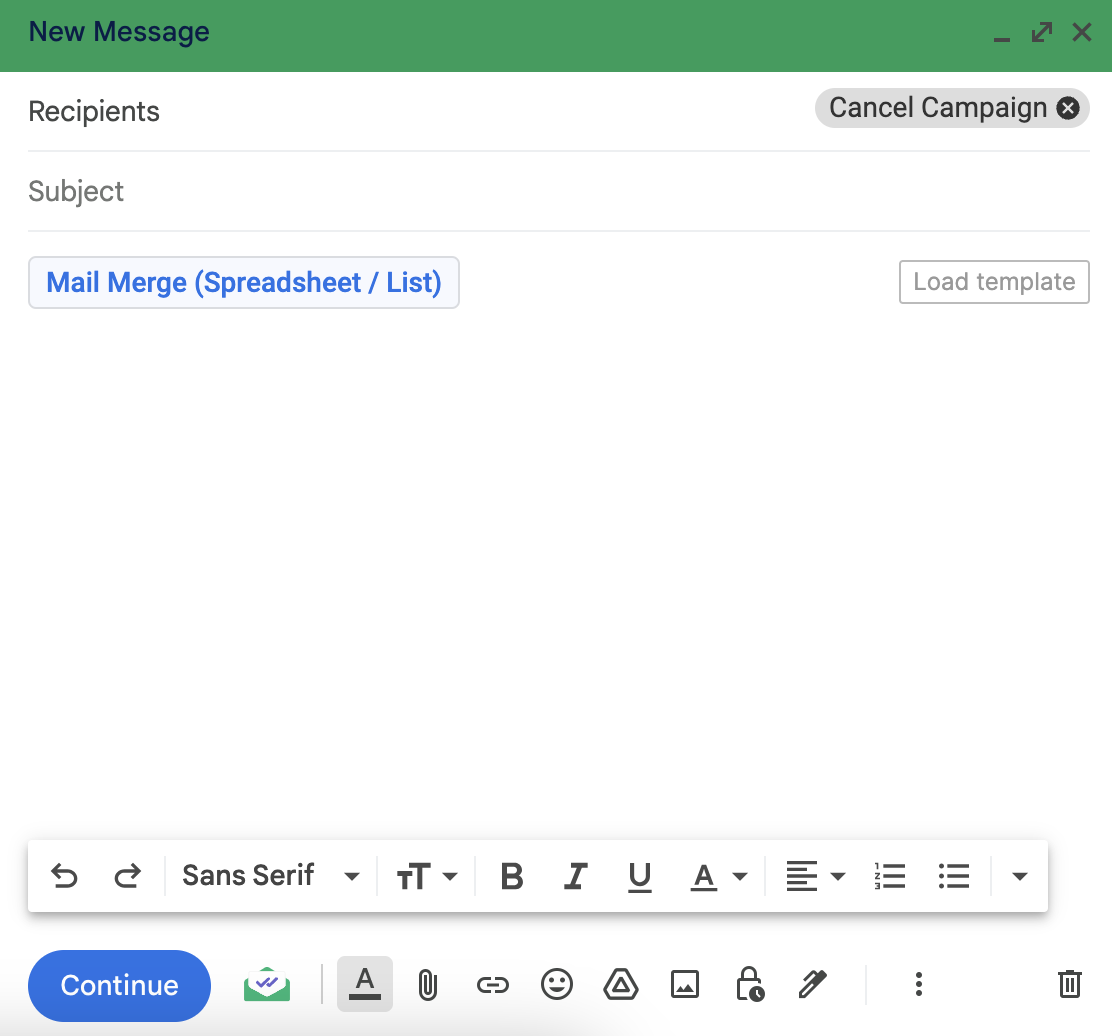
Install the Mailsuite add-in for Gmail. In Gmail, click on the Mailsuite icon and select “Create Campaign.” Choose the spreadsheet containing the recipient information you want to use for the mail merge.
Step 5: Customize your mail merge fields
Mailsuite will automatically map the fields from your spreadsheet to the placeholders in your email template. You can review and adjust these mappings if necessary.
Step 5: Attach PDF links
In the Mailsuite sidebar, click on the “Attachments” tab. Click on the “Add Link” button and paste the Google Drive link for one of the PDF files you want to attach. You can repeat this process to attach multiple PDF files.
Step 5: Set up PDF attachments tracking
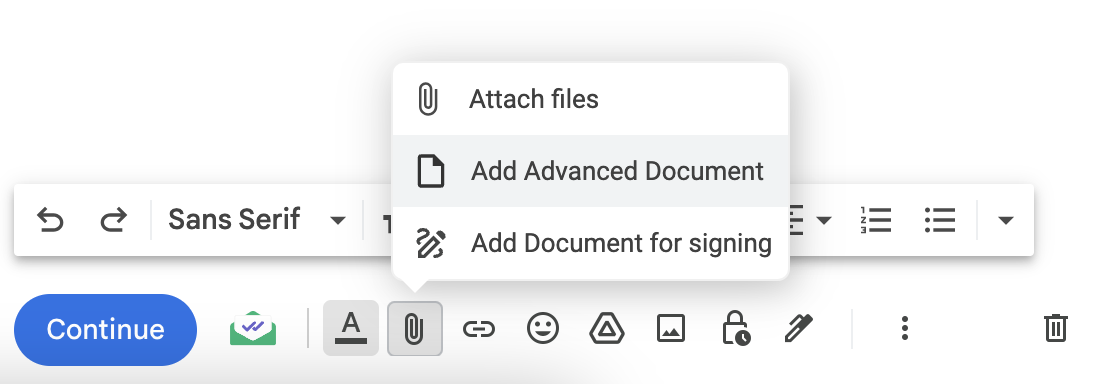
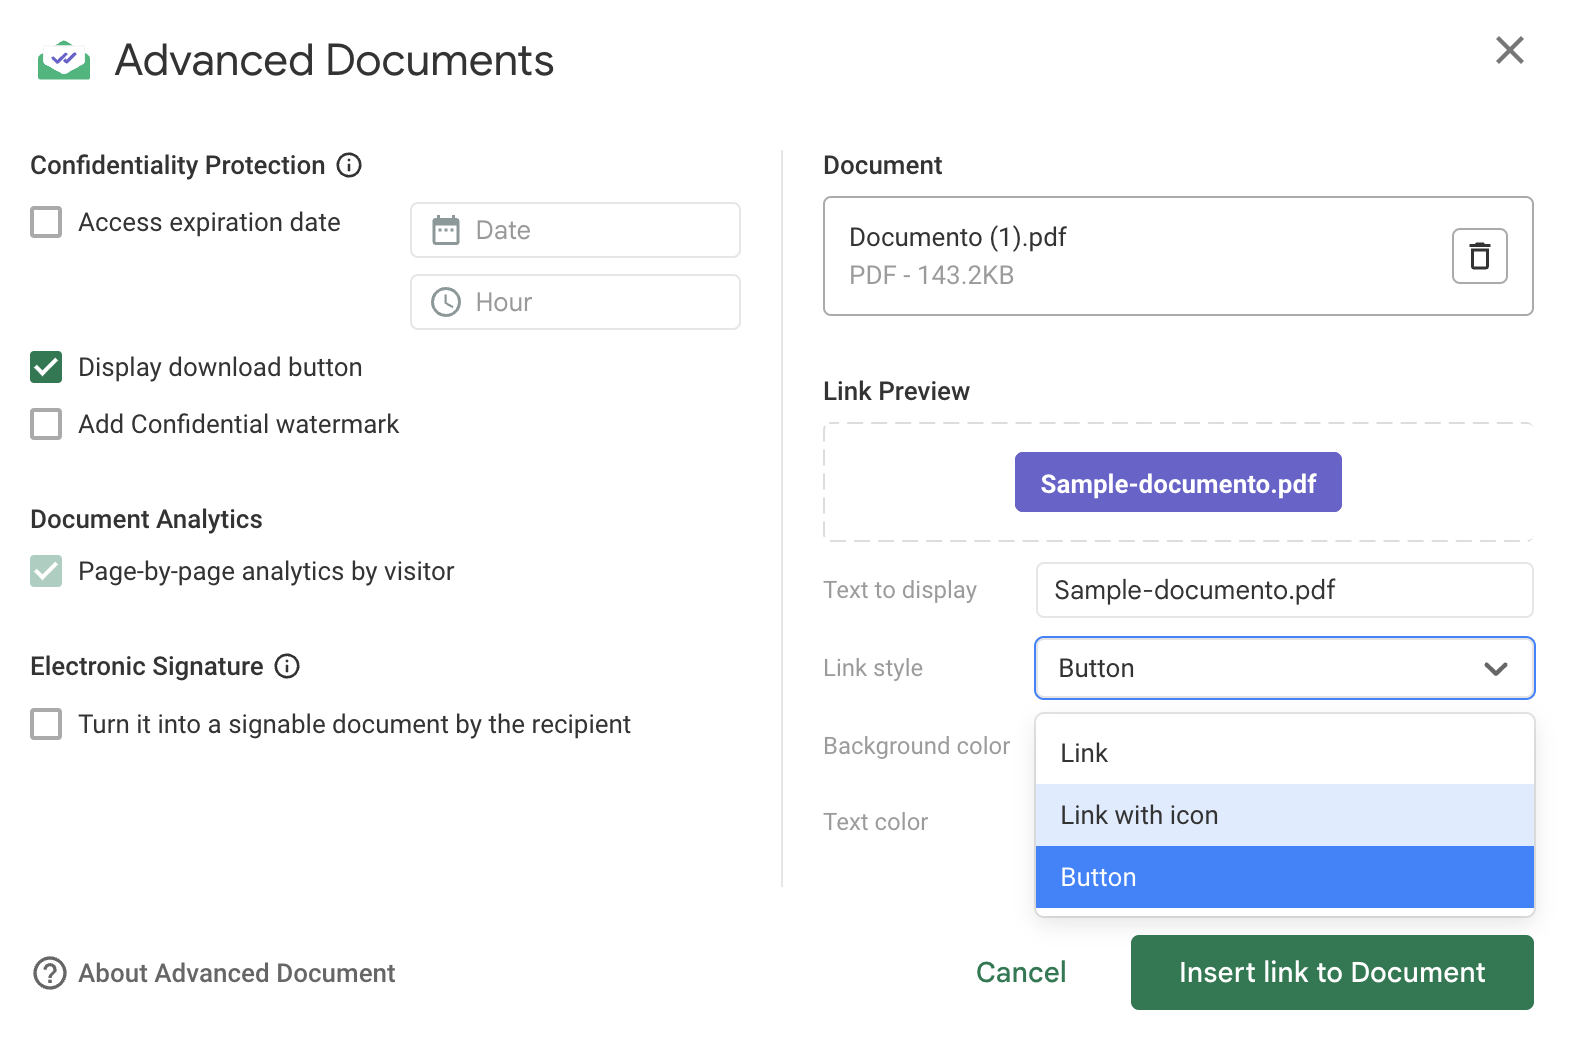
Go to Add Advanced Document and customize the confidentiality protection and tracking settings as needed.
You can also design the link style by choosing between link, link with icon, and button options.
Step 6: Review and send your bulk email
Review the personalized emails and attachments before sending them. Once everything is correct, click on the “Start Campaign” button in the Mailsuite sidebar. Mailsuite will send out the bulk email with the attached PDF links.
By using Mailsuite’s merge tag feature, you can dynamically attach different PDF files to each recipient based on their personalized information, making your bulk email campaign more targeted and effective.
How do I fix a grayed mail merge?
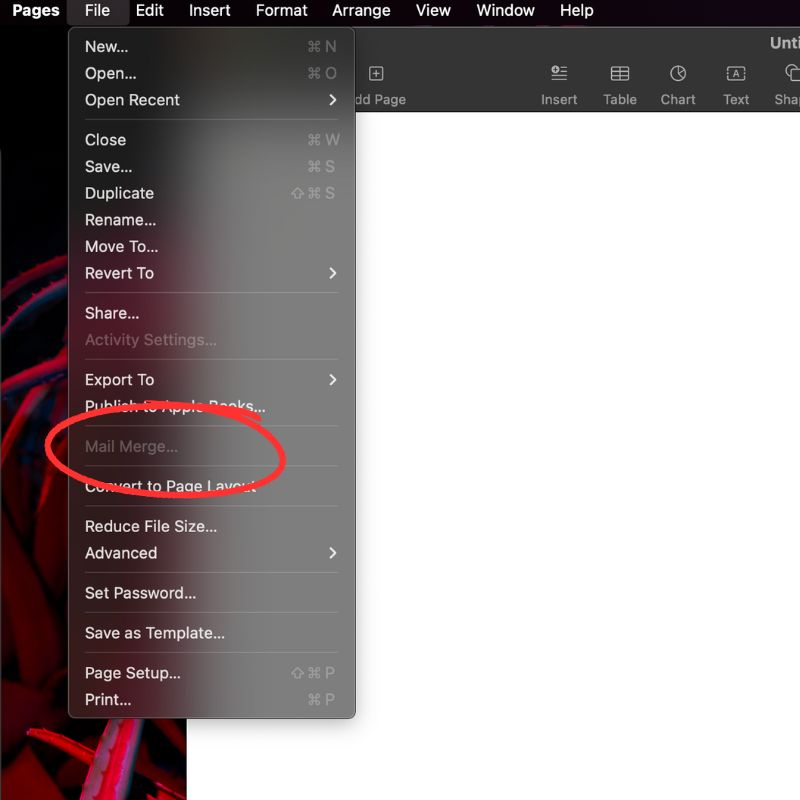
Ensure you have the right document permission and it is not read-only for a grayed-out mail merge in Pages for Mac.
Make sure your data source is properly linked and available and the fields in your document are properly linked to the columns in your data source.
Check if your Pages application is updated to work fine without any functionality issues. If the problem continues, consider reinserting the merge fields, converting the document format, or creating the mail merge in a fresh document.
The final option is contacting Apple Support or their community forums for help on the matter.
Always maintain backup versions of your document to safeguard your data during troubleshooting.
What are the main types of mail merge documents?
Major mail merge documents include letters used for personalized mass correspondences, envelopes, and labels serving addresses customized to the mass mailing list.
Each type facilitates the automated insertion of specific data, such as names and addresses, from a data source into pre-defined merge fields, streamlining the creation of personalized documents for multiple recipients.
Takeaway: Make the most of mail merge as it makes a comeback in Pages
The resurgence of the mail merge feature in Pages 12.1 brings forth many opportunities to streamline and personalize mass communication easily and precisely. It in turn enriches efficiency and helps to ensure there is an accurate flow of information.
The days of using AppleScripts workarounds are long gone, and the process is as easy as you expect from Apple!
The new Pages 12.1 mail merge features an improved, simplified interface that ensures a seamless process from selection sources of data to document creation. Now, you can map data fields easily, preview merged documents, and customize content for each recipient.
If you are looking for an easier and more elegant solution to sending mass email messages, Mailsuite can be the perfect solution.
Mailsuite provides a simplistic, user-friendly interface that seamlessly integrates with email platforms like Gmail, ensuring that implementing and managing mail merges is straightforward and accessible.
The platform allows you to send bulk emails with personalized content through mail merge and keep a vigilant eye on the recipient’s engagement.
Get Mailsuite today to try it out for free!
Read more about mail merge
Effortless Outreach: How to Do Mail Merge Using Google Docs
Mail Merge with Attachments: Is Outlook or Gmail Better?
Mail Merge in Outlook: Send Personalized Bulk Emails in 6 Easy Steps
Step-by-Step: Excel to Word Mail Merge Mastery
Why Is Mail Merge Not Working? Identifying Common Problems and Easy Fixes